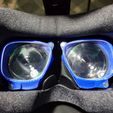
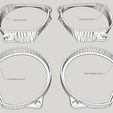
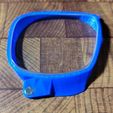
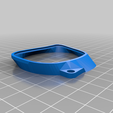
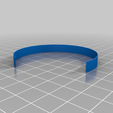
This is a magnet held Valve Index prescription lenses holder. You will need 8 magnets and an ordered prescription from Zenni. You will also need your current glasses prescription.
Filament Color suggestions
If you are the only prescription user on your headset, you could use different colors for the left and right side, making it easier to tell which lens should go to which one. If you have multiple users with their own prescriptions, each user’s color could be different to know which pairs go together and below to which user.
Using blue, I didn’t notice any bleed or glare, and I suspect that the color of the print shouldn’t matter while using the headset. If you notice otherwise, please note that in the comments. Darker colors would avoid this if it could be an issue.
Additional Resources
Magnets
3/16 inch diameter, 3/32 inch thickness, power 2.27 lbs, Axial polarity, grade: N40
I used Amazing Magnet (sold in quantities of 50 for $0.19 each, or $9.50 at time of writing)
K&J Magnetics, Inc has a N42 of the same size, and states a slightly weaker holding power (16% less holding power), but does sell in singles.
The print is designed to have pliers push the magnets into their slots. I put North outward on one side of a lens, and South outward on the other so that if trying to attach them backwards, they would repel instead of attach.
Prescription
Lenses from Zenni
Tanvach's Lens Adaptor (https://www.thingiverse.com/thing:3753906) has notes about the cost of the prescription glasses, along with suggestions of selection.
IPD (interpupillary distance): I used what Tanvach suggested for the glasses order. 67mm
As the print holds the lenses from all sides, popping them in will take about as much force as popping them out of their frames. My prescription is thick enough that it kinda looks like they aren’t in all the way when they actually are, protruding behind the print toward the eye. To know if the lens is popped in correctly, look for the triangle shaped rim around the lens, which fits into the shaped ridge around the print.
How I Designed This
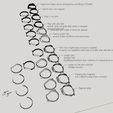
I started with kizinfo’s HTC Vive VR Optics (https://www.thingiverse.com/thing:2080071) while on Vive. I couldn’t get the right eye’s print to hold well in the headset. I also didn’t like how loose the lenses felt in their holders.
I then moved to Swifty_McFly’s Prescription Lens adapter (https://www.thingiverse.com/thing:3946348) which used the same lens cut with a design that went around nearly the entire lens. It held my lenses better, but I found a new problem. I couldn’t tell which way was up, since the lens cut was round. Also, if I ever needed to clean them, I’d have to pull the print out of the headset. This felt like it was loosening the print’s fit over time.
I then damaged my headset (unrelated to prints/prescriptions), and borrowed a Quest from a friend for a while, which led me to jegstad’s Quest Magnetic Prescription Lens Adapter (https://www.thingiverse.com/thing:3659124) which included a magnet to allow the lens to be removed easily. I liked this feature, but never purchased lenses for this print, as I didn’t expect to have the Quest long term.
Some time later, while on an Index, I was going to try tanvach’s Prescription Lens Adaptor (https://www.thingiverse.com/thing:3753906) but I wanted a magnet version, so I split their print in two. Once my prescription arrived, I found that the lenses weren’t held well, so I redesigned the print to hold the lens on all sides. After 8 iterations of design, I no longer had anything of tavach's print left.
I tried making a grip to help remove the lenses by pulling it straight off. This had two difficulties. The first was that there is so little space to try to fit a finger between the Index headset and the print, making this kind of pull off difficult. Taking off the magnet face cushion was necessary to make the grip usable. The second is that this often ends up pulling the magnets out.
This taught me that it’s better to try and slide the print off, but sliding off made me fear contact of the headset lens to the prescription lens, especially if the bottom print got pushed further down the headset. To prevent this, I added a ledge around the bottom print. Sliding the lens off removed the need to have grab spots.
Writing the above paragraph got me thinking if it was possible to remove the need of glue for the magnets by flipping the magnet’s holder, making the magnets pull harder into the print during removal instead of pulling out of the slot. Tested at 10 thousands thickness per print, and 20. The 10 thou print failed while I tried to install the magnet. The 20 thou worked wonderfully. I tried flinging around the small test print with a wrench and couldn’t get it to separate. This also removed part of the supports required to make the print.
My final print, I tried without any supports at all, and it came out wonderfully.
https://www.youtube.com/watch?v=1z5ExJvfJ7g

/https://fbi.cults3d.com/uploaders/19106591/illustration-file/ea5eb2ac-753c-4795-b3a4-53bd92986a29/20201205_153051.jpg)
