Introducción - Introduction
Español
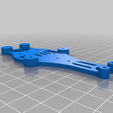
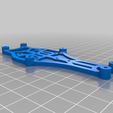
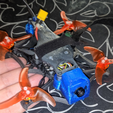
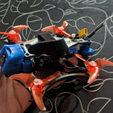
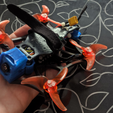
¿Estás cansado de lo feo que es tu Tyro69? Sabemos que los productos de Eachine no son para tirar cohetes, pero, si te animas y pruebas a montarle este frame, te aseguro que tu experiencia con él cambiara radicalmente.
Tiene muchísima mas estabilidad, vuela mucho mas suave y fluido. Si vas a volar en estabilizado si rozas una pared ya no se va al suelo tan fácilmente, ahora es capaz de estabilizarse antes de tocar el suelo. Ahora también la electrónica está mucho mas protegida de los golpes. También pasa a ser mucho mas fino.
Para mi ha sido lo mas parecido a comprarme un tiny nuevo.
English
Are you tired of your ugly Tyro69? We know that Eachine products are... not very good, but if you dare and try to mount this frame, I assure you that your experience with it will change radically.
It has much more stability, flies much smoother and more fluid. If you are going to fly stabilized if you brush against a wall it does not go to the ground so easily, now it is able to stabilize before touching the ground. Now the electronics are also much more protected from shocks. It also happens to be much finer.
For me it has been the closest thing to buying a new tiny.
¿Qué vamos a tener que cambiar? - What are we going to have to change?
Español
Para montarte este frame vas a tener que, al menos, alargar la antena del VTX ya que es muy corta como para ponerlo en la parte de la cola. Por lo que vas a tener que necesitar un pequeño cable de antena, te puede valer un pigtail viejo o que ese haya partido.
English
To mount this frame you will have to, at least, lengthen the antenna of the VTX since it is too short to put it in the tail of the frame. So you will have to need a small antenna cable, an old or broken pigtail may be work.
Materiales - Materials
Español
Yo te recomiendo que uses tornillos de naylon excepto para los motores, que te valdrán los originales.
Por lo que necesitarás:
- Tornillo M2 x 20
- Espaciador hembra - hembra M2 de 10 mm x 6 - Para las columnas
- Espaciador hembra - macho M2 de 6+6mm x 8 - (Para fijar la controladora y los ESC)
- Tuerca M2 x 8
English
I recommend that you use nylon screws except for the motors, which will be worth the original ones.
For what you will need:
- Screw M2 x 20
- M2 Spacer Female - Female 10mm x 6 M2 Spacer - For Columns
- M2 Spacer Female spacer - male 6 + 6mm x 8 - (To fix the controller and ESCs)
- Nut M2 x 8
Montaje - Build
Spanish
Quitamos los soportes, ayúdate en los huecos de los tornillos, atornillando un tornillo de metal desde el otro lado, el soporte caerá solo.
Poner los motores.
Montamos la ESC en el frame inferior. (4 tornillos, 4 espaciadores hembra - macho, 4 tuercas)
Ponemos la controladora de vuelo atornillada en la parte superior. Ten cuidado con la posición respeta la flecha de posición. Esta flecha tiene que quedar del lado de la parte superior del frame, es decir, no la tienes que ver una vez atornillada. (4 tornillos, 4 espaciadores hembra - macho, 4 tuercas)
Encaja las tanto el cannopy como la cola en los huecos de la columnas
Si vas a modificar la antena del VTX este es el momento, si no pasa al punto siguiente
Mete cámara y VTX en el cannopy. Todo debería quedar dentro de él. Únicamente sobresaldría por la parte de atrás los dos conectores de la cámara y el VTX y la antena.
Monta el receptor de radio. Yo lo he puesto en la parte superior, con una brida.
Conecta todo y comprueba que funciona todo, después configura en betaflight lo que necesites, ya que una vez montado tendremos que desatornillar una columna para acceder al USB.
Monta las columnas (12 tornillos y 6 espaciadores hembra - hembra)
Pon el strap y una batería en la parte superior.
Asegúrate de que el cable del X30 no impida girar alguna hélice!
Antes de volar calibra el acelerómetro y giroscopio desde el OSD.
English
Remove the supports, help yourself in the screw holes, screwing a metal screw from the other side, the support will fall by itself.
Put the motors.
Mount the ESC in the lower frame. (4 screws, 4 female - male spacers, 4 nuts)
Put the flight controller on top. Be careful with the position respect the position arrow. This arrow has to be on the side of the upper part of the frame, that is, you do not have to see it once it is screwed. (4 screws, 4 female - male spacers, 4 nuts)
Fit both the cannopy and the tail in the holes in the columns
If you are going to modify the antenna of the VTX this is the moment, if not go to the next point
Put camera and VTX in the cannopy. Everything should stay inside him. Only the two connectors of the camera and the VTX and the antenna would stick out from the back.
Mount the radio receiver. I have put it on top, with a flange.
Connect everything and check that everything works, then configure what you need in betaflight, since once mounted we will have to unscrew a column to access the USB.
Assemble the columns (12 screws and 6 female - female spacers)
Put the strap and a battery on top.
Make sure that the X30 wire does not prevent a propeller from turning!
Before flying calibrate the accelerometer and gyroscope from the OSD.
UPDATE 29-10-2020
Moved top holes to make the USB accessible

/https://fbi.cults3d.com/uploaders/18343599/illustration-file/045a7488-e1d4-4d41-b647-df49a9067942/tyor69_frame-Top_v2_mod_big_columns.png)
