Skip to content

Ecotech Reeflink USB Power Conversion

Advertising
Advertising
?
Creation quality: 0.0/5 (0 votes)
Evaluation of members on the printability, utility, level of detail, etc.

  • 758 views
  • 4 downloads

License
3D design format
STL Folder details Close
  • reeflink_usbc5.stl

Learn more about the formats

3D model size X 22.5 Γ— Y 16 Γ— Z 15.5 mm
Publication date 2021-07-25 at 23:08
?
Published to Thingiverse on: 2020-09-29 at 12:56
Design number 480567

3D printer file info

3D model description

My Ecotech Reeflink was working happily until all of a sudden, it wouldn't power on. No lights at all!

A quick poking around showed that the large black IC on the board inside had failed (responsible for converting mains AC voltage to 5 volts (0.8amp peak).

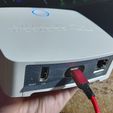
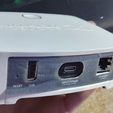
Seeing as though I bought it second hand and essentially had no warranty anyway etc, I decided to convert it to being USB powered!

Parts Needed:
* Soldering Iron
* Solder
* Snips of some sort are handy to cut off the parts we need to remove/clean up etc.
* This 3D print :)
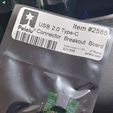
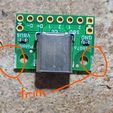
* Pololu usb07a board
* Some wire (something like 26awg silicone wire is good)
* 2x M2 nuts
* 2x M2 4mm bolts
* [optional] Double sided tape or glue (for re-attaching the rear sticker! The original glue doesn't cope well with being re-attached) - could just remove the sticker too.

Steps:
* Note; some pictures on the internet show a large black heatsink over the input power section - mine didn't have this (perhaps why it failed! haha). Switching to USB removes the need to dissipate heat anyway, so remove it if present.
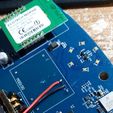
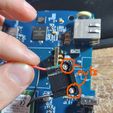
* De-solder/remove the large black IC (RECOM AC-DC Converter)
* De-solder/remove the figure-8 power connector (we're going to replace it with a USB-C connector)
* [optional] Remove the other mains AC components from the board (not needed, but for those interested in clean appearance :) )
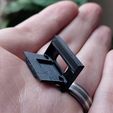
* Print this part (socket face-down, board mount sticking up)
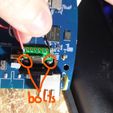
* Shave a small amount off the Pololu USB board, near the screw holes (else it doesn't quite fit! See pictures)
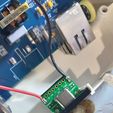
* Solder wires to run from the main board to the Pololu USB board (see pictures)
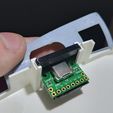
* Use the M2 fixtures to install the Pololu USB board into the 3D printed part, and slot that into where the figure-8 power connector used to live (See pictures).
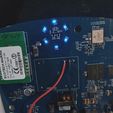
* Close the casing all back up, plug in, and make sure you get some lights showing! :)

3D printing settings

-

Advertising


Issue with this design? Report a problem.

Would you like to support Cults?

You like Cults and you want to help us continue the adventure independently? Please note that we are a small team of 3 people, therefore it is very simple to support us to maintain the activity and create future developments. Here are 4 solutions accessible to all:

  • ADVERTISING: Disable your banner blocker (AdBlock, …) and click on our banner ads.

  • AFFILIATION: Make your purchases online by clicking on our affiliate links here Amazon.

  • DONATE: If you want, you can make a donation via Ko-Fi πŸ’œ.

  • WORD OF MOUTH: Invite your friends to come, discover the platform and the magnificent 3D files shared by the community!


Sharing and downloading on Cults3D guarantees that designs remain in makers community hands! And not in the hands of the 3D printing or software giants who own the competing platforms and exploit the designs for their own commercial interests.

Cults3D is an independent, self-financed site that is not accountable to any investor or brand. Almost all of the site's revenues are paid back to the platform's makers. The content published on the site serves only the interests of its authors and not those of 3D printer brands who also wish to control the 3D modeling market.

100% secure payment by credit card, PayPal, Apple Pay, Google Pay, etc.
View all payment options.