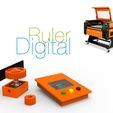
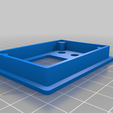
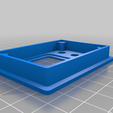
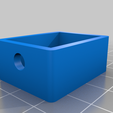
Digital Ruler for CO2 Laser and other MachinesA couple of weeks ago this wonderful CO2 Laser with 80W tube arrived. Before that, I had no experience with him in work, although I often made orders for cutting and engraving at enterprises specializing in this process. I mastered it in a day, everything turned out to be quite simple, but the alignment of the laser-tube and mirrors still needs to be done, it's not long. The assembly itself is surprisingly quite high quality, although I thought that I would have to work hard on its improvements. After a little practice with different materials and different heights of processing, such as spherical surfaces, where it is necessary to engrave and cut in layers from the center to the edge, I thought it would be nice to set an electronic ruler. And I already found where to buy, but the dimensions are either too long or short, and I did not want to cut the body. Therefore, I decided to make my own version, and even more so everything for this was at hand.The final version consists of two controllers Master and Slave, but before there were many options: with one controller, and with different displays, and I rewrote the program more than once using either a laser rangefinder or an ultrasonic one. But all these sensors do not very accurately measure the distance when tenths or hundredths of a millimeter are required. And I remembered about an ordinary encoder ... And by the way, if you use a stepper motor as an encoder, then you can even achieve accuracy up to thousandths of a millimeter, but this is not required in this machine, so displaying to tenths, although the program goes recalculation to hundredths.I’ll answer right away why there are two controllers, so that afterwards I don’t answer in the comments: - it’s safer! Here, the accuracy of measurements in serial work is important. It's an Arduino, however, multitasking doesn't work very well with it, especially when using an OLED display. Measuring, buttons and displaying information simply does not cope. As a result, there were gaps ... In a pair operation, one controller monitors the encoder and transmits via the SPI interface to the second, which already displays information on the screen. Having tested it thoroughly, I was convinced that there are no missing steps, so I am sharing a ready-made solution.Functional:measurement modes of absolute and relative distance;two languages of the user interface (English and Russian);zero setting;factor correction (distance mm = encoder steps / factor). Basic Coefficient = 7.7038 for HTD pulley 3M 16T;and of course a reset (reboot).The controller also remembers the last position before the machine is turned off. This happens every time the Z-axis shafts stop rotating after two and a half seconds. And do not worry about the memory resource (read / write), although the Arduino claims one hundred thousand cycles, but I implemented this process in such a way that writing occurs only if the value is different from the previous one. What is it for?! - You turn on the machine and immediately see the position of the table relative to zero (that is, the exact focus, which you have determined either by the table or by the material).Here is an example:you set the zero on the table, take a material with a thickness of, for example, 8 mm ... The focus should be set to the middle of the material thickness ... Just lower the table relying on the digital ruler by 4 mm. It's more convenient than aiming with a template, at least for me.Second example:3D engraving. Here, of course, you can operate the power / speed / airflow in layers, but better and more importantly cleaner (without charring the material) is obtained when each layer is in the exact focus of the laser, and even when a series production - this ruler helps out great.And yes! This ruler can be easily used in other machines, where the movement is not done by a program, but manually, for example, a stand for a drill, etc. Later I will screw this to my stand drill with Hilda.Connection diagram: I will not describe here how to flash the Arduino. Type this name into Google and you will get, as Google itself says - "Results: approximately 122,000,000" :)But the firmware itself is available in the project archive ...Instructionson how to change the coefficient, in case you use a different type of encoder / pulley / belt, etc.:We connect the slave controller to the Arduino IDE, select the board in the "Tools" menu (in my case, the Arduino PRO Mini), then in that menu, select the port on which the Arduino is connected. Open Serial Monitor. In the command line, we enter our coefficient with a dot as a separator. As I mentioned above, in the my case of coefficient = 7.7038. After the keyboard Enter - the entered coefficient will be displayed and saved in the controller's memory. Here are all the settings :)Well, perhaps that's enough, otherwise I've already written too much ... who reads all this?! :) ... But here's the important thing I wanted to add: LightBurn is just delightful in working with the machine. And I didn't like the program that came with laser ...How I soldered and assembled the digital ruler, you can look at the video: If you liked this thing - let me know by putting like!Parts links below: Arduino PRO Mini OLED Display Module 128X64 I2C Rotary Encoder Module For Arduino KY-040 Prototype PCB 4x6 cm JST PH 2.0/XH2.54 Connector Set Push Button 6x6mm Push Button Caps For 6*6 mm Wire Cable Mounting wires 30AWG TopZeal Filament ABS Adhesive cloth tape Glue T9000 Links to used tools: 80W CO2 Laser Machine Angle grinder Vise for CNC Small PCB Magnetic Holder LAOA Mini Hand Tools TE01 TC01 MINI MTweezers Crimping Pliers Tool SN-01BM Crimping Tool Mini Crimper Pliers Required files: digital-ruler.zip digital-ruler-firmware.zip My favorites: Thank you for every tip or donation,it means great recognition for me and helps a lot to keep going! My some other things:
3D Printer • Accessories
<img

/https://fbi.cults3d.com/uploaders/13528167/illustration-file/4fcf48a9-db7a-4b11-9d69-b5cace514ed6/Digital-Ruler-o.jpg)
