Skip to content

Phelps3D Beta Ray Bill's Stormbreaker Version 3

Advertising
Advertising
?
Creation quality: 0.0/5 (0 votes)
Evaluation of members on the printability, utility, level of detail, etc.

  • 1.6k views
  • 1 like
  • 1 collection

License
3D design format
STL Folder details Close
  • BRBsStormbreakerV3CR_30SplitAxePartA (repaired).stl
  • BRBsStormbreakerV3CR_30SplitAxePartB (repaired).stl
  • BRBsStormbreakerV3CR_30SplitHammerHandlePartA (repaired).stl
  • BRBsStormbreakerV3CR_30SplitHammerHandlePartB (repaired).stl
  • BRBsStormbreakerV3Merged (repaired).stl
  • BRBsStormbreakerV3SplitSideA (repaired).stl
  • BRBsStormbreakerV3SplitSideB (repaired).stl
  • BRBsStormbreakerV3_Axe (repaired).stl
  • BRBsStormbreakerV3_HammerPartA (repaired).stl
  • BRBsStormbreakerV3_HammerPartB (repaired).stl
  • BRBsStormbreakerV3_HammerSlottedDowel (repaired).stl
  • BRBsStormbreakerV3_HandleBottom (repaired).stl
  • BRBsStormbreakerV3_HandleSlottedDowel (repaired).stl
  • BRBsStormbreakerV3_HandleTop (repaired).stl
  • BRBsStormbreakerV3_MiddleSegment (repaired).stl

Learn more about the formats

Publication date 2021-08-01 at 22:31
Design number 484937

3D printer file info

3D model description

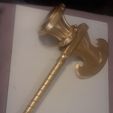
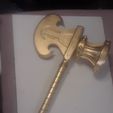
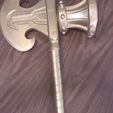
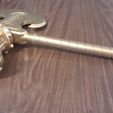
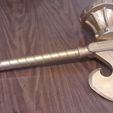
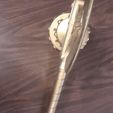
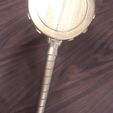
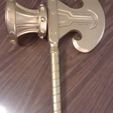
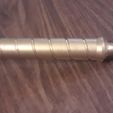
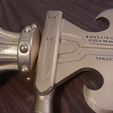
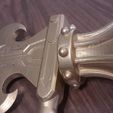
I decided the amount of work I put into this Marvel comics Beta Ray Bill's Stormbreaker for a cosplay contest was not to go to waste. I have improved it twice and then decided to change the files so you could choose how to slice them. The first was designed with the Creality Ender 3's build volume in mind. There is now a Merged version that you can slice any way you wish. Then there is also a Creality CR-30 version that separated the handle/hammer and the axe files, split so they can print flat.

This was my first attempt at trying to sand and paint a PLA print. My initial paint job went bad since the cheap black paint and the gold I was using just bubbled up. I had to strip it all down and re-try with a different set of paints.

By purchasing you are allowed to print up to 4 of these for your own use. You are NOT allowed to re-sell the prints or use these for any other commercial purposes.

https://youtu.be/VhybbwJr2Yw

3D printing settings

I would suggest printing these at 0.2 mm layer height. (Although you may like to use a larger nozzle and then half that to come to a good layer height.) While 10% infill may be fine for the hammer, axe and the pins, I suggest a 50% or higher on the handle and middle parts. These will be the easiest to break along the layer lines.

Advertising


Issue with this design? Report a problem.

Would you like to support Cults?

You like Cults and you want to help us continue the adventure independently? Please note that we are a small team of 3 people, therefore it is very simple to support us to maintain the activity and create future developments. Here are 4 solutions accessible to all:

  • ADVERTISING: Disable your banner blocker (AdBlock, …) and click on our banner ads.

  • AFFILIATION: Make your purchases online by clicking on our affiliate links here Amazon.

  • DONATE: If you want, you can make a donation via Ko-Fi πŸ’œ.

  • WORD OF MOUTH: Invite your friends to come, discover the platform and the magnificent 3D files shared by the community!


Sharing and downloading on Cults3D guarantees that designs remain in makers community hands! And not in the hands of the 3D printing or software giants who own the competing platforms and exploit the designs for their own commercial interests.

Cults3D is an independent, self-financed site that is not accountable to any investor or brand. Almost all of the site's revenues are paid back to the platform's makers. The content published on the site serves only the interests of its authors and not those of 3D printer brands who also wish to control the 3D modeling market.

100% secure payment by credit card, PayPal, Apple Pay, Google Pay, etc.
View all payment options.