Universal armillary sundial
On this sundial, the time is read by observing on a ring parallel to the earth's equator the shadow of the wire perpendicular to this ring.
The time read is the solar time of the time zone you are in.
This dial can be used anywhere, it is adjustable whatever the latitude and longitude of the place.
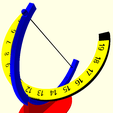
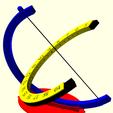
It is composed of 7 parts identified by their colors in the illustrations:
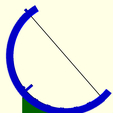
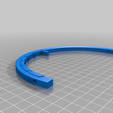
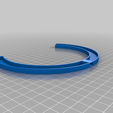
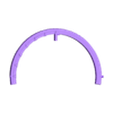
- The blue meridian ring which will carry the wire and the equatorial ring
- A small blue cap to tighten and fix the wire.
- The black equatorial ring which will carry the time reading ring
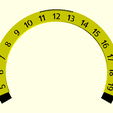
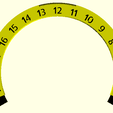
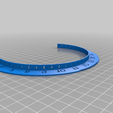
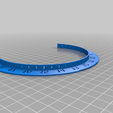
- Two yellow time-reading rings (one for the northern hemisphere, the other for the southern hemisphere), on which the shadow of the wire will be projected.
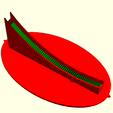
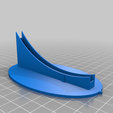
- A green serrated support of the meridian ring which will allow to adjust the latitude
- A red base carrying the whole.
The prints are made without support.
Assembly :
- On the blue meridian ring, pass a wire through the two holes. Make a knot to prevent the wire from crossing the hole near the 90° scale. Tighten the wire and secure it by putting the cap on the other hole.
- Insert the black equatorial ring with the flat side facing the wire cap on the blue meridian ring.
- Place the time ring of the desired hemisphere:
- For the northern hemisphere, the shadow moves from left to right. Therefore, use the ring graduated from 5 to 19 from left to right.
- For the southern hemisphere, the shadow moves from right to left. We therefore use the ring graduated from 19 to 5 from left to right
- Insert the green holder into the red base.
- Turn the base so that the highest part is on the left and put the meridian ring on the green support so that its graduations are facing you.
Settings and Installation
Latitude
The wire should be oriented so that it points to the celestial north or south.
Set the latitude by tilting the blue meridian ring so that the latitude faces the mark on the side of the red base.
Longitude
The sundial should give the solar civil time of the country you are in.
This solar civil time is based on the solar time of the reference meridians of the time zones placed every 15° west and east of the Greenwich meridian.

Along these reference meridians, the sun is at its highest when it is noon.
If you are a little east of this reference meridian, the sun will be at its highest a little before noon, so you will have to rotate the time ring so that it indicates noon after the sun is at its highest.
If you are west of the reference meridian, the sun will be at its highest a little after noon. So, you will have to rotate the time ring so that it indicates noon before the sun is at its highest point.
The rotation of the time ring corrects the time by 4 minutes for each degree east or west of the reference meridian.
To set this advance or delay:
- Place the 12 of the time ring facing the meridian ring
- Calculate the difference of the longitude where you are with the closest 15° multiple reference longitude (0°, 15°, 30°, 45°, 60°, 75°, 90°, 105°, 120°, 135°, 150°, 165°, 180°)
- Turn the time ring by the corresponding number of degrees (1 notch = 1°)
- to the left if you are west of the reference in the northern hemisphere or if you are east of the reference in the southern hemisphere
- to the right if you are east of the reference in the northern hemisphere or if you are west of the reference in the southern hemisphere.
Examples:
- Paris (N) : longitude 2°E => reference 0° => we are 2° east of the reference, we turn the ring of 2° to the right
- Moscow (N) : longitude 38°E => reference 45°E => we are 7° west of the reference, we turn the ring of 7° to the left
- New York (N): longitude 74°W => reference 75°W => we are 1° east of the reference: we turn the ring of 1° to the right
- Sydney (S) : longitude 151°E => reference 150°E=> we are 1° east of the reference, we turn the ring 1° to the left
- Johannesburg (S): longitude 28°E => reference: 30°E we are 2° west of the reference: we turn the ring of 2° to the right.
Installation
Orient the base on the north-south axis using its two markers, the top of the wire facing north in the northern hemisphere or south in the southern hemisphere.
Reading the time
The reading is done by observing the shadow of the wire on the inner face of the time ring. Slits are used as markers every hour or half hour.
The time that is read is the civil solar time. Depending on the country and the season, it may be necessary to add or subtract 1, 2 or 3 hours to the time read on the dial. In France, it is necessary to add 1 hour in winter and 2 hours in summer.
Cadran solaire armillaire universel
Sur ce cadran solaire armillaire, la lecture de l'heure se fait en observant sur un anneau parallèle à l'équateur terrestre l'ombre du fil perpendiculaire à cet anneau.
L'heure lue est l'heure solaire du fuseau horaire dans lequel on se trouve.
Ce cadran peut être utilisé n'importe où, il est réglable quelle que soit la latitude et la longitude du lieu.
Il est composé de 7 pièces repérées par leurs couleurs dans les illustrations:
- L'anneau méridien bleu qui portera le fil et l'anneau équatorial
- Un petit capuchon bleu destiné à tendre et fixer le fil
- L'anneau équatorial noir qui portera l'anneau de lecture de l'heure
- Deux anneaux de lecture de l'heure (un pour l'hémisphère nord, l'autre pour l'hémisphère sud), jaunes, sur lesquels sera projetée l'ombre du fil.
- Un support dentelé vert, de l'anneau méridien qui permettra de régler la latitude
- Une base rouge portant le tout.
Les impressions se font sans support.
Assemblage :
- Sur l'anneau méridien bleu, passer un fil par les deux trous. Faire un noeud pour empêcher le fil de traverser le trou près de la graduation à 90°. Tendre le fil et le bloquer en posant le capuchon sur l'autre trou.
2.Insérer l'anneau équatorial noir sur l'anneau méridien bleu, le côté plat vers le haut.
- Poser l'anneau de lecture du temps de l'hémisphère correspondant :
- Pour l'hémisphère nord, l'ombre se déplace de la gauche vers la droite. On utilise donc l'anneau gradué de 5 à 19 de gauche à droite.
- Pour l'hémisphère sud, l'ombre se déplace de droite à gauche. On utilise donc l'anneau gradué de 19 à 5 de gauche à droite
- Insérer le support vert dans la base rouge.
- Tourner la base de manière à ce que la partie la plus haute soit à gauche et poser sur le support vert l'anneau méridien de manière à ce que ses graduations soient face à vous.
Réglages et installation
Latitude
Le fil doit être orienté de manière à ce qu'il soit dirigé vers le nord ou le sud céleste.
Régler la latitude en inclinant l'anneau méridien bleu de manière à amener la latitude en face du repère sur le côté de la base rouge.
Longitude
Le cadran solaire doit donner l'heure civile solaire du pays dans lequel on se trouve.
Cette heure civile solaire est basée sur l'heure solaire des méridiens de référence des fuseaux horaires placés tous les 15° à l'ouest et à l'est du méridien de Greenwich.

Le long de ces méridiens de référence, le soleil est au plus haut quand il est midi.
Si on se trouve un peu à l'est de ce méridien de référence, le soleil sera au plus haut un peu avant midi, il faudra donc tourner l'anneau horaire pour qu'il indique midi après que le soleil ne soit au plus haut.
Si on est à l'ouest du méridien de référence, le soleil sera au plus haut un peu après midi. Il faudra donc tourner l'anneau horaire pour qu'il indique midi avant que le soleil ne soit au plus haut.
La rotation de l'anneau horaire corrige le temps de 4 minutes pour chaque degré à l'est ou à l'ouest du méridien de référence.
Pour régler cette avance ou ce retard :
- Placer le 12 de l'anneau du temps face à l'anneau mérdien
- Calculer la différence de la longitude où on se trouve avec la longitude de référence multiple de 15° la plus proche (0°, 15°, 30°, 45°, 60°, 75°, 90°, 105°, 120°, 135°, 150°, 165°, 180°)
- Tourner l'anneau du temps du nombre de degrés correspondants (1 encoche = 1°)
- vers la gauche si on est à l'ouest de la référence dans l'hémisphère nord ou si on est à l'est de la référence dans l'hémisphère sud
- vers la droite si on est à l'est de la référence dans l'hémisphère nord ou si on est à l'ouest de la référence dans l'hémisphère sud.
Exemples :
- Paris (N) : longitude 2°E => référence 0° => on est 2° à l'est de la référence, on tourne l'anneau de 2° vers la droite
- Moscou (N) : longitude 38°E => référence 45°E => on est à 7° à l'ouest de la référence, on tourne l'anneau de 7° vers la gauche
- New York (N) : longitude 74°W => référence 75°W => on est à 1° à l'est de la référence : on tourne l'anneau de 1° vers la droite
- Sydney (S) : longitude 151°E => référence 150°E=> on est à 1° à l'est de la référence, on tourne l'anneau de 1° vers la gauche
- Johannesburg (S) : longitude 28°E => référence : 30°E on est 2° à l'ouest de la référence : on tourne l'anneau de 2° vers la droite.
Installation
Orienter la base sur l'axe nord-sud en utiisant ses deux repères, le haut du fil tourné vers le nord dans l'hémispère nord ou vers le sud dans l'hémisphère sud.
Lecture de l'heure
La lecture se fait en observant l'ombre du fil sur la face interne de l'anneau du temps. Des fntes servent de repères toutes les heures ou toutes les demi-heures.
L'heure qui est lue est l'heure solaire civile. SUivant les pays et les saisons, il faut éventuellement ajouter ou retrancher 1, 2 ou 3 heures à l'heure lue sur le cadran. En France, il faut ajouter 1 h en hiver et 2 h en été.

/https://fbi.cults3d.com/uploaders/16670955/illustration-file/cf4acb24-332d-4f9b-83e2-6e6c606084d3/Photo3.jpg)

