Skip to content

DIY 3D Printed Mini Hobby Belt Sander

Advertising
?
Creation quality: 5.0/5 (1 vote)
Evaluation of members on the printability, utility, level of detail, etc.

  • 1.2k views
  • 7 likes
  • 16 downloads

License
3D design format
STL and ZIP Folder details Close
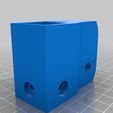
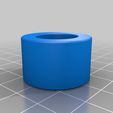
  • 40mm_Fan_Guard.stl
  • Belt_Sander_With_Fan.zip
    • Belt_Sander_With_Fan.stp
  • Belt_Tightener_Case.stl
  • Belt_Tightener_Roll.stl
  • Case.stl
  • Case_V2.stl
  • Dust_Bin.stl
  • Dust_Bin_V2.stl
  • Lid.stl
  • Lid_V2.stl
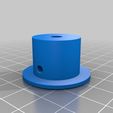
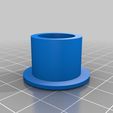
  • Pulley_Lower1.stl
  • Pulley_Lower2.stl
  • Pulley_Upper1.stl
  • Pulley_Upper2.stl
  • Upper_Shaft_Holder.stl

Learn more about the formats

Publication date 2021-08-15 at 23:07
?
Published to Thingiverse on: 2018-10-05 at 01:10
Design number 496033

3D printer file info

3D model description

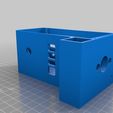
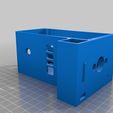
** 07.10.2018: ** V2 is out. You should only print suffixed with _V2. Other previous parts are suitable with new ones. Changes are:
* 5mm more room for motor driver in X axis in Case part
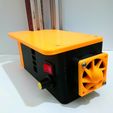
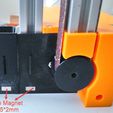
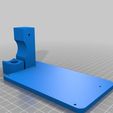
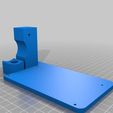
* Added magnet holes for Case and Dust_Bin to connect them more firmly. Also there is a male and female sections to connect them more precisely. Magnet is here:

https://www.aliexpress.com/item/10pcs-10-x-5-x-2-mm-Super-Strong-Round-Permanet-Neodymium-Magnets-Rare-Earth-Powerful/32887877712.html

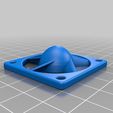
  • Added a 40mm fan to cool the driver. Becareful about the voltage of the fan and the input voltage. Input should suit to the fan's voltage range.
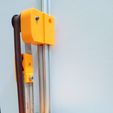
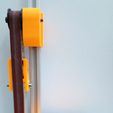
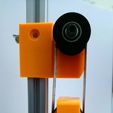
  • Belt_Tightener_Case and Belt_Tightener_Roll parts are revised

** EN: **
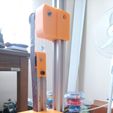
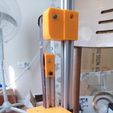
I needed a belt sander for small hobby projects. So I made one with 2020 aluminum extrusions. Belt is 15mm wide and bought a 1 meter one and cut into 15mm wide pieces then bonded the pieces to make a suitable one for my sander. You can buy here:
https://www.aliexpress.com/item/1meter-Emery-Cloth-Roll-Polishing-Sandpaper-For-Grinding-Polishing-Tools-Metalworking-Dremel-80-100-120-150/32811927490.html
Bond the pieces with a PVA glue or Gorilla Glue (or you can try what you want).
* Speed Controller:
https://www.aliexpress.com/item/PWM-DC-6V-12V-24V-28V-3A-Motor-Speed-Control-New-Switch-Controller/32831579722.html
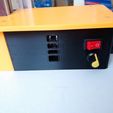
* DC Power Socket:
https://www.aliexpress.com/item/Mayitr-10Pcs-DC-Power-Jack-Socket-Female-Panel-Mount-Connector-High-Quality-Black-DC-Power-Jack/32817267539.html
* 775 Motor:
https://www.aliexpress.com/item/High-Power-775-DC-Electric-Spindle-Moto-Large-Torque-Motor-Ball-Bearing-Tools-12V-36V-Low/32891161654.html
* 625RS X 4:
https://s.click.aliexpress.com/e/bmg61iYY
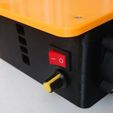
* Rocker Switch Mini Switch 2Pin 6A/250V ON-OFF 15*21MM
https://s.click.aliexpress.com/e/8J74wZ2

A Short Video:
https://www.youtube.com/watch?v=Gt4pn9rcOsQ

** If you use the same configuration, I advise you to not to use the sander over 12V because the 775 motor can consume more current above 3A after 12V

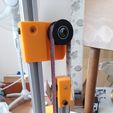
** I have wrapped some bike inner tyre around the pulleys to increase the friction. I have bonded it to pulleys with epoxy glue.


** TR: **

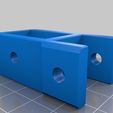
Küçük hobi işlerim için çok kez bant zımpara aletine ihtiyacım oluyordu ve sonunda elime bir 775 motor geçince bunu yaptım. Makineyi 2020 profil kullanarak yaptım ve profilleri plastik kısımlara sabitlemek için, resimlerde de var, ilgili yerlere M6 klavuz ile yiv açtım. Bant zımpara olarak da metrelik olarak satılan bant zımparalardan alıp 15mm eninde kestim. Yarım metre bir adet için yeterli oluyor. Yapıştıma olayı için nette videolar mevcut. Yapıştırıcı olarak elimde bulunan poliüretan Gorilla Glue kullandım. Yapıştırılacak yerleri verev olarak kesip bir ucun zımpara kısmını taşlamanız daha iyi sonuç veriyor. İşkence ile de iki katı plaka arasında yapıştırıcı kuruyana kadar bekletin.
775 motorun 10000 devir gibi yüksek devirlisi mevcut bir de 12V’ta 3500 devir civarı olanı var. Ben ikinci tipi kullandım. Ayrıca 12V üzerinde 3A’den fazla akım çekme olasılığı artıyor, özellikle de motoru biraz zorlarsanız. Bu yüzden 12V üzerinde kullanmamanız sürücü açısından iyi olur.
Ayrıca kasnakların zımpara şeridinin geçeceği kısımlarını bisikletçiden aldığım iç lastikleri uygun halde kesip epoksi ile yapıştırarak daha tutucu hale getirdim.
Alet için gerekli başlıca linkler yukarıda var. Eğer projeyi yaparsanız made kısmına eklemeyi unutmayınız ;)

3D printing settings

-

Advertising


Issue with this design? Report a problem.

Would you like to support Cults?

You like Cults and you want to help us continue the adventure independently? Please note that we are a small team of 3 people, therefore it is very simple to support us to maintain the activity and create future developments. Here are 4 solutions accessible to all:

  • ADVERTISING: Disable your banner blocker (AdBlock, …) and click on our banner ads.

  • AFFILIATION: Make your purchases online by clicking on our affiliate links here Amazon.

  • DONATE: If you want, you can make a donation via Ko-Fi 💜.

  • WORD OF MOUTH: Invite your friends to come, discover the platform and the magnificent 3D files shared by the community!


Sharing and downloading on Cults3D guarantees that designs remain in makers community hands! And not in the hands of the 3D printing or software giants who own the competing platforms and exploit the designs for their own commercial interests.

Cults3D is an independent, self-financed site that is not accountable to any investor or brand. Almost all of the site's revenues are paid back to the platform's makers. The content published on the site serves only the interests of its authors and not those of 3D printer brands who also wish to control the 3D modeling market.

100% secure payment by credit card, PayPal, Apple Pay, Google Pay, etc.
View all payment options.