Skip to content

CNC 3020T T-Slot Touch-Off Plate

Advertising
Advertising
?
Creation quality: 0.0/5 (0 votes)
Evaluation of members on the printability, utility, level of detail, etc.

  • 702 views
  • 3 downloads

License
3D design format
STL Folder details Close
  • Router_Clamp_for_Tool_Probe_2.stl
  • Touch_off_setter_adapter_2.stl

Learn more about the formats

Publication date 2021-08-18 at 23:13
?
Published to Thingiverse on: 2018-03-26 at 23:17
Design number 498424

Template info

3D model description

These are the parts needed for using a $19 touch probe from Amazon as a $100 touch off plate on a CNC 3020T Router. Using these parts I've been able to machine aluminum with 4 tool changes at a near perfect accuracy (less than a thou surface deviation between tools) Not bad for one of the "cheap" chinese CNC machines!

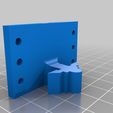
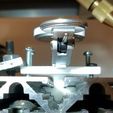
This tool consists of two printed parts and a few other bought or found parts. Of course you need one of those touch probes from Amazon, and it should have the flat v-grove style mount (you might have to edit the base clamp to make it attach to your probe if you get a different style,) and then you'll need to print two parts. The first part clamps to the top of the probe and provides a flexible shelf to register a larger area of pressure against the probe tip.

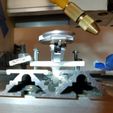
The second is the base that slides into the 3020T's slots (check the slot profile in the picture to make sure yours match of course.)

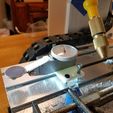
A CR2032 battery makes the perfect touch plate, I glued mine on with a little super glue. Mount and fix this to the side of your work area, I clamped mine to ensure it didn't move which would completely wreck the calibration after the job start.

Using your first endmill, area clear a consistent level on your work piece (even if it's just a few thou), when that job is finished, jog your tool over to the center of the battery (touch plate) and lower it until it engages a bit. Set the probe to 0 by rotating the dial and then use your router controls to jog up and down until you're reading 0. Note the coordinates on your CNC machine (you should only have moved the machine via jogs at this point.)

Now that it reads 0 on the dial indicator, lift the z axis manually and swap your tool, then lower it manually until the new tool reads 0. Near perfect tool change!

You should use some screws to clamp down the base in the front and the back btw, again, if this moves after the initial calibration (after you area clear and note your coordinates when you find 0) your tool changes will not be accurate.

Manufacturing settings

-

Advertising


Page translated by automatic translation. See the original version.
Issue with this design? Report a problem.

Would you like to support Cults?

You like Cults and you want to help us continue the adventure independently? Please note that we are a small team of 3 people, therefore it is very simple to support us to maintain the activity and create future developments. Here are 4 solutions accessible to all:

  • ADVERTISING: Disable your banner blocker (AdBlock, …) and click on our banner ads.

  • AFFILIATION: Make your purchases online by clicking on our affiliate links here Amazon.

  • DONATE: If you want, you can make a donation via Ko-Fi πŸ’œ.

  • WORD OF MOUTH: Invite your friends to come, discover the platform and the magnificent 3D files shared by the community!


Sharing and downloading on Cults3D guarantees that designs remain in makers community hands! And not in the hands of the 3D printing or software giants who own the competing platforms and exploit the designs for their own commercial interests.

Cults3D is an independent, self-financed site that is not accountable to any investor or brand. Almost all of the site's revenues are paid back to the platform's makers. The content published on the site serves only the interests of its authors and not those of 3D printer brands who also wish to control the 3D modeling market.

100% secure payment by credit card, PayPal, Apple Pay, Google Pay, etc.
View all payment options.