Skip to content

Artillery Genius Drag Chain 20x10mm

Advertising
Advertising
?
Creation quality: 5.0/5 (1 vote)
Evaluation of members on the printability, utility, level of detail, etc.

  • 7.6k views
  • 16 likes
  • 256 downloads

License
3D design format
STL Folder details Close
  • DragChain_Bed_Mount_20x10mm.stl
  • DragChain_Bed_Mount_FLAT_20x10mm.stl
  • DragChain_Case_Mount_20x10mm.stl

Learn more about the formats

Publication date 2021-08-19 at 23:10
?
Published to Thingiverse on: 2020-09-01 at 22:49
Design number 499083

exolor

3D printer file info

3D model description

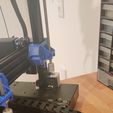
Drag chain holders for the Artillery Genius printer.

Drag chain:
UK: https://www.amazon.co.uk/YOTINO-Plastic-Towline-Printer-Carrier/dp/B07S6LW7BK
DE: https://www.amazon.de/YOTINO-Schleppkette-Kabelführung-Kabelschleppkette-Energiekette/dp/B07S6LW7BK

UPDATE:
I drilled a hole into the case so the cables don´t kink as in V1. I highly suggest using the FLAT case mount!

You need to extend the bed-cables. Make sure to do it right, these cables carry 230/110V! If you don´t have the knowledge DON´T DO THIS PROJECT. I´m not responsible for any damage if you do it wrong.

Remove all bed-cables from the PSU and mainboard. Make sure to follow safety guildlines when working on main-power parts.

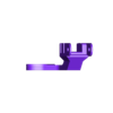
Install the cableholder onto the bed. Unscrew both back bed screws and slide it on, shouldn´t cause any problems. Put the bed-screws back after you installed it.

Guide the cables through the chain.

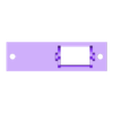
You need to drill one hole (3.2mm or slightly bigger) into the metal case. Use the printed part as a guide and make sure you drill the hole even with the one from the power plug. You need two M3x16mm or longer screws, 3 washers and one nut.
Install the case mount, can´t mess up the direction as there is a cutout for the plug.

Test-fit the cables and extend them as much as you need, better to leave them 5cm longer than too short!

Reconnect all cables, plug the chain together and you should be done.

I used 18 chain links to make sure the radius is big enough. The chain sags by design to prevent strain on the connector, it will lie on the table.

Fits on my printer that i bought July 2020. Maybe doesnt fit all printers and i can´t test it.

3D printing settings

-

Advertising


Issue with this design? Report a problem.

Would you like to support Cults?

You like Cults and you want to help us continue the adventure independently? Please note that we are a small team of 3 people, therefore it is very simple to support us to maintain the activity and create future developments. Here are 4 solutions accessible to all:

  • ADVERTISING: Disable your banner blocker (AdBlock, …) and click on our banner ads.

  • AFFILIATION: Make your purchases online by clicking on our affiliate links here Amazon.

  • DONATE: If you want, you can make a donation via Ko-Fi 💜.

  • WORD OF MOUTH: Invite your friends to come, discover the platform and the magnificent 3D files shared by the community!


Sharing and downloading on Cults3D guarantees that designs remain in makers community hands! And not in the hands of the 3D printing or software giants who own the competing platforms and exploit the designs for their own commercial interests.

Cults3D is an independent, self-financed site that is not accountable to any investor or brand. Almost all of the site's revenues are paid back to the platform's makers. The content published on the site serves only the interests of its authors and not those of 3D printer brands who also wish to control the 3D modeling market.

100% secure payment by credit card, PayPal, Apple Pay, Google Pay, etc.
View all payment options.