Skip to content

ANET A8 Z-saver and X leveling tool (mechanical end stop)

Advertising
Advertising
?
Creation quality: 5.0/5 (1 vote)
Evaluation of members on the printability, utility, level of detail, etc.

  • 3.3k views
  • 3 likes
  • 22 downloads

License
3D design format
SCAD and STL Folder details Close
  • z_saver.scad
  • z_saver.stl

Learn more about the formats

Publication date 2022-02-02 at 20:29
?
Published to Thingiverse on: 2017-08-22 at 22:37
Design number 627365

3D printer file info

3D model description

When installing an auto leveling sensor to the ANET, the z-min switch is replaced by the z-probe.

In case of any problem on the z-probe, nothing will stop the Z axis and it will crash into the bed and push on the glass directly with the nozzle. This could cause severe damage to the printer (break the glass bed, bend rods, ...) and at least ruin your calibration!

Last time I had a crash like that was when, after having modded the bed, I stupidly tried to autolevel my bed without heating the nozzle... and there was a big drop of solid filament at the tip of the nozzle which was thicker than the triggering distance of the z-probe....

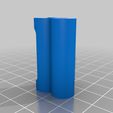
To avoid this, I created this z-saver thing.

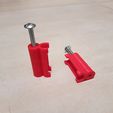
  • print a pair of them,
  • screw a M4 screw on each, (a standard M4 screw will self tap the PLA)
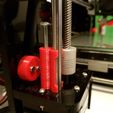
  • clip them on the bottom of the Z axis
  • turn each screw so that the top of the screw is around 0,5 to 1 mm lower than each z carriage

Should a problem occur with the Z probe, the nozzle would still crash into the bed but only by less than 1 mm which would be harmless as the ANET allows some flexion (springs, rods, bed, springy z couplers...)... (see the video https://youtu.be/Kc9WjSo-Jfk )

Besides this security function, this thing is also quite usefull to perfectly align your Z axis. You must first trim your Z-savers to the exact same lenght using a caliper.
Then follow this procedure:
- release all the axis (motors OFF)
- manualy home the noozle to X min endstop
- rotating the two Z threaded rods, move down your Z axis to come close to the z-savers
- then continue moving in Z until each carriage comes in contact with the z-savers (a paper sheet might help)
==> your X axis is perfectly calibrated before bed levelling!

EDIT : I had thought to perform an automatic X axis positonning stalling the motors on the z-savers but as long as there are springy z couplers on the rods, this procedure is not accurate enough. Removing the couplers could be the way to go!

3D printing settings

-

Advertising


Issue with this design? Report a problem.

Would you like to support Cults?

You like Cults and you want to help us continue the adventure independently? Please note that we are a small team of 3 people, therefore it is very simple to support us to maintain the activity and create future developments. Here are 4 solutions accessible to all:

  • ADVERTISING: Disable your banner blocker (AdBlock, …) and click on our banner ads.

  • AFFILIATION: Make your purchases online by clicking on our affiliate links here Amazon.

  • DONATE: If you want, you can make a donation via Ko-Fi πŸ’œ.

  • WORD OF MOUTH: Invite your friends to come, discover the platform and the magnificent 3D files shared by the community!


Sharing and downloading on Cults3D guarantees that designs remain in makers community hands! And not in the hands of the 3D printing or software giants who own the competing platforms and exploit the designs for their own commercial interests.

Cults3D is an independent, self-financed site that is not accountable to any investor or brand. Almost all of the site's revenues are paid back to the platform's makers. The content published on the site serves only the interests of its authors and not those of 3D printer brands who also wish to control the 3D modeling market.

100% secure payment by credit card, PayPal, Apple Pay, Google Pay, etc.
View all payment options.