Skip to content

Mavic Mini : B0B DIY battery parts

Advertising
Advertising
?
Creation quality: 5.0/5 (1 vote)
Evaluation of members on the printability, utility, level of detail, etc.

  • 2.5k views
  • 16 downloads

License
3D design format
PDF, SCAD, and STL Folder details Close
  • 4xMM_B0B_lock.stl
  • 5x_B0B_female_connector.stl
  • B0B_cale_batt.stl
  • B0B_center_batt.stl
  • B0B_female_connector.scad
  • B0B_read_me.pdf
  • B0B_template_batt.scad
  • B0B_template_batt.stl
  • MM_B0B_lock.scad

Learn more about the formats

Publication date 2022-02-02 at 20:29
?
Published to Thingiverse on: 2020-07-17 at 19:22
Design number 627380

3D printer file info

3D model description

Here are some parts to build DIY batteries for Mavic Mini
http://aeropic.free.fr/B0B/

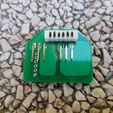
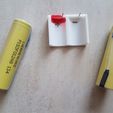
The most difficult part to build a DIY battery is the battery connector. If you donโ€™t get the DJI genuine one, I found a way to DIY a female battery connector.
The genuine lyre of DJI battery connector offers 4 contacts to the male pin. The DIY battery connector will offer also 4 contacts per pin.
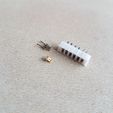
I simply extracted some female lyres from a 2mm pitch square pins connector and placed them two by two inside a 3D printed case.
It's a pain to solder in place and the best way is to use a male connector or at least a male pin to keep the pair of females in place while soldering.
Be patient, the result is excellent, we get the same four contacts to the male pin. Insertion into the male connector requires a lower but good enough amount of force than with the genuine one.
If the MM draws 10 A, this gives 5 A per pin as Vdd and GND are duplicated which turns into 2.5A per lyre and 1.25A per contact... It does a perfect job on B0B !

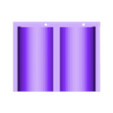
To make simple the battery soldering, use the 3D printed template. Print it and glue 2 pins inside the holes. Mark the polarities on the template to avoid any dramatic mistake.

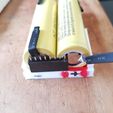
Insert the female 8 pins connector, and put the cells in contact of the connector

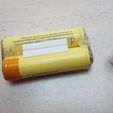
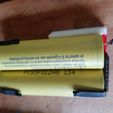
Hot glue the 2 cells together and attach the connector to the cells with some strong double sided tape.
You can now solder your cells to the connector. Only 3 pins from both sides. The two middle pins shall be removed.

Donโ€™t forget to solder the other side in serial and to add a one pin dupond connector to charge and balance the cells.

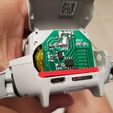
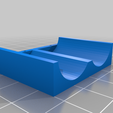
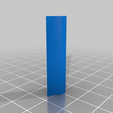
You can 3D print in spiral vase the B0B_center_batt thing. Just glue it under the cells, it will help centering correctly the battery inside the Mavic Mini hole. The conic slot is to be set at the opposite of the connector.

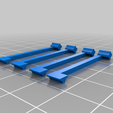
And finally You need also a way to secure your battery to the mavic mini : see MM_B0B_lock.stl

3D printing settings

-

Advertising


Issue with this design? Report a problem.

Would you like to support Cults?

You like Cults and you want to help us continue the adventure independently? Please note that we are a small team of 3 people, therefore it is very simple to support us to maintain the activity and create future developments. Here are 4 solutions accessible to all:

  • ADVERTISING: Disable your banner blocker (AdBlock, โ€ฆ) and click on our banner ads.

  • AFFILIATION: Make your purchases online by clicking on our affiliate links here Amazon.

  • DONATE: If you want, you can make a donation via Ko-Fi ๐Ÿ’œ.

  • WORD OF MOUTH: Invite your friends to come, discover the platform and the magnificent 3D files shared by the community!


Sharing and downloading on Cults3D guarantees that designs remain in makers community hands! And not in the hands of the 3D printing or software giants who own the competing platforms and exploit the designs for their own commercial interests.

Cults3D is an independent, self-financed site that is not accountable to any investor or brand. Almost all of the site's revenues are paid back to the platform's makers. The content published on the site serves only the interests of its authors and not those of 3D printer brands who also wish to control the 3D modeling market.

100% secure payment by credit card, PayPal, Apple Pay, Google Pay, etc.
View all payment options.