BOM:
- a ball pen tip
- 2x12 cm or so of 3 mm carbon shaft tube (from a kite shop) or any wood rod of 3mm
- 4 solar cell collected from a grasshoper toy (I bought them here: http://www.dx.com/p/novel-solar-powered-locust-30658)
- a coil of 0.2 mm enamelled copper wire
- 4 neodymium N42 disk magnets (12 mm diam x 3 mm)
- 2 neodymium N42 ring magnets (10 mm od x 4 mm in x 4 mm)
(here is a link for magnets http://www.supermagnete.fr/aimants-anneaux-neodyme/anneau-magnetique-10mm-x-4mm-x-5mm-neodyme-n42-nickele_R-10-04-05-N and http://www.supermagnete.fr/aimants-disques-neodyme-moyens/disque-magnetique-diametre-12mm-hauteur-3mm-neodyme-n45-nickele_S-12-03-N)
-a 50 mm x 2 mm torch glass lens (http://www.dx.com/p/52mm-x-1-8mm-glass-lens-5948#.VKlc73v-VFs)
how to build :
- with a soldering iron remove the solar-cells from the grasshopers
- print 5mm in height of the rotor body (mendocino.scad). Try to insert the solar cells, they should slide with some friction and remain in place when the 4th one is inserted. Try to insert the carbon rod in the central hole. You can adjust some parameters in the scad file:
m = 1.1; // margin added to SC width
th = 1.01; // wall thickness
rint = 1.75; // tube radius
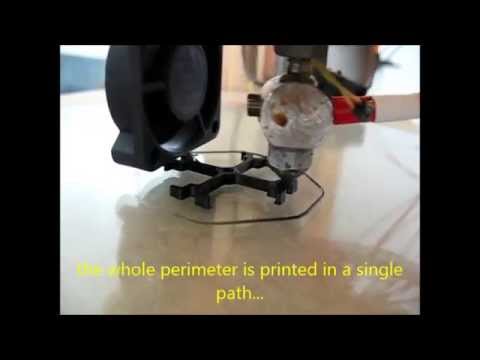
the wall thickness must be adapted to your printer configuration. To be nice and solid the rotor's wall is composed of 2 filaments printed side by side. With 1.01 mm and using a noozle diameter of 0.5mm coupled with a layer height of 0.2mm; slic3r does the job (see printing video http://youtu.be/nrUyedXopNo)
Once printed, insert the shaft inside the rotor, insert the 4 cells (take care of the orientation of the soldering tips that shall be at the extremity !).
Glue the ball pen tip in the shaft.
It's time to wind the coils. Just wind 100 turns of copper wire for each coil. Spread the wires 50 turns on each side of the carbon shaft. Don't forget to keep 8cm or so of free wire at each extremity...
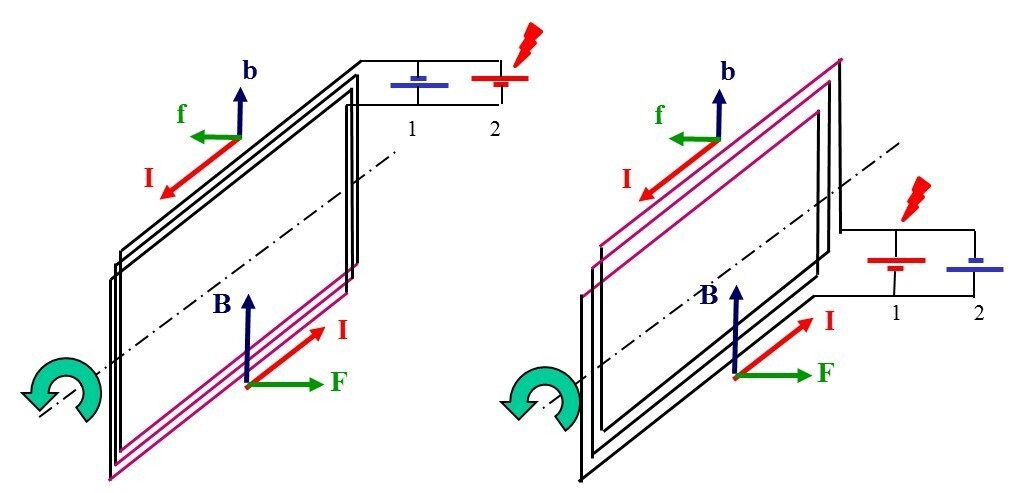
Gently push 5mm of cell from the rotor this will simplify the welding process. Wire the coils and cell as described on "mendo_principle.jpg" (parallel but with reverse polarity).
EDIT: Trying to be even clearer just follow those instructions :
1 - name the coil's ends :inner end as E (for Entry) and the outer end as O (for Output)
2- name cell1 2 pins: plus (name it C1+) and minus (name it C1-)
3- same for cell2 : C2+ C2-
now interconnect all this as follows :
C1+ to C2- to E
C1- to C2+ to O
Print the supports ( 2x support1.stl, one support2.stl). The magnets and glass shall slide with force inside the gaps. Glue them in place take care to the magnets orientation on each support. ( see "3D_printed_mendocino_motor-side-north.jpg")
Glue the glass and support at the tip of the second carbon rod shaft.
Insert the shaft inside the both other supports but DO NOT glue them yet. They shall slide with some friction.
Install the ring magnets on the rotor shaft. use some shrinking tubing or adhesive tape to adapt the shaft diameter to fit in the hole of the magnets. You can glue them on the shaft.
To levitate, the extremity magnet shall be placed 2mm in front of the support magnets (in the direction of the glass) while the back magnet shall be nearly aligned with its support (1mm in front of it or so).
With this, when placing the rotor in levitation, you should feel a small force pushing it towards the glass while in the cross direction you will feel the magnetic field as if the shaft was installed in a V shaped field of forces... And everything shall be stable here !
If not, it's maybe a matter of distance between the magnets of each support. it's a bit tricky: changing this parameter in support.scad "ec_magnet = 37; // magnets distance" might help as enlarging the distance will increase the lateral stability (The V becomes deeper) but decrease the vertical push... To a certain limit the rotor becomes vertically unstable... But if you use the same magnets as mine it will work without any change !!!
Once in levitation, you have to statically balance your rotor. use some sticky mastic (patafix in France) to add mass where needed (stick it first outside the rotor, then when happy with the result, remove the mastic and stick it inside the rotor...)
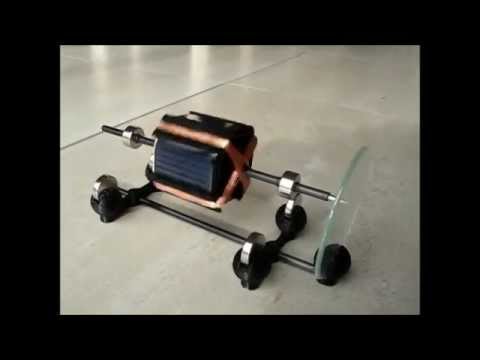
And you're done... it's time to put it in sun light or close to a 60W light bulb, it should turn and accelerate ...
I hope plenty babys mendocino will be printed !
Don't hezitate to contact me in case you need other clarifications. Enjoy ;-)
PS : as you may have noticed, there is no other horizontal magnet to produce the Laplace force interacting with the coil current. The magnetic field produced by the support magnets is more than enough. The proper orientation of the magnet (North facing North or South facing South...) is also the reason why it works without another magnet...
:format(webp)/https://fbi.cults3d.com/uploaders/21802002/illustration-file/4ba7a292-a981-4e3a-9d48-ddf12225b3aa/mendocino.gif)

/https://preview3d-images.cults3d.com/variants/pgo5z66h1ieyx3gz91rb6fbcjjpu/0efb2e1d82dc631f5d34681a1ec0e058e5293ebb996af2b22972af828007c8d8)
/https://preview3d-images.cults3d.com/variants/2cun3we3rd6pxcun21djo9y55q8b/0efb2e1d82dc631f5d34681a1ec0e058e5293ebb996af2b22972af828007c8d8)
/https://preview3d-images.cults3d.com/variants/4rrdliwvq38l6brb0xiheepr8d4y/0efb2e1d82dc631f5d34681a1ec0e058e5293ebb996af2b22972af828007c8d8)


