Skip to content

VW ID.4 sunglasses (and other items) tray

Advertising
Advertising
?
Creation quality: 5.0/5 (1 vote)
Evaluation of members on the printability, utility, level of detail, etc.

  • 9.9k views
  • 7 likes
  • 89 downloads
  • 2 makes

License
3D design format
PDF and STL Folder details Close
  • blade.stl
  • tray.stl
  • tray_lining_template.pdf

Learn more about the formats

Publication date 2022-02-05 at 16:48
Design number 630009

3D printer file info

3D model description

The ID.4 lacks a dedicated and easy to reach place to store your sunglasses or other small items, like RFID tags. It does however have two (credit) card slots at the front of the center console . This design uses these slots as a fixing point for a custom fit tray to solve this issue.

Note that even if the tray only uses the rear slot to attach to, it also blocks access to the other slot, so if you were using the slots for cards, then just place the cards in the tray instead.

Here's a short video showing how to assemble and use the tray:

https://www.youtube.com/watch?v=ATCNV66ar6k

The tray will rest on top of the piano black part of the center console, so if you are worried about scratches (even if that's quite unlikely since the tray is fixed in place), either add some tape/film to the parts of the console where the tray touches, or add some soft material to the underside of the tray, like fleece tape.

3D printing settings

The tray can be printed at any layer height, there's nothing special to be aware of.

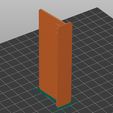
The blade has been designed to print at 0.3 mm layer height, and it must be printed standing on edge (as imported into the slicer, see picture), and I would recommend using a brim to ensure enough adhesion to the build plate. Do not use supports, even if the slots between the locking tabs might look like it's needed. The locking tabs will still work, and can be broken free quite easily by hand. Clean up the brim (if used), and then test fit the blade into the slot in the bottom of the tray. It should be a very tight fit, so some force is required. If it is too tight, sand the ends of the blade to take away some material. Breaking free the locking tabs is recommended, but usually they will break free by themself when inserted into the tray. After insertion, ensure that they have engaged properly so that the blade is well secured to the tray. The part of the blade that sticks out under the tray is angled forwards to perfectly mate with the rearmost card slot when mounted in the car.

Note: It is also possible to add a few drops of glue into the recess in the tray before clicking the blade into place, but it shouldn't be necessary.

It is a nice touch to add some self-adhesive felt/velvet to the bottom of the tray, both to reduce rattling from items in the tray, and also to make it look even nicer.

There's a PDF template in the download that can be printed out and used as a template for cutting out the lining. If you don't have the self-adhesive kind, it is of course possible to use other materials (or cloth types) and just use some doble sided sticky tape or glue to attach it to the bottom of the tray.

Note: If you purchase these files, you only have the right to make copies for personal use. You may not create copies for others.

Advertising


Issue with this design? Report a problem.

Would you like to support Cults?

You like Cults and you want to help us continue the adventure independently? Please note that we are a small team of 3 people, therefore it is very simple to support us to maintain the activity and create future developments. Here are 4 solutions accessible to all:

  • ADVERTISING: Disable your banner blocker (AdBlock, …) and click on our banner ads.

  • AFFILIATION: Make your purchases online by clicking on our affiliate links here Amazon.

  • DONATE: If you want, you can make a donation via Ko-Fi πŸ’œ.

  • WORD OF MOUTH: Invite your friends to come, discover the platform and the magnificent 3D files shared by the community!


Sharing and downloading on Cults3D guarantees that designs remain in makers community hands! And not in the hands of the 3D printing or software giants who own the competing platforms and exploit the designs for their own commercial interests.

Cults3D is an independent, self-financed site that is not accountable to any investor or brand. Almost all of the site's revenues are paid back to the platform's makers. The content published on the site serves only the interests of its authors and not those of 3D printer brands who also wish to control the 3D modeling market.

100% secure payment by credit card, PayPal, Apple Pay, Google Pay, etc.
View all payment options.