Skip to content

Hidden australian power point stash box

Advertising
Advertising
?
Creation quality: 5.0/5 (1 vote)
Evaluation of members on the printability, utility, level of detail, etc.

  • 2.2k views
  • 3 likes
  • 53 downloads

License
3D design format
STL Folder details Close
  • final_stash_box.stl
  • left_sidewall_clamp_3.stl
  • right_wall_clamp_1.stl

Learn more about the formats

Publication date 2022-02-07 at 19:34
?
Published to Thingiverse on: 2022-01-13 at 06:26
Design number 632030

3D printer file info

3D model description

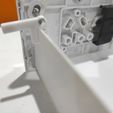
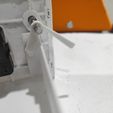
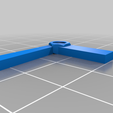
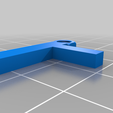
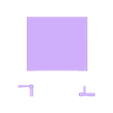
Note: the clamps should be printed at a slower speed. I used 40 and at the best resolution my printer can. I have added photos of how the clamps need to be orintated on the stash box. This is because they are both right hand thread.

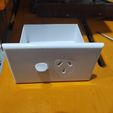
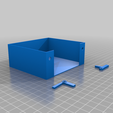
This is a hidden stash box / compartment for use with any Australian single power point. I believe they all have the same mounting holes. First time making anything so may need some improvement.

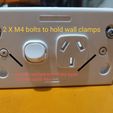
I used 2 m4 bolts and nuts, I actually printed them from the nut job https://www.thingiverse.com/thing:193647/files thing but ended un using metal instead. The compartment attaches to the holes in the centre of the power outlet, see labled image for details.

I removed some components of the power outlet to fit early versions of this design, you may not need to.

The two wall clamps are designed for 10mm gyprock / drywall.

Cut a hole slightly smaller than the face of the outlet but bigger than the compartment. make sure it is only a couple of mm bigger than the compartment.

The two clamps are labled with the side they need to go on. They need to be inserted and screwed on a few threads prior to putting the unit in the wall. One in begin tightening with a screwdriver. DO not use a power tool as it may break the clamp. The clamp will stop against compartment stopping it from spinning, it will then tighted more and more against the back side of the gyprock until it is firmly in position.

Once secure in the wall place the face plate on and you cant tell the difference. When it comes time to access the compartment simply rotate the bolt holding the clamp in place once in an anti clockwise direction. It should spin the clamp out of the way.

3D printing settings

-

Advertising


Issue with this design? Report a problem.

Would you like to support Cults?

You like Cults and you want to help us continue the adventure independently? Please note that we are a small team of 3 people, therefore it is very simple to support us to maintain the activity and create future developments. Here are 4 solutions accessible to all:

  • ADVERTISING: Disable your banner blocker (AdBlock, …) and click on our banner ads.

  • AFFILIATION: Make your purchases online by clicking on our affiliate links here Amazon.

  • DONATE: If you want, you can make a donation via Ko-Fi πŸ’œ.

  • WORD OF MOUTH: Invite your friends to come, discover the platform and the magnificent 3D files shared by the community!


Sharing and downloading on Cults3D guarantees that designs remain in makers community hands! And not in the hands of the 3D printing or software giants who own the competing platforms and exploit the designs for their own commercial interests.

Cults3D is an independent, self-financed site that is not accountable to any investor or brand. Almost all of the site's revenues are paid back to the platform's makers. The content published on the site serves only the interests of its authors and not those of 3D printer brands who also wish to control the 3D modeling market.

100% secure payment by credit card, PayPal, Apple Pay, Google Pay, etc.
View all payment options.