Skip to content

Ender 3 v2 Max Time Lapse

Advertising
Advertising
?
Creation quality: 0.0/5 (0 votes)
Evaluation of members on the printability, utility, level of detail, etc.

  • 3.5k views
  • 2 likes
  • 2 downloads

License
3D design format
STL Folder details Close
  • Extrusion Mount.stl
  • ROWA JAPAN Trigger Mount.stl
  • Slide Arm Left Sided.stl
  • Slide Arm Lock.stl
  • Slide Arm Ridgt Sided.stl
  • Universal Trigger Mount Lock Curved.stl
  • Universal Trigger Mount Lock FLAT.stl
  • Universal Trigger Mount Left Sided.stl
  • Universal Trigger Mount Right Sided.stl

Learn more about the formats

Publication date 2022-02-13 at 04:26
Design number 637276

3D printer file info

3D model description

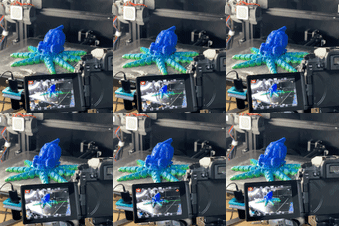
Time Lapse Trigger for Ender 3 v2 Ender 3 Max

**Updated model!

Make awesome time lapse with every print using your cartesian style FDM printer!

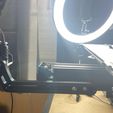
This time lapse trigger is attached to the 4040 extrusion of the
Y-axis. It uses and adjustable clamping system which allows the usage of different kinds of triggers up to a length of 30mm and 25mm in depth. The arm's length is adjustable so that you can adjust the distance of your trigger from the edge of the bed as it parks. The trigger holder is also adjustable to enable fine tuning of the height of the trigger, making sure that the shutter button is pressed every time the print bed parks to the front. Please use adhesive foam on the universal trigger clamp.

Compatibility:

Ender 3 v2
Ender 3 MAX
**Any printer that has a 40x40 Y-axis extrusion underneath like the machines mentioned above.

You will need some M3 nuts and bolts with varying lengths for affixing the parts.
Two m3 nuts and bolts for the trigger clamp.
One m3 nut and bolt to attach the clamp to the arm.
Two m3 nuts and bolts to attach the arm to the extrusion mount.
Two M5 nuts and T nuts to affix the arm mount to the Y axis extrusion.

You can choose to make the left or right sided version.
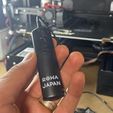
Aside from the universal shutter release clamp, I have also added a specific mount for the lumix G7 shutter release that I use which is Rowa Japan (off amazon).

3D printing settings

PLA, PLA plus, PETG, ABS -all good!
perimeters: 4
top: 5
bottom: 5
infill: grid, cubic or lines at 6mm infill distance

I use Cura. Dont forget to set the time lapse parameters!
Extensions - Post Processing - Modify Gcode - Add a Script - Time Lapse -> Check "Park Print Head" -> Set "Park Print Head Y to the maximum limit of your Y axis. I set it to 300 for my Ender 3 Max and 235 for my Ender 3 V2.
I only use Cura to set this feature since it is very reliable and easy. Other slicer may also have this feature.

Advertising


Issue with this design? Report a problem.

Would you like to support Cults?

You like Cults and you want to help us continue the adventure independently? Please note that we are a small team of 3 people, therefore it is very simple to support us to maintain the activity and create future developments. Here are 4 solutions accessible to all:

  • ADVERTISING: Disable your banner blocker (AdBlock, …) and click on our banner ads.

  • AFFILIATION: Make your purchases online by clicking on our affiliate links here Amazon.

  • DONATE: If you want, you can make a donation via Ko-Fi πŸ’œ.

  • WORD OF MOUTH: Invite your friends to come, discover the platform and the magnificent 3D files shared by the community!


Sharing and downloading on Cults3D guarantees that designs remain in makers community hands! And not in the hands of the 3D printing or software giants who own the competing platforms and exploit the designs for their own commercial interests.

Cults3D is an independent, self-financed site that is not accountable to any investor or brand. Almost all of the site's revenues are paid back to the platform's makers. The content published on the site serves only the interests of its authors and not those of 3D printer brands who also wish to control the 3D modeling market.

100% secure payment by credit card, PayPal, Apple Pay, Google Pay, etc.
View all payment options.