Since I didn't like any of the other designs of this iconic prop, either for being inaccurate or requiring screws to assemble, I designed my own, fully 3D printable version. It's the most accurate replica of this worldwide-known knife from the game CS:GO and feels very solid in hand.
It can be printed on any machine because the multi-colour version is printed with just a filament change, no dual-colour printer is needed.
It moves very smoothly (as far as 3D printed butterfly knives go) so tricks can be performed quite nicely. The blade can be printed in two parts and glued together afterwards (but with a seam along the middle), or in one part with no seam (but I'm not sure what the best model orientation would be since the blade is too steep to be printed on its side, but you do you).
I uploaded click-in pins and a latch. The latch goes onto the bite handle endpin around the spacer with the side tangent to the circle facing away from the knife. Did not test it yet, but some makers did, so see the makes on this thing.
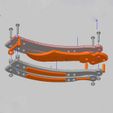
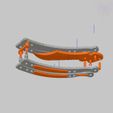
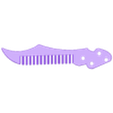
I added two pictures that might help you with the assembly. At the bottom of the page is the list of the parts needed to assemble this knife. I also added a comb version of the blade, so you can comb with style. ;)
There are 3 ways of printing the handles:
1 - with an automated filament change in Cura (which doesn't work on all printers, including mine)
2 - as two separate gcode files (as I did), one of which is 5 mm above the print surface and printed on top of the handle (manual positioning of the models required since the handle and the padding don't have the same centre point)
3 - as two completely separate models glued together (not as strong)
Share and like if you like this model.
Read the print settings and assembly notes below.
WARNING: Just in case somebody would be very dumb and wanted to use this as a weapon, I want everybody to know that this is just a replica for display or trick performing and wasn't by any means designed as a weapon.
I also want to say that I have no profit from this, so, please, don't sell it as your design. You can sell printed copies of this as long as you link to this model tho. Thank you.
Parts list
Important: The handles can be printed with filament change at 5 mm height (handle_top/bottom_L/R), or as two different models (e.g. handle_top_whole_L+rubber_top_L), one printing on top of the other. For the second option, you must:
a) go to Cura General settings and uncheck the "Automatically drop models to the build plate" option
b) go to print settings search bar, search for "remove empty first layers" and uncheck it as well
Once you did that, you position the models accordingly, the rubber must be 5 mm above the build platform.
Now, the parts list:
-handle top left
-handle bottom left
-handle top right
-handle bottom right (see the "important" section above)
-spacer
-4x holder pin clicker OR 4x holder pin + 4x holder pin end OR 4x M3x20 bolts + 4x M3 nuts
-blade (either split and glued together or non-split) OR the comb version of the blade
2x end pin
-latch (optional)
Now, see the assembly pictures or instructions above.
Assembly
Glue the blade together.
To assemble, just take the left bottom handle, connect it with the right bottom handle via the holder pins and holder pin ends and put the spacer between them. Repeat for the top handle (if needed, use a hammer to slide the pin ends over the pins, but be careful). Then, take the end stop pins and insert them into the very front and very back hole on the blade end. Slide the bottom handle over the corresponding hole in the blade and use the pin and the pin end to secure it in place (again, a hammer might help but mind your fingers and your part). And that's it! You're ready to do some tricks! (If this was unclear, see the assembly pictures)

/https://fbi.cults3d.com/uploaders/15976968/illustration-file/1f54e95a-4f75-4c4d-8ec6-6132acc295d0/1.jpeg)


