Skip to content

Chassis raid inline battle 80

Advertising
Advertising
?
Creation quality: 5.0/5 (1 vote)
Evaluation of members on the printability, utility, level of detail, etc.

  • 2.3k views
  • 7 likes
  • 4 downloads

License
3D design format
STL Folder details Close
  • Brazo curvo.stl
  • H.stl
  • POLEA.stl
  • brazo recto.stl
  • cuerpo.stl
  • cuna caja larga.stl
  • soportes L laterales carroceria.stl

Learn more about the formats

Publication date 2022-02-19 at 21:46
Design number 643789

3D printer file info

3D model description

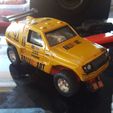
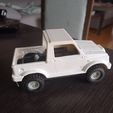
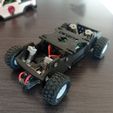
Raid chassis that I prepare for my resins.

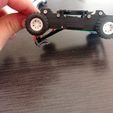
Inline long-box engine layout with tilting cradle. The rear axle moves together with the movement of the motor, which saves wear of the crown wheel.

I include 2 types of arms together with the chassis, one with curve at its tip and the other straight. Depending on the height of the wheels you mount, one or the other will fit better... the higher the better, the one with a curve is preferable...

To assemble the arm and cradle assembly, a m2 metal rod is recommended. When you say metal rod, you mean a piece of carbon fiber rod. Surely you will have to rework the assembly holes of the components so that they dance with ease once everything is assembled.

The chassis is made to use screw dampers. Personally I make them myself and I usually adjust them to the development depending on the wheel height and according to the type of bodywork.

If you want to change it to 4x4 you must use toothed pulleys or ninco pulleys. I'm including a 3d drawn pulley, that if you have rubbers at home you can use. The tighter it fits on the shaft, the better.

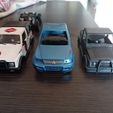
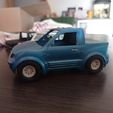
The pictures of the finished models are an example of the application.

3D printing settings

As always I recommend for my own taste, the impression in petg. This material better withstands the temperatures that can acquire the engine, although they are not excessive, but the pla deforms it and tends to split. In these cars the trigger is not usually at full throttle all the time, it tends more to the trigger, but depending on how tight you take the relationship this makes the engine hot and can break. That's why use this material.

The filler is 100/100. For a finer quality finish I recommend printing at 0.16 and no more than 40 mms/s. Depending on the part it may or may not have supports... That's up to you when positioning the part.

Advertising


Page translated by automatic translation. See the original version.
Issue with this design? Report a problem.

Would you like to support Cults?

You like Cults and you want to help us continue the adventure independently? Please note that we are a small team of 3 people, therefore it is very simple to support us to maintain the activity and create future developments. Here are 4 solutions accessible to all:

  • ADVERTISING: Disable your banner blocker (AdBlock, …) and click on our banner ads.

  • AFFILIATION: Make your purchases online by clicking on our affiliate links here Amazon.

  • DONATE: If you want, you can make a donation via Ko-Fi πŸ’œ.

  • WORD OF MOUTH: Invite your friends to come, discover the platform and the magnificent 3D files shared by the community!


Sharing and downloading on Cults3D guarantees that designs remain in makers community hands! And not in the hands of the 3D printing or software giants who own the competing platforms and exploit the designs for their own commercial interests.

Cults3D is an independent, self-financed site that is not accountable to any investor or brand. Almost all of the site's revenues are paid back to the platform's makers. The content published on the site serves only the interests of its authors and not those of 3D printer brands who also wish to control the 3D modeling market.

100% secure payment by credit card, PayPal, Apple Pay, Google Pay, etc.
View all payment options.