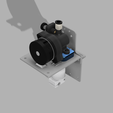
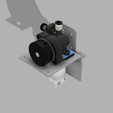
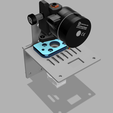
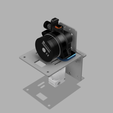
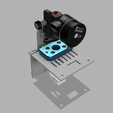
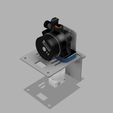
Gravitron : Orbiter 1.5+2.0 adapter
The Orbiter is a wonderful extruder. Making an adapter for it to fit the i3 Mega/Mega-S series with original X carriage is a great way to further enhance on this already very capable printer.
It's the easiest and most effective mod one could do to this printer to get Direct-Feed and print flexibles without hassles.
Notes:
Due to some request, the adapter plates for Orbiter 1.5 are now available, with the same 2 flavors as Orbiter 2.0 ("slim" and "thick"). :) Installation is the same as for Orbiter 2.0.
The Mega-S can print flexibles out-of-the-box thanks to its Titan-inspired Bowden-Feed extruder
Designed with Mega and Mega-S in mind, it may work with other models from this series sharing the same hotend carriage design, as Mega-X and Mega-Pro do.
Mega-SE and Mega-Zero don't share the same design, this adapter plate won't probably work on these. If I'm wrong, please let me know ! :)
Due to the way the older i3 Mega series models are designed, print volume is slightly reduced in Z.
Mounting the adapter is very easy, it's simply "inserted" between the Orbiter and the hotend plate. It comes with two variants:
Slim (4 mm) variant : better suited if you have, as I did, removed the PCB from the hotend carriage and re-wired the whole printer with "point-to-point" connection. This is the variant I currently use.
Thick (8 mm) variant will fit the original carriage with stock wiring (cable harness + PCB). Though I couldn't test it, there should be enough clearance for the wires and connectors. If the spiral wire wrap doesn't seem to fit inbetween the plate and the Orbiter, simply move it slightly on the left and secure it with a zip tie using one of the two holes it was attached to. Maybe the "slim" version could work too with stock wiring. Let me know ! :)
Both variants have the extruder oriented in a natural way, square to the X axis.
Important information before printing
These adapters have sockets for captive nuts on one side, and for the 4 screws holding the hotend on the other side.
As a consequence, there will be "voids" if you choose to print parts with the largest areas facing the build plate (which you should). Hopefully, there are a few slicer tricks to counteract this.
SuperSlicer users
Set "Fill void with bridges" (Print Options > Perimeters & Shell > Advanced, "No perimeters on bridge areas" option) to tell the slicer to add bridges on these areas.
All you have to do once the part is printed is to use a screw or a drill bit and poke through the bridges. Using a drill is the fastest option. :)
PrusaSlicer users
PS doesn't have this option so far; you might add modifiers to trick the slicer so it prints bridges.
Maybe it can also be printed "as is", without modifiers. I didn't try, maybe printing infill before perimeters could help.
Cura users
Check "Make overhangs printable" in "Experimental" section, with "Model maximum angle" set to 70°.
Of course, you can also choose to print these parts "standing" too. There is no right or wrong orientation, although I'd recommend to orient it so a big flat area faces the build plate.
Required parts
2 M3 hex nuts
2 M3x12 socket cap head screws. If you printed the slim version, use M3x8 screws instead. These go with the 2 hex nuts and secure the extruder on the adapter.
4 M3x30 socket cap head screws (M3x20 for slim version). Longer than the original ones used to secure the hotend, and used for the same purpose: lock the adapter and the hotend in place to their respective locations.
A piece of PTFE tube. Length will vary depending on your hotend, you'll have to experiment a bit to find the right length.
Optional : 2 M3 washers. Nylon washers are a valid option, though you may have to use slightly longer screws (and probably trim them) to secure the extruder to the adapter.
Tinkering time!
This mod is very straightforward, yet I'll detail the steps so things are clear.
Add captive nuts
- grab the orbiter adapter of your choice, M3 nuts, a long hex screw (longer than the adapter thickness), and matching Allen key or hex screwdriver.
- Drive the screw through one of the two outmost holes and a nut.
- Make sure the nut is properly aligned with its matching socket. Keep the nut in place and continue driving the screw until the nut is fully inserted. It should be a snug fit, the nut being slightly recessed. Remove the screw.
- Repeat steps 2-3 with the other hole and nut. *Part 1 complete !
Install the adapter plate
- remove the 4 screws securing the hotend and put them aside. They're not needed anymore.
- Orient the adapter so the 4 screw sockets face you. Grab the 4 new long screws (M3x20 or M3x30).
- Put the adapter on the hotend carriage (proper orientation: larger corner radius to the front), make sure the holes are properly aligned.
- Drive each screw through the adapter and the hotend carriage so it attaches with the original hotend retaining piece (which has threaded holes). DON'T TIGHTEN YET.
- Tighten each screw equally. Your hotend should remain square to its plate. Make sure screws are flush with the top face (they should ... by design).
Add the extruder
- grab the PTFE tube piece and insert it into the heatsink.
- Put the Orbiter ontop of it. **There shouldn't be any gap between the extruder and adapter!
- Add the 2 remaining screws (with optional washers, if needed), make sure the extruder is firmly held in place.
*Enjoy!
Notes
2023/03/30 : slight dimension changes on both 1.5 and 2.0 versions (mostly on PTFE tube hole, much narrower). I'm also working on a new frame design for the older i3 Mega series so no space is lost in Z. It may or may not use the original bottom case (which is really sturdy and adds a lot to global stability).
2023/02/06 : added a slightly less wide version of the Orbiter 1.5 mount (stndard and chunky models) + rendering pictures
2022/03/06 : adapter plates for Orbiter 2.0 created

/https://fbi.cults3d.com/uploaders/16480005/illustration-file/e240e874-598b-4dbc-b624-f3834ca12969/i3-Mega-Orbiter-1.5-mount-view-CHUNKY.png)
