Skip to content

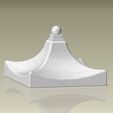
Pagoda Japanese garden lamp

Advertising
Advertising
?
Creation quality: 5.0/5 (1 vote)
Evaluation of members on the printability, utility, level of detail, etc.

  • 5.1k views
  • 22 likes
  • 27 downloads
  • 2 collections

License
3D design format
STL Folder details Close
  • pagode_dach.stl
  • pagode_mittelteil_v1.stl
  • pagode_unterteil.stl

Learn more about the formats

Publication date 2022-03-09 at 19:14
Design number 660367

3D printer file info

3D model description

Hello printer community,

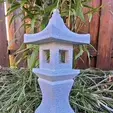
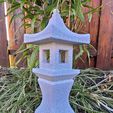
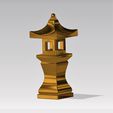
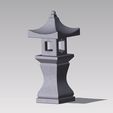
here I publish the 3D model of my Japanese garden lamp in the style of a pagoda.

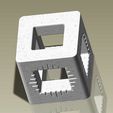
Filament print, original printed on an Anycubic I3 Mega. Only the middle part needs a support structure, the bottom part and roof do not need support structures.

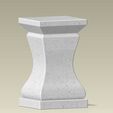
This pretty lantern consists of 3 models, bottom part, middle part and roof. My lantern has a total height of about 40cm height and in the widest part of the roof dimensions of about 16cm x 16cm. The size can be adjusted variably for each printer, just scale all components evenly and pay attention to bed size and height.

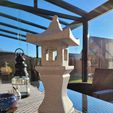
My Japanese garden lamp is painted with a commercial granite spray, before that I applied a plastic bonding agent. This lamp made of PLA has now endured about 2 years of even strong sun and UV rays. Nothing has melted or aged, The granite spray from the hardware store protected my lamp very well.

So the application of this Japanese lantern, glued and painted with granite spray is tested for a long period of time in my outdoor garden area and judged very good.

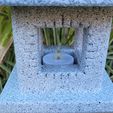
An LED tea light can be operated in the center of the lamp. If scaled too small, of course, it should be tight at some point to put the tea light there. :)

A very nice lamp. I would be very happy to receive likes and fair downloads. Have fun printing. :)

3D printing settings

Printed in 3 parts/models on a filament printer I3 Mega with 0.4mm nozzle and 0.2mm layer sleeve.

Due to large contact areas, the adhesion to the print bed is very good.

Bottom and top parts are printed without supports.

The middle part needs a support structure in all 4 openings.

Filling was printed with about 25%, pattern zig zag shape.

Assembly

After the center section has been freed from the support structure in the windows and deburred, the components can be joined with suitable adhesive. Make sure that they are visually centered.

For the exterior, a suitable and pretty paint is recommended. You can see some painting examples in the pictures as a suggestion.

Advertising


Page translated by automatic translation. See the original version.
Issue with this design? Report a problem.

Would you like to support Cults?

You like Cults and you want to help us continue the adventure independently? Please note that we are a small team of 3 people, therefore it is very simple to support us to maintain the activity and create future developments. Here are 4 solutions accessible to all:

  • ADVERTISING: Disable your banner blocker (AdBlock, …) and click on our banner ads.

  • AFFILIATION: Make your purchases online by clicking on our affiliate links here Amazon.

  • DONATE: If you want, you can make a donation via Ko-Fi πŸ’œ.

  • WORD OF MOUTH: Invite your friends to come, discover the platform and the magnificent 3D files shared by the community!


Sharing and downloading on Cults3D guarantees that designs remain in makers community hands! And not in the hands of the 3D printing or software giants who own the competing platforms and exploit the designs for their own commercial interests.

Cults3D is an independent, self-financed site that is not accountable to any investor or brand. Almost all of the site's revenues are paid back to the platform's makers. The content published on the site serves only the interests of its authors and not those of 3D printer brands who also wish to control the 3D modeling market.

100% secure payment by credit card, PayPal, Apple Pay, Google Pay, etc.
View all payment options.