Skip to content

Layout Square

Advertising
Advertising
?
Creation quality: 0.0/5 (0 votes)
Evaluation of members on the printability, utility, level of detail, etc.

  • 1k views
  • 1 download

License
3D design format
STL Folder details Close
  • layout_square_v04_09925.stl
  • layout_square_v04_09950.stl
  • layout_square_v04_09975.stl
  • layout_square_v04_10000.stl
  • layout_square_v04_10025.stl
  • layout_square_v04_10050.stl
  • layout_square_v04_10075.stl

Learn more about the formats

Publication date 2022-03-18 at 20:24
Design number 668479

3D printer file info

3D model description

Carpenter's squares with a large lip along one side are great for marking a line perpendicular to the side of a piece of lumber. But that lip gets in the way in any other orientation, lifting the square off the plane making markings inaccurate.

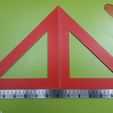
Hence the lip-less layout square. This layout square is designed completely for imperial measurements such as those used in North America for woodworking. The arms are exactly one inch across and its exactly one eighth inch thick. The perpendicular arms are exactly eight inches along and the scale is notched along one arm, on both sides, in one sixteenth increments. You do not need supports to print this.

There are seven versions included so you can choose the one that will be perfectly square even if your printer's gantry and bed are not perfectly square to each other. They are numbered 09925, 09950, 09975, 10000, 10025, 10050, 10075 for stretching along the diagonal from -3/4% to +3/4% in 1/4% increments. My printer required it to be stretched by +1/2% so I chose the file numbered 10050 (1.005% stretch).

I suggest printing the 10000 file (no stretched skew) first then determining if its square (if your printer is square) or whether you need a positive stretch or negative 'squish'. You don't have to print the whole model, only three layers in my estimation.

How do you determine if its square? You can compare to a known square like I did with my carpenters square. Or you can print two and put them together on a known straight edge and see if there's a gap in between at the top. See my photos showing that.

I printed mine in two colours, red on top and bottom sandwiching a middle light grey. You don't have to do this because the markings are actual recesses, you'll see them without the contrasting colour. But if you want to try two colours you don't have to have a two colour printer because the colours aren't mixed on the same layer. You only need to insert pauses at the layers that need a colour swap.

Advertising


Issue with this design? Report a problem.

Would you like to support Cults?

You like Cults and you want to help us continue the adventure independently? Please note that we are a small team of 3 people, therefore it is very simple to support us to maintain the activity and create future developments. Here are 4 solutions accessible to all:

  • ADVERTISING: Disable your banner blocker (AdBlock, …) and click on our banner ads.

  • AFFILIATION: Make your purchases online by clicking on our affiliate links here Amazon.

  • DONATE: If you want, you can make a donation via Ko-Fi πŸ’œ.

  • WORD OF MOUTH: Invite your friends to come, discover the platform and the magnificent 3D files shared by the community!


Sharing and downloading on Cults3D guarantees that designs remain in makers community hands! And not in the hands of the 3D printing or software giants who own the competing platforms and exploit the designs for their own commercial interests.

Cults3D is an independent, self-financed site that is not accountable to any investor or brand. Almost all of the site's revenues are paid back to the platform's makers. The content published on the site serves only the interests of its authors and not those of 3D printer brands who also wish to control the 3D modeling market.

100% secure payment by credit card, PayPal, Apple Pay, Google Pay, etc.
View all payment options.