Skip to content

IMPROVED ADAPTIVE GRIPPER V2.0 COMPLETE KIT (WITH ARDUINO CODE)

Advertising
Advertising
?
Creation quality: 4.4/5 (8 votes)
Evaluation of members on the printability, utility, level of detail, etc.

  • 12.6k views
  • 41 likes
  • 66 downloads
  • 4 collections

License
3D design format
RAR and ZIP Folder details Close
  • Adaptive_gripper_v2.0.zip
    • Adaptive_gripper_v2.0.ino
  • STEP_files.rar
  • STL_Files.rar

Learn more about the formats

Last update 2022-07-16 at 01:07
Publication date 2022-04-04 at 13:58
Design number 683586

3D printer file info

3D model description

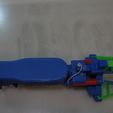
You'll download the STL files and STEP files, along with an Arduino code. Refer to the video for details of installation and wiring.
https://youtu.be/Cd1YlTOBukQ

NOTE: I did not mention this on the video, but you need to connect two 10kohms resistors, one between ch7 and GND, and the other one between ch8 and GND, of your Arduino board, for the limit switches to work properly with the code.

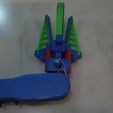
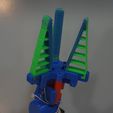
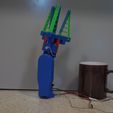
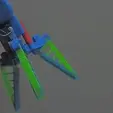
This is an improved version of my original Adaptive Gripper, with a greater gripping force that allows this gadget to lift up to 500gr (the equivalent of a mid size cup full of water). This new design has also a wrist joint, which rotates 180 degrees .

You need to print one of each STL file, with the exception of the flexible green fingers (ADAPTIVE FINGER V1.1.stl), which you need 3 pcs.

This gripper is fully compatible with the LAD Robotic Torso https://cults3d.com/en/3d-model/gadget/lad-robotic-torso-v1-0-humanoid-robot

3D printing settings

NONE OF THE PARTS NEED SUPPORT. MUST TURN OFF SUPPORTS ON YOUR SLICER.

All parts are printed in hard material with the exception of the Green finger or "ADAPTIVE FINGER v1.1.stl" which is of flexible material ( TPU 92 shore A). I have printed this one on my Ender 3, which has a Bowden tube. You need to use the following settings to successfully print flexible material on a Bowden Tube machine.

The printing Settings of TPU flexible material are:

*Print *speed of 20mm/sec.
*Retractions need to be turned OFF.
*In CURA, under TRAVEL", set the "COMBINE MODE" to ALL, which will make the nozzle to travel inside the printed part only.

Advertising


Issue with this design? Report a problem.

Would you like to support Cults?

You like Cults and you want to help us continue the adventure independently? Please note that we are a small team of 3 people, therefore it is very simple to support us to maintain the activity and create future developments. Here are 4 solutions accessible to all:

  • ADVERTISING: Disable your banner blocker (AdBlock, …) and click on our banner ads.

  • AFFILIATION: Make your purchases online by clicking on our affiliate links here Amazon.

  • DONATE: If you want, you can make a donation via Ko-Fi πŸ’œ.

  • WORD OF MOUTH: Invite your friends to come, discover the platform and the magnificent 3D files shared by the community!


Sharing and downloading on Cults3D guarantees that designs remain in makers community hands! And not in the hands of the 3D printing or software giants who own the competing platforms and exploit the designs for their own commercial interests.

Cults3D is an independent, self-financed site that is not accountable to any investor or brand. Almost all of the site's revenues are paid back to the platform's makers. The content published on the site serves only the interests of its authors and not those of 3D printer brands who also wish to control the 3D modeling market.
100% secure payment by credit card, PayPal, Apple Pay, Google Pay, etc.
View all payment options.