Skip to content

Anniversary Panel (for KDS LED LightBox)

Advertising
Advertising
?
Creation quality: 0.0/5 (0 votes)
Evaluation of members on the printability, utility, level of detail, etc.

  • 293 views
  • 1 collection

License
3D design format
MTL, OBJ, and ZIP Folder details Close
  • Anniversary Panel KDS.zip
    • hearts.stl
    • Light up panel.stl
    • README First!.txt
  • Light up panel.mtl
  • Light up panel.obj
  • hearts.mtl
  • hearts.obj

Learn more about the formats

Publication date 2022-04-13 at 21:51
Design number 693049

3D printer file info

3D model description

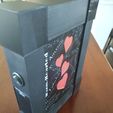
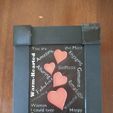
This front panel is for use with the LED LightBox (separate) I designed. It comes from 2 files, a hearts file and light up panel file. The hearts file gets printed first, then the Light up panel over the hearts; giving the plate the ability to have a total of three color change effects with a single extruder FDM printer.

Hearts - printed in red
Light up panel starts with white; then perform a color change at layer and change to black (or another dark color).

When lit up in a dark room, the text and hearts shine very well,without a huge amount of light.

3D printing settings

README file included in .zip file. If you do not know how to do color changes in the middle of printing or with Z-hop enabled, search youtube, there are plenty of videos that teach it.

Cura Slicer instructions: (done with standard .2 layer height)
Open hearts.stl, make sure centered on the build plate in cura, and slice. Save the gcode file - don't delete the Hearts.stl file just yet.
- Do not use a brim, skirt, or anything that will print around the heart objects.

With hearts.stl file still in Cura, Open Light Up panel.stl, and make sure it is also centered on the build plate.
If completely lined up, just delete the hearts.stl file in cura and add any post-processing scripts you may need for color change at layer or Z-Height change/pause to perform your color changes as required.
- Ensure Z-Hop is set to atleast 1.2 mm and enabled or your print nozzle may crash into the printed parts.
- 100% infill (or max walls)
If the Hearts.stl file and the Light Up Panel.stl file are still offset, follow these instructions:
- Select the Hearts.stl on the plate in Cura.
- Shift-Select the Light UP panel on the plate in Cura.
- Right-Click, and select "Merge Models". This will set the Light Up panel over the hearts.
- Right-Click again, and this time, select "Ungroup models".
- Left click to select just the hearts.stl on the plate in Cura.
- Delete the Hearts.stl from Cura.
Slice and save the gcode file.

Print Hearts.stl first, making sure it is completely centered on the build plate (0,0,0 XYZ axis or whatever your center setting is).
- Do not use a brim, skirt, or anything that will print around the hearts.stl objects. If you do, the print nozzle will run into them while printing the plate.
- Once it is finished printing, maintain the bed temperature or the hearts may come loose.
Next print the Light Up panel.stl after having ensured the Light Up panel.stl matched up with the Hearts.stl in the slicer software.
Again, ensure Z hop setting is atleast 1.2 mm and enabled, or your print nozzle may crash into the printed hearts.
Ensure 100% infill or max walls are set to prevent infill walls from showing through when lit.
Use post-processing code in Cura slicer to set the Z height pause or layer color change to gain your desired result. My personal settings were Layer 8 or a Z-height of 1.6.

Advertising


Issue with this design? Report a problem.

Would you like to support Cults?

You like Cults and you want to help us continue the adventure independently? Please note that we are a small team of 3 people, therefore it is very simple to support us to maintain the activity and create future developments. Here are 4 solutions accessible to all:

  • ADVERTISING: Disable your banner blocker (AdBlock, …) and click on our banner ads.

  • AFFILIATION: Make your purchases online by clicking on our affiliate links here Amazon.

  • DONATE: If you want, you can make a donation via Ko-Fi πŸ’œ.

  • WORD OF MOUTH: Invite your friends to come, discover the platform and the magnificent 3D files shared by the community!


Sharing and downloading on Cults3D guarantees that designs remain in makers community hands! And not in the hands of the 3D printing or software giants who own the competing platforms and exploit the designs for their own commercial interests.

Cults3D is an independent, self-financed site that is not accountable to any investor or brand. Almost all of the site's revenues are paid back to the platform's makers. The content published on the site serves only the interests of its authors and not those of 3D printer brands who also wish to control the 3D modeling market.

100% secure payment by credit card, PayPal, Apple Pay, Google Pay, etc.
View all payment options.