Skip to content

Darby Handcuffs | Realistic

Advertising
Advertising
?
Creation quality: 5.0/5 (2 votes)
Evaluation of members on the printability, utility, level of detail, etc.

  • 7.3k views
  • 29 likes
  • 343 downloads
  • 2 collections

License
3D design format
STL Folder details Close
  • Bodies_1x.STL
  • Hinge_Pin_2x.STL
  • Key_1x.STL
  • Lock_2x.STL
  • Lock_Pin_2x.STL
  • Shackle_2x.STL

Learn more about the formats

Publication date 2022-04-23 at 03:06
?
Published to Thingiverse on: 2019-02-16 at 08:46
Design number 702545

3D printer file info

3D model description

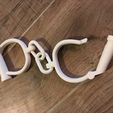
I enjoyed designing these hinged handcuffs (https://www.thingiverse.com/thing:3215043) quite a bit, so set out to find other interesting handcuffs to design. I stumbled on the antique Darby style handcuffs.

These are a sort-of clone of the Darby style handcuffs. The real ones use a spring latch, and have a swivel in the middle of the chain.

No hardware is required, it's all printed. They're pretty strong!

Unfortunately some of the parts do need supports, and some need higher layer resolution.

Parts and settings


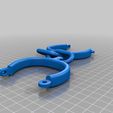
Bodies (1x)

The chain links are print-in-place. This part will require supports for both the hinge, latch, and links. Despite needing supports, it does come out pretty nice. I'd recommend no z-gap between supports and the model, especially for the chain links. These come out quite strong.

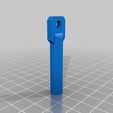
Key (1-2x)

Print the key vertically. It might need a brim, as the bottom features are small and it might not adhere to the bed very well.

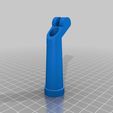
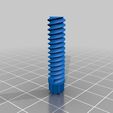
Lock (2x)

This part should be printed vertically. I used a 0.05mm layer height so that the threads would come out nicely. It didn't take too long at this layer height.

Lock pin (2x)

This part should be printed horizontally for maximum strength. I printed without a brim or raft and it did just fine.

Shackle (2x)

Print vertically. No supports needed and layer height of 0.2mm works great.

Hinge pin (2x)

Print laying down. No brim or raft needed. 0.2mm works great.

Post printing


  1. Clean up the ends of the lock pins. Hammer these into the small holes of the lock part, all the way down. This pin will be what engages and locks the shackle shut.
  2. Press the hinge pin through the shackle and bodies.
  3. Thread the lock pin and lock into the shackles using the key.
  4. Go play!

Versions

Check back here for any changes to the design!

  • v1.0.0: Initial Release

3D printing settings

-

Advertising


Issue with this design? Report a problem.

Would you like to support Cults?

You like Cults and you want to help us continue the adventure independently? Please note that we are a small team of 3 people, therefore it is very simple to support us to maintain the activity and create future developments. Here are 4 solutions accessible to all:

  • ADVERTISING: Disable your banner blocker (AdBlock, …) and click on our banner ads.

  • AFFILIATION: Make your purchases online by clicking on our affiliate links here Amazon.

  • DONATE: If you want, you can make a donation via Ko-Fi πŸ’œ.

  • WORD OF MOUTH: Invite your friends to come, discover the platform and the magnificent 3D files shared by the community!


Sharing and downloading on Cults3D guarantees that designs remain in makers community hands! And not in the hands of the 3D printing or software giants who own the competing platforms and exploit the designs for their own commercial interests.

Cults3D is an independent, self-financed site that is not accountable to any investor or brand. Almost all of the site's revenues are paid back to the platform's makers. The content published on the site serves only the interests of its authors and not those of 3D printer brands who also wish to control the 3D modeling market.

100% secure payment by credit card, PayPal, Apple Pay, Google Pay, etc.
View all payment options.