Skip to content

2 cylinder Air engine

Advertising
Advertising
?
Creation quality: 5.0/5 (1 vote)
Evaluation of members on the printability, utility, level of detail, etc.

  • 2.3k views
  • 3 likes
  • 3 downloads

License
3D design format
STL Folder details Close
  • v2crank1.stl
  • v2crank2.stl
  • v2crank3.stl
  • v2crank4.stl
  • v2crankcase1.stl
  • v2crankcase2.stl
  • v2crankcase3.stl
  • v2cylinder.stl
  • v2flywheel.stl
  • v2piston1.stl
  • v2piston2.stl
  • v2pistonarm1.stl
  • v2pistonarm2.stl
  • v2slider arm.stl
  • v2slider.stl

Learn more about the formats

Publication date 2022-04-24 at 16:36
Design number 704161

3D printer file info

3D model description

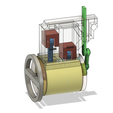
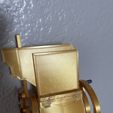
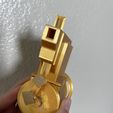
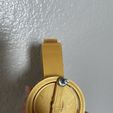
This is a low pressure, 2 cylinder, 2 stroke air engine.

to build this you will need:

roughly 3mm skewer/dowel
11mm outside, 5mm inside diameter bearing 2x
2 small screws or bolts, or small metal object
hot glue
small section of cardboard

Assembly:

  1. put a small amount of hot glue in the crank case lid hole, then insert bearing and add glue as necessary. do the same for both lids.

  2. take one of the shaft crank pieces, (file name: crank2 or 3) and put it through the lid bearing, then attach the slider push, (file name: crank4) on the other side.

  3. glue that lid piece onto the main crank case with the slider pull on the outside, and the shaft crank piece on the inside.

  4. sand down the pistons to fit in the cylinder smoothly, add pencil lead all over the pistons if you want.

  5. cut off a small piece of the 3mm skewer and insert it through the piston hole and piston arm hole. Glue the skewer on to the piston, and check if the piston still moves smoothly through the cylinder, if not, sand again. do this for both pistons

  6. insert one of the piston arms through one of the 2 holes on the crank case, then slide it over the protruding part of the shaft crank.

  7. put a small amount of glue in the connecting hole of the main crank, (file name: crank1) then slide it in the hole of the piston arm you inserted and onto the protruding part of the shaft crank.

  8. insert the second piston arm and do the same as step 7, just backward. Slip the piston arm over the main crank connector, put some glue in it, and connect the second shaft crank on the other side.

  9. now when you spin the crank by its 2 ends, it should push one piston up, while the other down. make sure the slider push(file name: crank4) is pointing almost up when the nearest piston is down.

  10. Glue on the second lid on the side that doesn't have a lid. Take the flywheel and add your 2 metal pieces/weights on opposite sides of the wheel with hot glue. then add the wheel to the outside of the remaining shaft crank.

  11. Put the slider plate into the cylinder with the knob facing out. Then attach the cylinder to the crank case with the slider side, facing the slider push side of the crank case.

  12. then add the connecting rod onto the slider and slider pusher so they move at the same time. Then add a small square of cardboard over the knobs on the slider and slider push to hold the connecting rod in place.

  13. Test! try blowing into the engine and give it a spin in either direction and see what it does!

3D printing settings

0.2 layer height
20% infill
custom supports

Advertising


Issue with this design? Report a problem.

Would you like to support Cults?

You like Cults and you want to help us continue the adventure independently? Please note that we are a small team of 3 people, therefore it is very simple to support us to maintain the activity and create future developments. Here are 4 solutions accessible to all:

  • ADVERTISING: Disable your banner blocker (AdBlock, …) and click on our banner ads.

  • AFFILIATION: Make your purchases online by clicking on our affiliate links here Amazon.

  • DONATE: If you want, you can make a donation via Ko-Fi πŸ’œ.

  • WORD OF MOUTH: Invite your friends to come, discover the platform and the magnificent 3D files shared by the community!


Sharing and downloading on Cults3D guarantees that designs remain in makers community hands! And not in the hands of the 3D printing or software giants who own the competing platforms and exploit the designs for their own commercial interests.

Cults3D is an independent, self-financed site that is not accountable to any investor or brand. Almost all of the site's revenues are paid back to the platform's makers. The content published on the site serves only the interests of its authors and not those of 3D printer brands who also wish to control the 3D modeling market.

100% secure payment by credit card, PayPal, Apple Pay, Google Pay, etc.
View all payment options.