Skip to content

Amulet trollhunters

Advertising
?
Creation quality: 5.0/5 (1 vote)
Evaluation of members on the printability, utility, level of detail, etc.

  • 18.4k views
  • 22 likes
  • 32 downloads

License
3D design format
STL Folder details Close
  • G final v2.stl
  • G final.stl
  • M final v2.stl
  • M final.stl
  • R final v2.stl
  • R final.stl
  • aguja 2 v2.stl
  • aguja 2 v3.stl
  • aguja 2.stl
  • aguja1 v2.stl
  • aguja1 v3.stl
  • aguja1.stl
  • carcasa parte puertas v2 con hueco para interruptor de 9x5mm.stl
  • carcasa parte puertas v2.stl
  • carcasa parte puertas.stl
  • carcasa parte reloj.stl
  • circulo agujas.stl
  • disco careta v2.stl
  • disco careta v3.stl
  • disco careta.stl
  • disco eje pequeรฑo.stl
  • disco eje v2.stl
  • disco eje v3.stl
  • eje agujas v2.stl
  • eje agujas v3.stl
  • j final v2.stl
  • j final.stl
  • jinv final v2.stl
  • jinv final.stl
  • piedra.stl
  • plato puertas piedras.stl
  • plato reloj.stl
  • tope eje pequeรฑo v3.stl
  • tope eje pequeรฑo.stl
  • tope grande reloj.stl
  • tope v2.stl
  • tope v3.stl
  • y final v2.stl
  • y final.stl

Learn more about the formats

Publication date 2022-04-26 at 10:41
Design number 706116

3D printer file info

3D model description

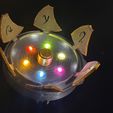
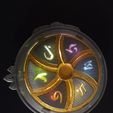
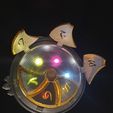
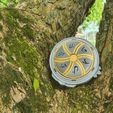
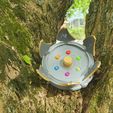
The Amulet is said to have been created by the wizard Merlin with Morgana's left hand. According to legend, he made it malleable so that every Slayer could fight the darkness that even he could not foresee. It is not known how old the amulet is or how many Slayer's have used it.You could be next.

You can see the finished design in this video:

https://youtu.be/pcU9gldc_L8

3D printing settings

The print I made was at layer height 0.2, speed 40mm/sg.

The hinges of the gates I have made them with 0.5mm thick piano wire, the hole in the 3d design of the gates is 1mm, the piano wire passes perfectly if you print the gates so that no supports are generated in the hole. Then cut the piano wire to size and introduce it into the channel corresponding to your gate, a drop of cyanoacrylate (loctite, la gotita, pekecho, etc) and accelerator spray to not affect the movement of the gate, if you do not have accelerator will be more laborious.

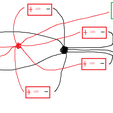
The installation of led lights I have made it with a 12v led strip, I have cut the independent leds and soldered wires (I have eliminated the resistance of the led strip) I have soldered all the led in parallel and I have passed the negative of the battery of 3v of button type cr 2016 by a switch of 9mm x 6mm. The positive direct to leds. I leave you a crappy hand painted schematic in the wiring photos.

There are several versions of needles, mask disk, shaft disk, stops, the only thing that varies are small enlargements of the hole to make it easier to fit according to the quality of your prints.

It's the same with the gates, the hole is 1mm and the piano wire goes through perfectly, on the v2's the hole is 1.25mm to help with the print.

We have 3 casing part doors, the v1 is the one in the photo is the lowest, the v2 widens a little the thickness to have more space inside for the electronics, and then there is a 3rd version in which is added to the v2 the hole for the switch.

Advertising


Page translated by automatic translation. See the original version.
Issue with this design? Report a problem.

Would you like to support Cults?

You like Cults and you want to help us continue the adventure independently? Please note that we are a small team of 3 people, therefore it is very simple to support us to maintain the activity and create future developments. Here are 4 solutions accessible to all:

  • ADVERTISING: Disable your banner blocker (AdBlock, โ€ฆ) and click on our banner ads.

  • AFFILIATION: Make your purchases online by clicking on our affiliate links here Amazon.

  • DONATE: If you want, you can make a donation via Ko-Fi ๐Ÿ’œ.

  • WORD OF MOUTH: Invite your friends to come, discover the platform and the magnificent 3D files shared by the community!


Sharing and downloading on Cults3D guarantees that designs remain in makers community hands! And not in the hands of the 3D printing or software giants who own the competing platforms and exploit the designs for their own commercial interests.

Cults3D is an independent, self-financed site that is not accountable to any investor or brand. Almost all of the site's revenues are paid back to the platform's makers. The content published on the site serves only the interests of its authors and not those of 3D printer brands who also wish to control the 3D modeling market.

100% secure payment by credit card, PayPal, Apple Pay, Google Pay, etc.
View all payment options.