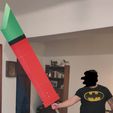
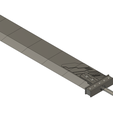
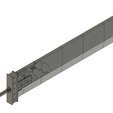
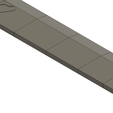
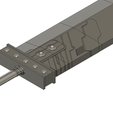
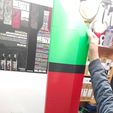
The design arises from a "no balls to... " design Cloud's deadly sword from the Final Fantasy VII Remake video game, at actual size, for Cosplay (That is firm and can be fearlessly picked up or moved**).
And I got to work, live with my friends on Discord, and got it in about 7 and a half hours, straight through, with the help of an internet blueprint of the previous Buster Sword, and with pictures my friends were sending me of different shots and perspectives of the sword directly from the video game on PS5, so that I could capture as much detail as possible.
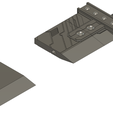
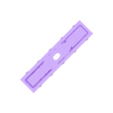
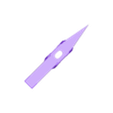
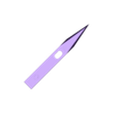
Once I had the design, it was time to prepare it for printing (235*235 bed of an Ender3), and the main idea was to cut the sword in half (vertically) and several horizontal cuts for later joining with simple "studs ".
But this solution was not at all feasible, since not even by the middle of the assembly, grabbing the sword by the handle was impossible without breaking it all.
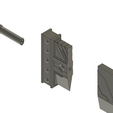
I decided to focus the design, so that it would have an iron/wooden rod on the inside, so that I could pick it up or maneuver with it without fear. So I added a center hole and decided not to cut the sword vertically, so that we would pass each piece through, as if it were a "Bracelet ".
I opted for a 15x25x1500 mm oval iron rod that I found in a smith's shop, since if it were round, the pieces could rotate horizontally, and this way we make sure they won't, fitting perfectly.
The pieces, without vertical cutting, would fit in the bed of the Ender3, if we placed them diagonally.
A tip for a normal print having the (Rectangular) pizas diagonally on the bed, is to enlarge the Fill Angle 45º, from the "Fill " settings.
Before printing all the pieces at once, it is advisable to print one of the pieces of the handle of the sword, and verify that it fits correctly in the rod that we have bought, and if it costs a little to enter, decrease the Size XY Compensation until it fits well, but that the piece is firm. (You can add some glue before inserting the piece definitively in the rod, I did not need it, except in the upper tip of the edge).
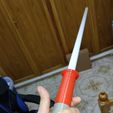
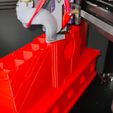
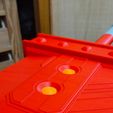
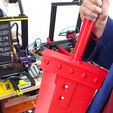
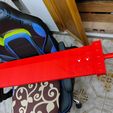
I will leave you pictures of the result, although it is still in the process of painting.
I will update once it is finished.
Thank you all.
Any advice, criticisms, suggestions or problems you have with the design, feel free to leave a comment, or send me a message.
Let's burn some coils!
The design comes from a "no balls to... "to design Cloud's deadly sword from Final Fantasy VII Remake, at actual size, for Cosplay (that is firm and can be fearlessly picked up or moved).
And I got to work, live with my friends in Discord, and I got it in about 7 and a half hours, in a row, with the help of an internet plan of the previous Buster Sword, and with pictures that my friends sent me of different plans and perspectives of the sword directly from the video game in PS5, so I could capture as many details as possible.
Once I had the design, it was time to prepare it for printing (235*235 bed of an Ender3), and the main idea was to cut the sword in half (vertically) and several horizontal cuts for later joining with simple "blocks ".
But this solution wasn't viable at all, since not even by the middle of the assembly, to take the sword by the handle was impossible without breaking it all.
I decided to focus the design, so that it would have an iron/wooden rod on the inside, so that I could pick it up or manoeuvre with it without any fear. So I added a central hole and decided not to cut the sword vertically, so that we would pass each piece through, as if it were a "Bracelet ".
I opted for a 15x25x1500 mm oval iron rod that I found in a smith's shop, because if it were round, the pieces could rotate horizontally, and this way we made sure they wouldn't, fitting perfectly.
The parts, without a vertical cut, would fit in the Ender3 bed, if we placed them diagonally.
A tip for normal printing with the (Rectangular) pieces diagonally on the bed, is to extend the Fill Angle 45º, from the "Fill " settings.
Before printing all the pieces at once, it is advisable to print one of the pieces of the handle of the sword, and verify that it fits correctly in the rod that we have bought, and if it costs a little to enter, decrease the Compensation of size XY until it fits well, but that the piece is firm. (You can add some glue before inserting the piece definitively in the rod, I did not need it, except in the upper tip of the edge).
I will leave you pictures of the result, although it is still in the process of painting.
I will update once it is finished.
Thanks to all of you.
If you have any advice, constructive criticism, suggestions or problems with the design, don't hesitate to leave a comment, or send me a message.
Let's burn plastic coils!

/https://fbi.cults3d.com/uploaders/13554863/illustration-file/1fb6fdee-e9b4-4109-9304-e37697ade114/BS_Testing.jpg)
