Skip to content

Anycubic i3 Mega S X-Belt Tensioner MK.III

Advertising
Advertising
?
Creation quality: 5.0/5 (1 vote)
Evaluation of members on the printability, utility, level of detail, etc.

  • 1.4k views
  • 3 downloads

License
3D design format
STEP and STL Folder details Close
  • Belt Tensioner_mk3.STEP
  • Left_Clamp_PartA.STL
  • Left_Clamp_PartB.STL
  • MainBody_mk2.STL
  • Right_Clamp_PartA.STL
  • Right_Clamp_PartB.STL

Learn more about the formats

Publication date 2022-05-02 at 19:55
Design number 712793

3D printer file info

3D model description

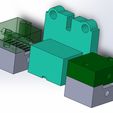
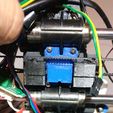
Anycubic i3 Mega S X-Belt Tensioner


UPDATE:

This MK.III design has been revised to be more robust and more streamlined. I currently use this on my own printer.


Failing to find any good stream-lined design out there, I went ahead and designed my own X-belt tensioner. You can really torque this down to the appropriate tension without anything coming loose.


DESIGN SPECIFICATIONS:

Streamlined design with zero interference.
Print without supports.
Ease of installation with the use of existing holes without the need for drilling into the machine or modifying anything else.


HARDWARE NEEDED:

4 x M3 screws of the appropriate length to secure Part A to Part B of the belt clamp

4 x Longer M4 screws to extend the current screws where the current linear rod bearings mount to (to affix your Belt Tensioner Main Body).

4 x M4 nuts

4 x M2.5 heat inserts

Misc. washers to distribute load on the head of the screw if you wish.


INSTALLATION:

  1. It is pretty straightforward. Clamp belts with Part A and Part B affixed together. Use M3 screws here. The hole is undersized so you will thread into the plastic.
    NOTE: The original Anycubic i3 Mega S belt is slightly thinner than a Gates belt, if so, you will have to fold the belt on itself (with teeth facing outward so it will mesh into the clamp). When you fold it on itself, make sure that a little loop of the belt sticks out the front, insert a short wire into this loop to prevent the belt from slipping loose when you torque it down.

  2. Heat-set 4 x M2.5 inserts into the Main Body.

  3. Install Main Body between the two linear rod bushings by using longer M4 screws coming through the front side. Make sure to press the Main Body toward the linear rod bushing housing as you thread the M4 screws from the front. Optionally, secure with M4 heat insert (as a nut will not fit due to clearances).

  4. Tension the belt by screwing both left and right side of the Belt Clamps into the Main Body.


NOTE:

The design is dimensionally accurate. If you are not getting accurate parts, then your printer needs to be tuned and calibrated to print accurate parts. The design has been printed and checked for dimensional accuracy.


3D printing settings

As mentioned above, you need to have a calibrated printer that prints accurate parts. All of the dimensions have a tolerance of 0.05mm.

Print with PLA if you don't expose your printer environment to higher than 50ΒΊC. Otherwise, use PETG or even better use ABS/ASA. The parts are small enough that you can probably get away with printing ABS without an enclosure. Use a brim or a raft to assist with bed-adhesion and avoid warping.

Print with 100% infill.

Advertising


Issue with this design? Report a problem.

Would you like to support Cults?

You like Cults and you want to help us continue the adventure independently? Please note that we are a small team of 3 people, therefore it is very simple to support us to maintain the activity and create future developments. Here are 4 solutions accessible to all:

  • ADVERTISING: Disable your banner blocker (AdBlock, …) and click on our banner ads.

  • AFFILIATION: Make your purchases online by clicking on our affiliate links here Amazon.

  • DONATE: If you want, you can make a donation via Ko-Fi πŸ’œ.

  • WORD OF MOUTH: Invite your friends to come, discover the platform and the magnificent 3D files shared by the community!


Sharing and downloading on Cults3D guarantees that designs remain in makers community hands! And not in the hands of the 3D printing or software giants who own the competing platforms and exploit the designs for their own commercial interests.

Cults3D is an independent, self-financed site that is not accountable to any investor or brand. Almost all of the site's revenues are paid back to the platform's makers. The content published on the site serves only the interests of its authors and not those of 3D printer brands who also wish to control the 3D modeling market.

100% secure payment by credit card, PayPal, Apple Pay, Google Pay, etc.
View all payment options.