3D model description
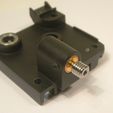
Here is how I installed common bi-metal heatbreaks on an SV04 with standard extruders in place of the original custom heatbreaks. This also applies to the SV01 Pro that uses the same extruder as the left one on the SV04.
The standard ptfe lined heatbreaks on the SV04 and SV01 Pro were custom made for Sovol so currently an off-the-shelf straight drop in option is unavailable. The big problem is that the shaft on the Sovol heatbreaks is 8mm. At this stage a Mk10 heatbreak appears to be the only one available that has an 8mm shaft but they are too long and would need to be cut down. Currently nobody seems to have actually tried this. Most commonly available heatbreaks have a 7mm shaft and that's the type I used.
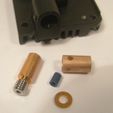
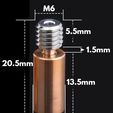
The heatbreaks I used are 1.5mm shorter than the original ones and need a washer above them to take up this space and get the hot end sitting exactly where the original one does. Depending on which heatbreaks you get you may or may not need to do this. If your heatbreaks are slightly longer or shorter you will need either a thinner, thicker or no washer and an appropriate length of pipe. The ones I used are counterbored several millimetres at the top and need a little piece of Capricorn tube in there so that you maintain a fully constrained filament path. Yours may or may not need this. Calipers are your friends.
Here are the instructions for the heatbreakes I used:
You will need:
- Heatbreak(s) (e.g. https://www.aliexpress.com/item/1005002797534007.html)
- 8x0.5mm copper pipe (e.g. https://www.aliexpress.com/item/1005003202374590.html)
- M4x8x1.5 copper washer(s) (e.g. https://www.aliexpress.com/item/33061778602.html)
- Capricorn tube
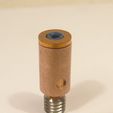
1) Cut off two 13.5mm lengths of copper pipe (only one needed for the SV01 Pro). A pipe cutter that you should find in the plumbing section of any hardware store, if you don't already have one, gives a nice square end. Clean up the ends so the heatbreak slips in without much effort but doesn't wobble around. You may need to give the inside a very light clean up with fine sandpaper or steel wool.
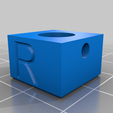
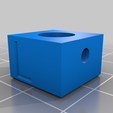
2) Using the jigs, drill holes in one end of the sleeve(s) for the grub screws. For the SV01 Pro you only need the Left jig. Clean up the holes and make sure the heatbreak(s) still fit snugly. I suggest doing either one whole extruder at a time or labeling the sleeves so you don't get them muddled up.
3) Cut 5.5mm length(s) of capricorn tube. Chamfer the ends a little to make filament feeding easier. If you put the tube in the top of the heatbreak and then put the washer on, the end of the tube should be flush with the top of the washer.
4) Pull an extruder apart. Remove the heatsink from the original heatbreak, which is held in by two small grub screws. If you're careful you can leave the thermistor and heater cartridge in the heat block and just remove the heatbreak from it.
5) Drop the washer into the heatbreak hole in the heatsink, it is held captive by the sleeve. The sleeve should be a slip fit into the heatsink with no significant play. Sand lightly on the outside if too tight. Make sure to line the grub screw holes up correctly when inserting the sleeve. Take your time as once the sleeve is in it's not that easy to remove without damaging it. Make sure you use the correctly drilled sleeve for each side.
6) Fit your new heatbreak to the heat block. Place the short ptfe tube in the top of the heatbreak and slide it into the heatsink. You might have to wiggle it a bit to get it to seat properly. Align the heatblock and tighten the grub screws. It's best to tighten the screws before refitting the heatsink to the extruder as they are very hard to get to once it's on.
7) Refit the heatsink to the extruder and reattach the fan etc.
8) Don't forget to do a PID tune when it's all back together.

/https://fbi.cults3d.com/uploaders/14461763/illustration-file/69de3cb1-0e98-4ca6-a392-d1f7af15a7c1/DSCF8077.JPG)
