Skip to content

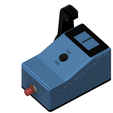
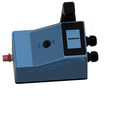
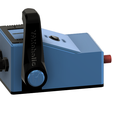
trolling motor throttle with built in ESC/battery monitor/Kill switch and ON/OFF botton

Advertising
Advertising
?
Creation quality: 5.0/5 (1 vote)
Evaluation of members on the printability, utility, level of detail, etc.

  • 1.9k views
  • 3 likes
  • 3 downloads

License
3D design format
STEP and STL Folder details Close
  • 14 gear bearing clamp.stl
  • 30 gear bearing clamp.stl
  • Body (RAM-201U-B).stl
  • Knob (RAM-201U-B).stl
  • Leaver cap.stl
  • Plastic Washer (RAM-201U-B).stl
  • RAM-2461U.stl
  • Spur Gear (14 teeth).stl
  • Spur Gear (30 teeth).stl
  • controller lid.stl
  • gasket.stl
  • housing.stl
  • throttle BASIC VERSION v5.step
  • throttle leaver.stl

Learn more about the formats

Last update 2023-10-07 at 03:28
Publication date 2023-06-25 at 00:15
Design number 1289435

3D printer file info

3D model description

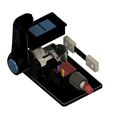
trolling motor throttle with built in ESC, battery monitor, ON/OFF switch and a kill switch
My original throttle I made for my kayak it was very complicated for anyone to duplicate so I made a very simple version so anyone assemble with minimum hardware needed. also with this throttle you will have the center detin even if the pot (potentiometer) you're using doesn't have one.

PARTS NEEDED:
* 10k pat with shaft diameter of 6mm, it doesn't need to be center detin as this throttle has its own center detin using a spring and 1 ball barring .

*1 kill switch/ wiring/
* 2 connectors 10AWG

* 2 gland PG11

servo tester

spring in 3mm diameter and 10m~15mm long ( this will go into a hole located in the second gear base as it will push a 2mm ball to create the center detin ****** you can get a spring from a pen*****

1 ball from a ball barring (you will need to take the ball baring a part to take one ball from it or you can just buy loose balls for ball barring) this will sit on top of the spring and it will act as a center detin

1 hex bolt M8 60mm long with lock nut (for the leaver arm and the barring)

12 screws M3 10mm (for the ball barring mounts and seal the lid to the throttle housing)

NOTE* this purchase is optional *6 M3 heat insert ( this go's on to the housing holes where the lid going to be sealed)

NOTE* this purchase is optional *2 M4 heat insert ( tis go's on the lid where the Ram Ball Mount so you can mount the throttle to your boat)

2 screws M2 5mm (for the servo tester circuit board)

1 mini Ram Ball Mount (3" with 1" balls) I'll include the stl for the ram ball just for reference only. as this mount is patent/pending there for I encourage you to purchase the authentic mount and use the STL for referencing.
PARTS REFERENCE LINKS FROM AMAZON CANADA AND USE

ESC hobbywing 880
USA Amazon https://a.co/d/2d1HZVx

Servo Tester
USA Amazon https://a.co/d/73bPDUF

pot
USA Amazon https://a.co/d/5Jk6eAo
Canada Amazon https://a.co/d/5Jk6eAo

Battery Monitor with 100A shunt
USA Amazon https://a.co/d/2QZ9MoE
Canada Amazon https://a.co/d/gyCP7LP

Kill switch
USA Amazon https://a.co/d/aE6UADz
Canada Amazon https://a.co/d/4yrtIrR

Waterproof Rocker switch for ON/OFF
USA Amazon https://a.co/d/dlMlemt

Spring ( you can use one from a Pen ;) )
USA Amazon https://a.co/d/b9Dkfum
Canada Amazon https://a.co/d/eiWFSGN

608RS Ball Bearings
USA Amazonhttps://a.co/d/a06AvM7
Canada Amazon https://a.co/d/7jHkLUA

Authentic Ram Mount
https://rammount.com

3D printing settings

3D PRINTING SETTINGS
print the housing body with 100% infill and for filament use ASA,ABS,PC,CFPC,PETG ( ASA or ABS is the best as it give nicer looks and you can vaper Acetone it for professional looks

print the the leaver arm at 25% infill and for filament use ASA,ABS,PC,CFPC,PETG

print the lid at 50% infill and for filament use ASA,ABS,PC,CFPC,PETG

print the barring mount at 100% infill and use same type of filament you used to print the lid

print the gasket at 100% infill with TPU filament

for the Ram mount, you can print them with whatever you like at any infill as its there for reference only

3D PRINTER FILE INFORMATION

Advertising


Issue with this design? Report a problem.

Would you like to support Cults?

You like Cults and you want to help us continue the adventure independently? Please note that we are a small team of 3 people, therefore it is very simple to support us to maintain the activity and create future developments. Here are 4 solutions accessible to all:

  • ADVERTISING: Disable your banner blocker (AdBlock, …) and click on our banner ads.

  • AFFILIATION: Make your purchases online by clicking on our affiliate links here Amazon.

  • DONATE: If you want, you can make a donation via Ko-Fi πŸ’œ.

  • WORD OF MOUTH: Invite your friends to come, discover the platform and the magnificent 3D files shared by the community!


Sharing and downloading on Cults3D guarantees that designs remain in makers community hands! And not in the hands of the 3D printing or software giants who own the competing platforms and exploit the designs for their own commercial interests.

Cults3D is an independent, self-financed site that is not accountable to any investor or brand. Almost all of the site's revenues are paid back to the platform's makers. The content published on the site serves only the interests of its authors and not those of 3D printer brands who also wish to control the 3D modeling market.

100% secure payment by credit card, PayPal, Apple Pay, Google Pay, etc.
View all payment options.