Intro
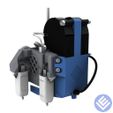
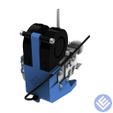
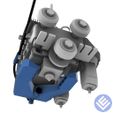
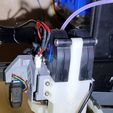
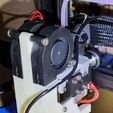
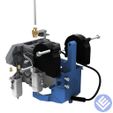
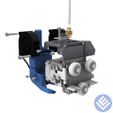
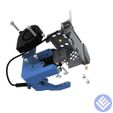
Creality Sprite stock fan is very weak, so I designed this upgrade that will bring more cooling power and other features.
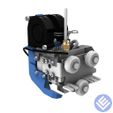
The fan duct is designed for mount 2 5015 blower fans, this is more than enough also if you're printing really fast.
Another top feature is the possibility to mount as the nozzle camera a standard cheap 7mm endoscope connected via USB. This kind of camera comes already equipped with LED lights so it's really easy to mount.
I had major problems with plate leveling so I added a Y axis zero offset BLTouch mount, this helped obtain a decent probe mesh.
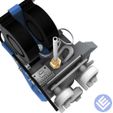
As I use ERCF as MMU I need a reverse bowden connection to the extruder, on top of the filament entry I made a threaded hole so you can mount a threaded 1/8" BSP to 4mm push fitting.
There's also a space for mounting an ADXL345 accelerometer for Klipper tuning.
Description
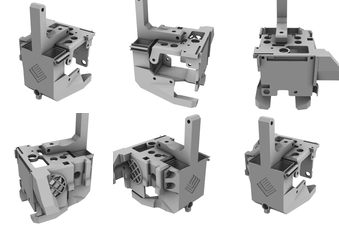
The fan duct is not totally a mine design, but I had to rework quite completely because I had some issues. First the nozzle is not centered on the extruder motor, I don't know if all the Sprite extruders are built like mine but I have tried many designs from Thingiverse and everyone was not fitting properly.
Because of this also the camera hole need to be off center, I found that the camera tends to overheat if used in a enclosed chamber with temps more than 40°, so I made some holes around the camera and left some space around it so the air can cool the camera down.
I'm using one of the cheap endoscope USB camera that you can find on Aliexpress, it's important to buy the one with the diameter of 7MM and the FLEX CABLE, the resolution is really low but for less than 10€ is a great deal as it comes already equipped with LED lighting.
When the camera is hot I found that the image will turn whiteish and randomly will loose the USB connection, it's better to turn it off if you want to print with high chamber temperatures.
If you don't mount the camera you need to print the P1M1_2 part and insert into the camera hole, otherwise air from the fans will flow out the hole
On the left side there's a second BLTouch mount with Y 0 offset, this help to obtain a decent bed mesh because mine X axis gantry is twisted and I never managed to get good bed mesh. It's up to you decide where mount the sensor, it's also possible to use the unused mount to fix other things like a dial gauge for leveling the bed.
On top of the extruder I added a threaded hole for mounting a reverse bowden fitting, this is useful if you want to use a MMU as the Sprite extruder doesn't have a tube connector.
On the right side there's a place for mounting a ADXL345 sensor for Klipper resonance tuning, unfortunately this sensor is available in many form factors so it's not possible to have a standard mount.
BOM
- 2 x 5015 24V Blower Fans
- 6 x M3 threaded inserts
- 2 x M2.5 threaded inserts
- 1 x M4 threaded insert
- 8 x M3x8 screws
- 4 x M4x20 screws
- 1 x M4x16 screw
- 1 JST 1.25 male to 1 JST 2.5 female adapter
Assembly
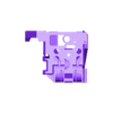
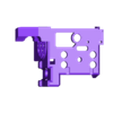
First of all mount all the threaded insert in P1M1_0, the M4 goes on top, the M2.5 on the rear and the other ones in the BL touch zone.
Remove the old plastic support from the extruder and replace it with the P1M1_0 part, the part is compatible with the old one so you shouldn't have to change any settings in Klipper.
On top you will find a square hole near the extruder cooling fan, this is the place where you have to insert the JST plug adapter, connect the 1.25 JST connector to the power board and leave out the other end for connecting the fans.
Mount the 2 fans on the P1M1_1 part, use 4 M4x20 screws, the part came with already threaded M4 holes.
Not overtighten the screws.
Insert the camera in the hole, if you can't insert freely just use a 7MM drill to correct the hole. Wait to fix the camera because you will need to align the orientation when the extruder is mounted.
Assemble the part P1M1_1 on the extruder with the M3 screws on the sides and the M4 on the top, in case on maintenance it's enough to disassemble this part without removing the BL touch.
Last mount the tube fitting on top of the extruder
Not overtighten the tube fitting as there's no end stop
Electrical connection
! DANGER ! modify the original electric circuit of the printer only if you know what you're doing
Unfortunately Creality used a mini JST 1.25 connector for the fan, so you will need an adapter or to cut the original fan cable.
As can happen to open the extruder for the maintenance frequently I used a female adapter that fits perfectly the 6MM square hole on the top left of the P1M1_0 part. You have just to cut the cables at the correct lenght and join the two fan connectors into one.
Compatibility List

/https://fbi.cults3d.com/uploaders/24629837/illustration-file/9f267711-9a1e-424a-89ce-b927f79ceff0/ViewCapture20230729_225025.jpg)
