Skip to content

Osu! mechanical keypad three keys keyboard with pi pico

Advertising
Advertising
?
Creation quality: 5.0/5 (1 vote)
Evaluation of members on the printability, utility, level of detail, etc.

  • 1.2k views
  • 2 likes
  • 4 downloads

License
3D design format
STL and ZIP Folder details Close
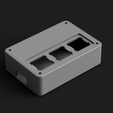
  • case.stl
  • firmware files.zip
    • boot.py
    • code.py
    • kmk/bootcfg.py
    • kmk/consts.py
    • kmk/hid.py
    • kmk/keys.py
    • kmk/key_validators.py
    • kmk/kmktime.py
    • kmk/kmk_keyboard.py
    • kmk/scheduler.py
    • kmk/types.py
    • kmk/utils.py
    • kmk/__init__.py
    • kmk/extensions/international.py
    • kmk/extensions/led.py
    • kmk/extensions/lock_status.py
    • kmk/extensions/media_keys.py
    • kmk/extensions/oled.py
    • kmk/extensions/peg_oled_display.py
    • kmk/extensions/peg_rgb_matrix.py
    • kmk/extensions/rgb.py
    • kmk/extensions/statusled.py
    • kmk/extensions/stringy_keymaps.py
    • kmk/extensions/__init__.py
    • kmk/extensions/keymap_extras/keymap_jp.py
    • kmk/handlers/sequences.py
    • kmk/handlers/stock.py
    • kmk/handlers/__init__.py
    • kmk/hid_reports/nkro_keyboard.py
    • kmk/hid_reports/pointer.py
    • kmk/modules/adns9800.py
    • kmk/modules/autoshift.py
    • kmk/modules/capsword.py
    • kmk/modules/cg_swap.py
    • kmk/modules/combos.py
    • kmk/modules/dynamic_sequences.py
    • kmk/modules/easypoint.py
    • kmk/modules/encoder.py
    • kmk/modules/holdtap.py
    • kmk/modules/layers.py
    • kmk/modules/midi.py
    • kmk/modules/modtap.py
    • kmk/modules/mouse_keys.py
    • kmk/modules/oneshot.py
    • kmk/modules/pimoroni_trackball.py
    • kmk/modules/potentiometer.py
    • kmk/modules/power.py
    • kmk/modules/rapidfire.py
    • kmk/modules/serialace.py
    • kmk/modules/split.py
    • kmk/modules/sticky_mod.py
    • kmk/modules/string_substitution.py
    • kmk/modules/tapdance.py
    • kmk/modules/__init__.py
    • kmk/quickpin/pro_micro/avr_promicro.py
    • kmk/quickpin/pro_micro/boardsource_blok.py
    • kmk/quickpin/pro_micro/frood.py
    • kmk/quickpin/pro_micro/helios.py
    • kmk/quickpin/pro_micro/kb2040.py
    • kmk/quickpin/pro_micro/nice_nano.py
    • kmk/quickpin/pro_micro/sparkfun_promicro_rp2040.py
    • kmk/scanners/digitalio.py
    • kmk/scanners/encoder.py
    • kmk/scanners/keypad.py
    • kmk/scanners/__init__.py
    • kmk/transports/pio_uart.py
    • kmk/transports/__init__.py
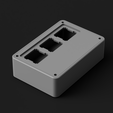
  • top plate.stl

Learn more about the formats

Publication date 2023-07-04 at 14:30
Design number 1306075

3D printer file info

3D model description

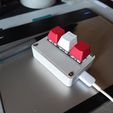
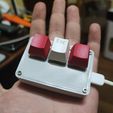
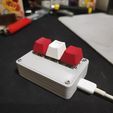
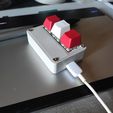
Economical mechanical keypad for osu! . You can build your own very cheap. It can accept any cherry mx style switches of your choice. It is built to accept an rp2040 microcontroller like raspberry pi pico. I used a Chinese pico clone i bought for 2.50 euros, and it has usb type c.
You will need:
- an rp2040 microcontroller board compatible with circuit python
- 3 cherry mx style switches
- some wires
- Three 1N4148 diodes(optional)
- tree keycaps(you can use my blank keycap stl to print your own)

It runs KMK firmware in order to be simpler to diy yourself with no programming experience. On the following youtube link you will find the guide i also watched to program your keyboard. I will also provide my own files for the firmware.

https://www.youtube.com/watch?v=Q97bFwjQ_vQ&t=7s&ab_channel=JanLunge

3D printing settings

How to Guide:
-Firmware:
1. Plug the board to the computer
2. Download circuit py and install on the board. Wait for it to reboot,
it does automatically. It will now be recognized as flashdrive.
3. Copy my files from the zip folder on to the drive. You will now have
a working keypad for osu. If you need to have different keys, or
macros you will have to change the code. Everything is on youtube,
with a little research you will find anything.

-Keypad
1. 3d print my files
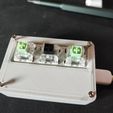
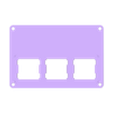
2.install the switches to the plate.
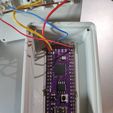
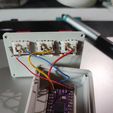
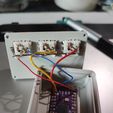
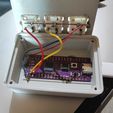
3. wire the switches and diodes as shown in the pictures I uploaded.
Some soldering needed for permanent connection.
4. connect the switches to the board pins. Pin 17 is the row. Pins
18,19,20 are the columns. Soldering needed for
permanent connection.
5. Use a small amount of hot glue to attach the board to the case and the switches to the plate, as shown in the photos.
6. Screw in the plate to the case using small 2mm or 2,5 mm screws.

Advertising


Issue with this design? Report a problem.

Would you like to support Cults?

You like Cults and you want to help us continue the adventure independently? Please note that we are a small team of 3 people, therefore it is very simple to support us to maintain the activity and create future developments. Here are 4 solutions accessible to all:

  • ADVERTISING: Disable your banner blocker (AdBlock, …) and click on our banner ads.

  • AFFILIATION: Make your purchases online by clicking on our affiliate links here Amazon.

  • DONATE: If you want, you can make a donation via Ko-Fi 💜.

  • WORD OF MOUTH: Invite your friends to come, discover the platform and the magnificent 3D files shared by the community!


Sharing and downloading on Cults3D guarantees that designs remain in makers community hands! And not in the hands of the 3D printing or software giants who own the competing platforms and exploit the designs for their own commercial interests.

Cults3D is an independent, self-financed site that is not accountable to any investor or brand. Almost all of the site's revenues are paid back to the platform's makers. The content published on the site serves only the interests of its authors and not those of 3D printer brands who also wish to control the 3D modeling market.

100% secure payment by credit card, PayPal, Apple Pay, Google Pay, etc.
View all payment options.