Skip to content

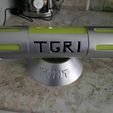
TMNT Ooze Canister - Light Up

Advertising
Advertising
?
Creation quality: 5.0/5 (1 vote)
Evaluation of members on the printability, utility, level of detail, etc.

  • 2k views
  • 5 likes
  • 5 downloads

License
3D design format
STL Folder details Close
  • cannister_lightmount.stl
  • ooze-bottom-mag v1.stl
  • ooze-bottomSides v2.stl
  • ooze-stand-logo v1.stl
  • ooze-top_cap.stl
  • ooze-top_sides.stl
  • tgri-side-V2.stl

Learn more about the formats

Publication date 2023-07-05 at 22:14
Design number 1308565

mholmberg13

3D printer file info

3D model description

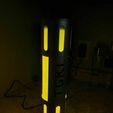
Modeled from TMNT Secret of the Ooze, this Ooze Canister is a functioning, light up prop that you can build with very little electronic knowledge. Just slide the canister in the base and it will light up!

Parts needed:

-15mm purse magnets - X2

-12v LED strip lights

-12v power adapter

-SmartWater waterbottle - Large - X2

Instructions:

Print 1 of every piece EXCEPT the lightmount, print 2 of these. Cut your water bottle to size, removing the top part of the bottle and leaving the bottom. You want the bottles to connect at the bottom part of the top cylider piece, so that the seam is hidden. Sand and finish all exterior pieces. Connect the 2 lightmount pieces, using glue or plastic welding, at the top of each narrow part of the lightmount. Tape or glue your led strips onto 2 sides of the lightmount. and run your wire into the hole at the bottom. Put your light mount inside the bottle parts and run your wire through a hole in the bottom of the bottle. Slide your bottom cylinder over the bottom of the bottle. Mount your magnets in the holes of the bottom cap and connect the led wires to each of those. Now Put the cap with magnets onto the bottom cylinder.

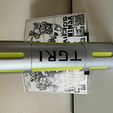
Assemble the top cap and cylinder and then slide the top piece of your water bottle into the cylinder, glueing the cut edge that will align with the other cut edge of the waterbottle. Slide the whole top assembly onto the bottom assembly, covering the rest of the lightmount. Use glue on that seam. Glue the TGRI side pieces onto the sides.

Connect the other two sides of the purse magnets at the top of the base and run your power from the adapter to these magnets. When the magnets connect it will allow the current to run to the LEDs .

Advertising


Issue with this design? Report a problem.

Would you like to support Cults?

You like Cults and you want to help us continue the adventure independently? Please note that we are a small team of 3 people, therefore it is very simple to support us to maintain the activity and create future developments. Here are 4 solutions accessible to all:

  • ADVERTISING: Disable your banner blocker (AdBlock, …) and click on our banner ads.

  • AFFILIATION: Make your purchases online by clicking on our affiliate links here Amazon.

  • DONATE: If you want, you can make a donation via Ko-Fi 💜.

  • WORD OF MOUTH: Invite your friends to come, discover the platform and the magnificent 3D files shared by the community!


Sharing and downloading on Cults3D guarantees that designs remain in makers community hands! And not in the hands of the 3D printing or software giants who own the competing platforms and exploit the designs for their own commercial interests.

Cults3D is an independent, self-financed site that is not accountable to any investor or brand. Almost all of the site's revenues are paid back to the platform's makers. The content published on the site serves only the interests of its authors and not those of 3D printer brands who also wish to control the 3D modeling market.

100% secure payment by credit card, PayPal, Apple Pay, Google Pay, etc.
View all payment options.