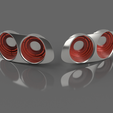
3D model description
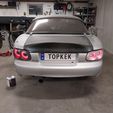
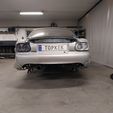
You want to make your own Sequential LED Taillights for your NB? Well, look no further!
A quick showcase: YouTube
An introduction: This setup uses WS2812B addressable LEDs that is controlled by a BlueGhozt automotive LED controller. The controller has its own phone app for configuring the LEDs. The controller has inputs for Reverse, Brake, L/R Turn, DRL etc. The LEDs use a small amount of power when they are off, but it quickly adds up when you have 160 of them. That's why I have added a power cutoff that is controlled by the BlueGhozt PLUS 2.0 (The LITE version does not have a relay for controlling the cutoff)
Practical information: You will need to source clear taillights like the ones I used and you will have to gut most of them, leaving only the frame. You will need to fill and sand if you want a good finish. The LED rings require soldering and it might be an idea to hot glue the joints to combat the elements and vibrations. You will also need to swap out your blinker relay with a LED compatible one (CF13), and you will most likely need to swap out your front blinkers to LED as well, due to the load limit on the relay.
Here's what you will need:
Taillights like THESE
LEDs: BIG RINGS 45 LEDS and SMALL RINGS 35 LEDS
Wiring: 3 pin LED wiring
LED blinker relay: CF13 Relay
LED controller: BlueGhozt Plus 2.0
12V to 5V converter: 12V to 5V
Power Cutoff Module: Power Cutoff
20x M3 20mm Button Head Screws (For the covers)
2x M5 10mm (Attaching the taillight to the car from the inside)
A quick rundown on how to proceed:
- Get everything from the list. Start with the taillights as they are most likely the hardest to source. I got mine used for around 50$
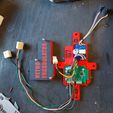
- Hook up everything electrical on your work bench. The LED rings are daisy chained like this: 4-3-2-1-BlueGhozt-1-2-3-4 with each ring having an input and an output. Make sure that your app communicates with the BlueGhozt controller.
- Start setting up the LEDs in the controller App. I wired them in the following order: Small inner-Large inner-Small outer-Large outer. Then you can add four halos in the setup, and set the first to 35 Leds, second to 45, third to 35 and the fourth to 45. I'll post a screenshot of this when I get back to the car.
- Print one side and make sure that the LED rings fits in their slots and that the cover fits correctly and lines up over the rings.
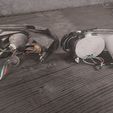
-Put the taillights in an oven at around 95*C for around 10 minutes and start pulling the glass off. Be very gentle as these are extremely brittle. If it feels stuck, up the temperature to 100 and give it another go. Once the glass is off, remove everything inside the light, leaving you with the bare frame.
- Start cutting. I've attached a photo of how it looks from the back. Be sure to leave enough material for the glue to stick between the printed part and the frame. Once one side is done, you can proceed with printing and finishing the other side.
- Once the printed part is attached to the taillight frame and you are done with the sanding and painting, you can glue the Screw Mount to the rear of the taillight and make sure that you can reach it from inside the car.
- Assuming your aftermarket taillights came with wiring, you can cut these as close to the bulbs as possible. I used Blinker, Reverse, Brake and Running light from the right pigtail, and only the Blinker from the left one(This can change depending on NB1/NB2). I used the positive leads from the pigtail into the screw terminals of the controller. That gives signal to the various functions. I'm attaching a photo of this soon.
- Swap out your blinker relay with the LED compatible one, as well as the front blinkers. Your blinker speed should now be normal.
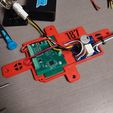
- Tidy up all wiring, use hot glue to protect any joints. I've attached a picture of the box I made for the controller and power cutoff module.
- Final configuration in the app. This consists of setting the halo rotation, offset, programming the rings to certain functions and so on.

