Skip to content

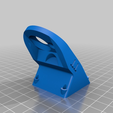
Fan duct for Solidoodle4 w/ E3Dv6 and stock carriage

Advertising
Advertising
?
Creation quality: 0.0/5 (0 votes)
Evaluation of members on the printability, utility, level of detail, etc.

  • 297 views
  • 2 downloads

License
3D design format
Folder details Close
  • SD4E3DfanA.STL
  • SD4E3DfanB.STL
  • SD4E4DfanA_lp.STL

Learn more about the formats

Publication date 2023-07-10 at 18:51
?
Published to Thingiverse on: 2015-01-04 at 18:52
Design number 1317368

3D printer file info

3D model description

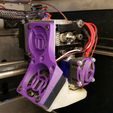
Provides a means to hold a 40x10 fan and direct cool(er) air directly around the nozzle to help reduce droops and increase overhang printing capability. I attached my E3Dv6 by removing the top lip on the E3d heatsink on a lathe at which point it slides right into the same hole the stock heater core attaches and is held with the same set screw. This fan shroud will not likely fit any other arrangement.

Since upgrading my SD4 to a Lawsy carriage (http://www.thingiverse.com/thing:104059) and stronger Y idlers (http://www.thingiverse.com/thing:731769), my original design started bumping at the edges reducing the available bed space so I made a new "low profile" (_lp) version to address these issues and recover the full print volume.

3D printing settings

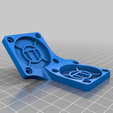
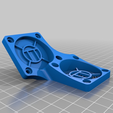
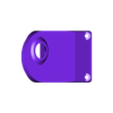
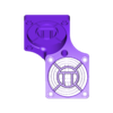
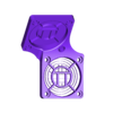
You will need to acquire four M3x20 socket head screws and four M3X8. The fan on the left of the extruder is no longer needed so is a great candidate to use in the fan shroud. It must be removed from the extruder and sandwiched between partA and partB with the M3X20 screws. The whole assembly, then, is attached to the carriage with the M3x8 screws. I printed the lower shroud (part B) in Nylon since it has a higher melting point than ABS and PLA. My settings were:

Part A ("_lp" version recommended):

material: ABS

nozzle diameter: 0.4mm

layer height: 0.2mm (built-in supports assume 0.2mm layer height - may not print well if other layer height is used)

supports: No

Part B:

material: Taulman 645

nozzle diameter: 0.4mm

layer height: 0.15mm

supports: No

After printing part A, remove any dropped loops that may interfere with the fan. You may need to drill the holes in the fan grills out with a 1/8" drill. DO NOT drill out the holes in the lower shroud (part B). Instead, tap them with a M3-0.5mm tap (chuck into a cordless drill for quick work). You may get away without pre-tapping but run the risk of splitting the part if you force the screws in.

Although the shroud does not come into contact with the extruder or heater block, I still noticed some evidence of melting due to the close proximity but the air channel remained intact. Adding a layer of kapton between the heater core and the shroud seems to help.

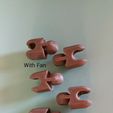
Unless you already have a similar fan in place, you are probably doomed to printing this twice. Once w/o the fan which should work but may not look too nice around the undercut areas and once again with the fan installed to get a cleaner print.

Advertising


Issue with this design? Report a problem.

Would you like to support Cults?

You like Cults and you want to help us continue the adventure independently? Please note that we are a small team of 3 people, therefore it is very simple to support us to maintain the activity and create future developments. Here are 4 solutions accessible to all:

  • ADVERTISING: Disable your banner blocker (AdBlock, …) and click on our banner ads.

  • AFFILIATION: Make your purchases online by clicking on our affiliate links here Amazon.

  • DONATE: If you want, you can make a donation via Ko-Fi πŸ’œ.

  • WORD OF MOUTH: Invite your friends to come, discover the platform and the magnificent 3D files shared by the community!


Sharing and downloading on Cults3D guarantees that designs remain in makers community hands! And not in the hands of the 3D printing or software giants who own the competing platforms and exploit the designs for their own commercial interests.

Cults3D is an independent, self-financed site that is not accountable to any investor or brand. Almost all of the site's revenues are paid back to the platform's makers. The content published on the site serves only the interests of its authors and not those of 3D printer brands who also wish to control the 3D modeling market.

100% secure payment by credit card, PayPal, Apple Pay, Google Pay, etc.
View all payment options.