Skip to content

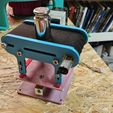
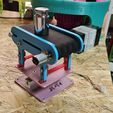
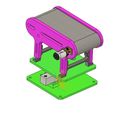
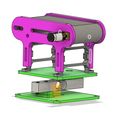
Conveyor belt 100mm for load cell

Advertising
Advertising
?
Creation quality: 0.0/5 (0 votes)
Evaluation of members on the printability, utility, level of detail, etc.

  • 1.5k views
  • 2 likes
  • 1 download

License
3D design format
STL Folder details Close
  • Base cinta.stl
  • Base.stl
  • Chasis der 100.stl
  • Chasis izq 100mm.stl
  • Rodillo conducido.stl
  • Rueda conductora.stl
  • pata cinta 100mm v4.stl

Learn more about the formats

Publication date 2023-07-14 at 17:29
Design number 1324632

3D printer file info

3D model description

functional mock-up of a conveyor belt (100mm long) for load cell .

Materials needed:

x8 nuts m3.

x6 screws m3 x +- 10m

x2 screws M5 x 65mm.

x1 screw M5 x 16mm

x2 nuts M5

x3 washers M5

x 2 screws M1.6 x 4mm

x1 Motor N20 +- 30 RPM 12V

x4 O-rings 20 x 3.5mm

x1 stud m3 x +- 6mm

x3 bearings 625zz

elastic band 50mm wide x +- 40mm long

INSTRUCTIONS

  • Insert nut m3 into drive roller.

  • Insert bearing into drive roller

  • Install O-rings on drive roller

  • Insert bearings in driven roller

  • Insert M3 nuts on legs

  • Join the two chassis with the rollers :

  • Use a M5 x65 bolt for the driven roller, position

an M5 washer between the roller and the chassis.

  • Thread the M5 x16 screw in the part where the roller is located.

(insert another washer between the roller and the chassis).

chassis).

  • Fasten the N20 motor with M1.6 screws.

  • Once everything is joined together insert the set screw into the roller.

driver.

  • Insert another M5 x 65mm bolt in the center of the chassis to

reinforce the structure (it is advisable to use a nut).

self-locking nut as it does not have to be tightened, it is only

to prevent it from opening.

  • Once the chassis has been assembled, the elastic band will be measured plus.

with the driven roller displaced inwards (for

to be able to tighten the belt later).

  • Cut the tape to length and then sew it.

  • Finally place the tape, tighten it and assemble the legs.

For any questions or suggestions.

JPRobotics3d@gmail.com

3D PRINTING PARAMETERS

Printed with anycubic chiron :

Layer height 0.25mm

10% fill

Printed in PLA

3D printing settings

Printed with kingroon k3ps :

Layer height 0.25mm

10% fill

Printed in PLA

Advertising


Page translated by automatic translation. See the original version.
Issue with this design? Report a problem.

Would you like to support Cults?

You like Cults and you want to help us continue the adventure independently? Please note that we are a small team of 3 people, therefore it is very simple to support us to maintain the activity and create future developments. Here are 4 solutions accessible to all:

  • ADVERTISING: Disable your banner blocker (AdBlock, …) and click on our banner ads.

  • AFFILIATION: Make your purchases online by clicking on our affiliate links here Amazon.

  • DONATE: If you want, you can make a donation via Ko-Fi πŸ’œ.

  • WORD OF MOUTH: Invite your friends to come, discover the platform and the magnificent 3D files shared by the community!


Sharing and downloading on Cults3D guarantees that designs remain in makers community hands! And not in the hands of the 3D printing or software giants who own the competing platforms and exploit the designs for their own commercial interests.

Cults3D is an independent, self-financed site that is not accountable to any investor or brand. Almost all of the site's revenues are paid back to the platform's makers. The content published on the site serves only the interests of its authors and not those of 3D printer brands who also wish to control the 3D modeling market.

100% secure payment by credit card, PayPal, Apple Pay, Google Pay, etc.
View all payment options.