Skip to content

N Scale Model Train Intermodal Flatcar Freight with Magnetic Loads Micro-Trains Couplers

Advertising
Advertising
?
Creation quality: 5.0/5 (1 vote)
Evaluation of members on the printability, utility, level of detail, etc.

  • 2.4k views
  • 8 likes
  • 2 collections

License
3D design format
STL Folder details Close
  • 4A #1 20' for 45' Bulk Flatcar Cargo Container Load.stl
  • 4A #3 20' for 45' Bulk Flatcar Cargo Container Load.stl
  • 4A Round Magnet 20' #1 Train Load Cargo Container.stl
  • 4A Round Magnet 20' #2 Train Load Cargo Container.stl
  • 4A Round Magnet 20' #3 Train Load Cargo Container.stl
  • 4A Round Magnet 40' #1 Train Load Cargo Container.stl
  • 4A Round Magnet 40' #2 Train Load Cargo Container.stl
  • 4A Round Magnet 40' #3 Train Load Cargo Container.stl
  • 6A car Rect flatcar magnets #1.stl
  • 6A car Supported Rect flatcar magnets #1.stl

Learn more about the formats

Publication date 2023-07-17 at 20:28
Design number 1330396

3D printer file info

3D model description

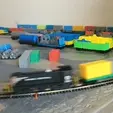
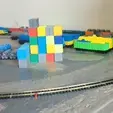
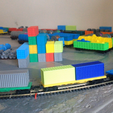
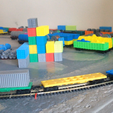
Here is my first 3D printed flatcar for N Scale model train layouts. The car uses two 6x2mm round magnets, one in each end. Each 20' cargo load has a single magnet inside, while the 40' loads have two magnets each. The cars use Micro-Trains medium shank couplers and are printed on a FDM 3D printer. Currently using a Creality CR10 V3 printer. There is a short video about the Flatcar and printing process here: https://youtu.be/BYTNTguXe2M

Included are three versions of both the 20' and 40' Intermodal Cargo containers freight loads. I find the minor differences in the versions break up the trains and adds interesting visual realism. Each 20' load has a single magnet inside and the 40' have two magnets. These cars are designed to use Micro-Trains Medium Shank couplers. Here is a small video on how to install the couplers. https://youtu.be/iG7RecpV6t0

3D printing settings

To print the Intermodal Flatcar you must use a pause command which is inserted into the slicer program to cause the extruder to move to the side pausing the print and allowing access to the print so as to add the magnets. Make sure you always use the same orientation by first putting the new magnet on another finished part like the same thing you are printing. i.e. use a load for loads and a car for cars as the polarity and orientation will be reversed depending on which you are printing. If you flip a magnet, you can destroy the print with pliers to recover the magnet if you put it in upside down, just don't destroy the magnet.

Pause Commands for S3D slicer can be added to the Scripts tab under Post Processing add:

{REPLACE "\nM117 Layer XXX, Z=" "\nM300 S2000 P80\nG1 X10 Y55 Z25\nM300 S2000 P100\nM0\nM117 Layer XXX, Z="}; pause at layer, move head, play sound

Just replace both of the XXX's with the layer number when the magnet open space first gets covered. You can find this by raising the slicer layer until the space gets bridged i.e. layer 9 the space gets printed over, you would then replace both of the XXX's with a 9.

This will move the extruder to the side and beep alerting you to the pause. Add the magnet (Use another load or car to orientate it) and hit the button on the controller again. This is specifically for the Creality CR10 V3 printer.

Advertising


Issue with this design? Report a problem.

Would you like to support Cults?

You like Cults and you want to help us continue the adventure independently? Please note that we are a small team of 3 people, therefore it is very simple to support us to maintain the activity and create future developments. Here are 4 solutions accessible to all:

  • ADVERTISING: Disable your banner blocker (AdBlock, …) and click on our banner ads.

  • AFFILIATION: Make your purchases online by clicking on our affiliate links here Amazon.

  • DONATE: If you want, you can make a donation via Ko-Fi πŸ’œ.

  • WORD OF MOUTH: Invite your friends to come, discover the platform and the magnificent 3D files shared by the community!


Sharing and downloading on Cults3D guarantees that designs remain in makers community hands! And not in the hands of the 3D printing or software giants who own the competing platforms and exploit the designs for their own commercial interests.

Cults3D is an independent, self-financed site that is not accountable to any investor or brand. Almost all of the site's revenues are paid back to the platform's makers. The content published on the site serves only the interests of its authors and not those of 3D printer brands who also wish to control the 3D modeling market.

100% secure payment by credit card, PayPal, Apple Pay, Google Pay, etc.
View all payment options.