Skip to content

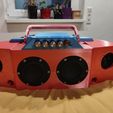
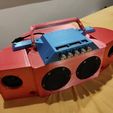
2.1 Stereo speaker system with real 35Hz low bass and 60W output power

Advertising
Advertising
?
Creation quality: 0.0/5 (0 votes)
Evaluation of members on the printability, utility, level of detail, etc.

  • 800 views
  • 1 like

License
3D design format
STL Folder details Close
  • Kabelführung.stl
  • Lautsprechergitter.stl
  • SW-Oberschale.stl
  • SW-Unterschale.stl
  • Satellit Links.stl
  • Satellit Rechts.stl
  • Seitenwand Links.stl
  • Seitenwand Rechts.stl
  • Tragegriff.stl
  • Verstärkergehäuse.stl

Learn more about the formats

Publication date 2023-07-23 at 20:47
Design number 1341098

tenner21

3D printer file info

3D model description

Small portable 2.1 speaker, which should not be missing at any party and even outdoor provides above-average sound reinforcement.

The small box was designed for 2 pieces Tang Band W3 1876S (connected in parallel) and 2 x FR58 8 ohms from Visaton.

In the amplifier compartment fits the TB21 2.1 amplifier with 2 x 50W and 1 x 100W (subwoofer) with Bluetooth and AUX

The box is handy and also quickly stowed. Since up to 24V it has no battery compartment - a 12-24V power supply with 120W is needed!

All holes have 2.5mm, 3mm, 3.3mm and 4mm. M3/M4 threads are drilled directly into the 2.5 and 3.3mm holes.

Only M3 and M4 stainless steel screws with cylinder heads (DIN 912) are used.

The carrying handle is reinforced with 2 x M3 cylinder head screws to prevent it from breaking out.

Mounting:

First, print the two subwoofer halves and glue them to each other with super glue. Then screw the satellites to the sides (M4). Then insert the amplifier into the carrier and screw on the amplifier carrier. Pull speaker cables to the satellites and suboofer, cover with cable guide (CAUTION: The subwoofer connection cables must be pulled through the cover FIRST so that the cables do not swing open on the cabinet).

Then crimp or solder all connections firmly with cable lugs.

The satellite cabinets are insulated with Sonofil, the subwoofer remains insulation-free!

First put the screws through the speaker grilles (print 2x), then through the housing and from the back with M4 nuts fasten the FR58.

3D printing settings

No supports needed!!!

If you're not sure, you can enable supports on cable routing - but should work without.

The satellites are printed with the speaker opening facing down, both TML chambers lying with the bottom. The amplifier cabinet and cable routing are printed standing up on the surface.

Infill subwoofer 20%, infill satellites 30%.

Advertising


Page translated by automatic translation. See the original version.
Issue with this design? Report a problem.

Would you like to support Cults?

You like Cults and you want to help us continue the adventure independently? Please note that we are a small team of 3 people, therefore it is very simple to support us to maintain the activity and create future developments. Here are 4 solutions accessible to all:

  • ADVERTISING: Disable your banner blocker (AdBlock, …) and click on our banner ads.

  • AFFILIATION: Make your purchases online by clicking on our affiliate links here Amazon.

  • DONATE: If you want, you can make a donation via Ko-Fi 💜.

  • WORD OF MOUTH: Invite your friends to come, discover the platform and the magnificent 3D files shared by the community!


Sharing and downloading on Cults3D guarantees that designs remain in makers community hands! And not in the hands of the 3D printing or software giants who own the competing platforms and exploit the designs for their own commercial interests.

Cults3D is an independent, self-financed site that is not accountable to any investor or brand. Almost all of the site's revenues are paid back to the platform's makers. The content published on the site serves only the interests of its authors and not those of 3D printer brands who also wish to control the 3D modeling market.

100% secure payment by credit card, PayPal, Apple Pay, Google Pay, etc.
View all payment options.