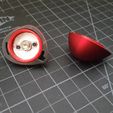
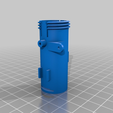
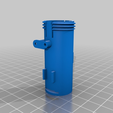
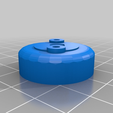
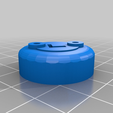
Let me start off with saying this mod is not for the faint of heart. I saw there was a need for a more secure battery cap with the new FrSky X-Light remote, so I designed one to hopefully help out a few fellow pilots. Below is a step by step description of the modification.
Parts are printed with PETG.
You will need one item that isn't included with the controller. A very thin piece of sheet metal, like you would see in a simple soda can. You will need to cut two small round plates the size of a quarter. I tried to design this mod with all stock parts but using this extra piece of thin metal was unavoidable but easy to obtain.
1= Print out the parts (I know that was a given)
2= Remove the old battery holders and wiring from the controller.
3= Unsolder the wire from the battery terminal at the back end of the battery holder.
4= Remove all wiring and metal terminal extenders from around the old battery holders.
Also remove the back terminal plate and spring.
5= Completely remove (desolder) the spring from the terminal back plate of the previous
step and save the springs for later.
6= Remove the hardware from within the battery caps. Keep the screws and spring plate.
7= Completely remove (desolder) the spring from the battery cap spring plate. You won't
be needing these springs again.
8 = BIG STEP HERE. Ok now you take the spring from the back battery terminal (the first
spring you removed) and the spring plate from the battery cap terminal and solder them
together. You will need to remove a small section of the bottom of the spring (only 1/2
to 1 coil) just enough to where the spring fits nicely on the center circle of the battery
cap terminal spring plate. You will also need to bend the bottom of the spring just a bit
inward where you cut the coil from the base of the spring to help make it fit on the plate
(This step is critical to give the proper spacing and tension for the new screw cap).
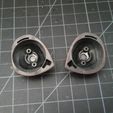
9= Place the back battery terminal plates into the new 3D printed screw type battery
holders (Yes without a spring). Solder the wire from the wire harness back to the plate.
Don't forget to use some heat shrink.
10= You will need to cut two small very thin metal plates 20mm in circumference to place in the new 3D printed battery cap inserts. Use a soda can and face the metal side up as
you place the metal plates inside the caps. Drill two holes in the plates to match the
screw holes in the cap incerts.
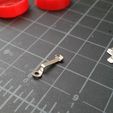
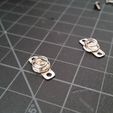
11= The battery terminal extenders that extend to the outer edge of the battery holder need to be bent 180 degrees to lay over the edge of the battery holder as shown in the pictures. This is a very delicate step. You only have one chance to bend the little end nub to face completely in the opposite direction.
If you try to bend it to fast or more than once it will simply break off. Note: Even if it
breaks off, the edge will still stick out past the edge of the battery holder enough to
make contact with the battery cap metal plate so don't worry.
You may have to layer more than one piece of metal in the cap to achieve proper
contact if you go all out and break all the ends off but it will still work. Note: adding
more layers of metal will also help you achieve a proper stopping point for the caps if
you find they are spinning too far past the point of being lined up with the controller.
12= Install the battery terminal extenders and wiring to the new 3D printed screw type
battery holders and install them into the controller just like the old battery holders were
installed.
13= This is another big step. You will need to modestly dremel out the inside of the battery
cap covers to make room for the screw type inserts. DO NOT DREMEL TO MUCH
OUT!! You can easily dremel through to the outer surface if your not careful. Take your
time and go slowly. I used the raised edge as a guide. Once you have removed far
enough out removing the raised edge you should be good and only need to dremel out
a little bit at a time to get just the right fit. This is the scariest step of the entire mode. I
can't stress enough GO SLOWLY. Your dealing with very thin walls. That being said
once I was done I still had at least 1.0 to .50mm left at the thinnest point.
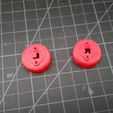
14= Screw the 3D printed screw type inserts along with the spring and spring plate you
created on top of the metal plates into the battery cap covers (See pictures). Make
sure the right and left sides are in the proper battery cap covers with the top of the L or
R pointing towards the top of the cap. (Right and Left top and bottom is orientated
based from looking at the controller when in normal use facing up towards the user).
Note: Both caps screw on spinning towards the outside and screw off spinning towards
the inside. This allows for the caps to only be placed on the proper side and it looks
cool.
15= Enjoy not worrying about your caps coming off.

/https://fbi.cults3d.com/uploaders/20288846/illustration-file/1cb9f9fe-f3d2-4899-89b0-9f93401bc13f/7.jpg)


