Skip to content

Pyro Ignacious Spark - Pelvis replacement - Transformers G1

Advertising
Advertising
?
Creation quality: 0.0/5 (0 votes)
Evaluation of members on the printability, utility, level of detail, etc.

  • 451 views
  • 4 downloads

License
3D design format
Folder details Close
  • G1_Pyro_pelvis_ratchets.blend
  • pyro_mushroom_peg.stl
  • pyro_waist_with_ratchets.stl

Learn more about the formats

Publication date 2023-07-27 at 23:05
?
Published to Thingiverse on: 2023-07-27 at 19:52
Design number 1348530

3D printer file info

3D model description

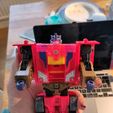
Hi! I recently repaired a broken G1 Pyro Ignacious Spark who had, as is his way, decided to break at the waist due to GPS. The pelvis was completely shattered after removal due to a previous owner's judicious use of super glue so I needed a replacement.

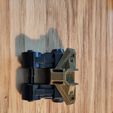
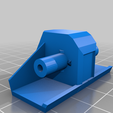
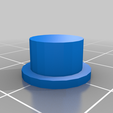
Fortunately, Printformers had just the thing I needed! It needed a little work however, so the ratchet joints would work and the whole thing would be easier to print. I ended up remodelling the original part quite a bit and splitting it into two pieces, the part itself and a mushroom peg. You will still need the front piece from the original Printformers post though! You can find that here (https://www.thingiverse.com/thing:4227263). Leave him a Make while you're at it, he deserves to see how many Pyros he's brought back from the brink! =)

To replace the waist you'll have to first disassemble Pyro himself. It's pretty straightforward, but fiddly.

To disassemble the legs:
- Remove the screw on his butt to take the pelvis apart. Be prepared for shrapnel.
- Remove the screws on the back of his legs. Take the upper legs out. There are tight springs and blue ratchet pieces in there, so make sure to catch them.
- Remove the screws from his hips. Again, catch the springs and ratchets. Note that the ratchets on the hips are different from his knees.

To disassemble the upper body:
- Remove the two screws that are immediately apparent.
- Remove the two screws underneath the blue stickers on his pecs. You can lift these easily if you apply some lighter fluid and then lift them with a scalpel or similar. Search Toy Polloi sticker removal on Youtube to see a demonstration.
- Pry the upper body apart carefully. Make sure the light bar isn't blocking the disassembly.

To assemble the new pelvis:
- Print it in a bronze PLA or in another material that you paint.
- Glue the front part into the pelvis.
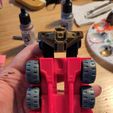
- Dry fit the mushroom peg (no glue yet!) into the pelvis and test it in the upper body. If the fit is loose, cut or sand off some of the peg from the bottom.

Now assemble everything. The legs are a pain to put together, but I believe in you! Just go slow =)

Advertising


Issue with this design? Report a problem.

Would you like to support Cults?

You like Cults and you want to help us continue the adventure independently? Please note that we are a small team of 3 people, therefore it is very simple to support us to maintain the activity and create future developments. Here are 4 solutions accessible to all:

  • ADVERTISING: Disable your banner blocker (AdBlock, …) and click on our banner ads.

  • AFFILIATION: Make your purchases online by clicking on our affiliate links here Amazon.

  • DONATE: If you want, you can make a donation via Ko-Fi πŸ’œ.

  • WORD OF MOUTH: Invite your friends to come, discover the platform and the magnificent 3D files shared by the community!


Sharing and downloading on Cults3D guarantees that designs remain in makers community hands! And not in the hands of the 3D printing or software giants who own the competing platforms and exploit the designs for their own commercial interests.

Cults3D is an independent, self-financed site that is not accountable to any investor or brand. Almost all of the site's revenues are paid back to the platform's makers. The content published on the site serves only the interests of its authors and not those of 3D printer brands who also wish to control the 3D modeling market.

100% secure payment by credit card, PayPal, Apple Pay, Google Pay, etc.
View all payment options.