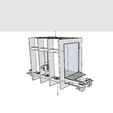
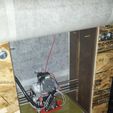
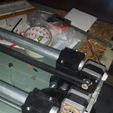
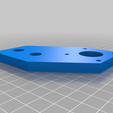
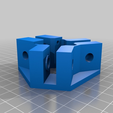
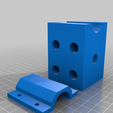
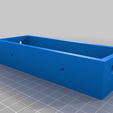
This is a design I have been working on.
It works!! It works so well that I have converted two prusa models over to this design. I am now able to print ABS parts at a 100 micron layer resolution. I normally print at 150 to 180 microns now cause 100 micron layer height takes forever. Ill probably never go back to printing PLA now. PLA is so stringy and gooey, also weak and prone to melting especially in a hot vehicle.
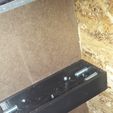
It uses 3/4 inch conduit for the y axis. There is a long y axis panel under the build plate to "cap" the build chamber. The frames are cut from OSB. OSB rocks! Such a stable material.
Im opening this plan up to the universe to see what will come of it. I currently have just the "middle" assembled and its working great.
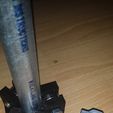
You gotta check out the y axis bearing guide thing that slides on conduit. I designed that to replace a sm8uu bearing and uses standard 608 bearings. It has 18mm by 24mm hole spacing so it should just attach to any build plate mount. The more I think about this part the more my mind tries to apply it to other ideas. My hope is to eliminate all the smooth rods and use conduit instead. I know the print quality is diminished in the end but lets face it no matter what parts always look "3d printed" anyways so just use cheap conduit. The longer you use the machine the better the print quality becomes as the machine breaks in the conduit and makes a smooth spot.
Engineer I am not... Business man I am. This is the first printer I have designed.
Some highlights:
Cheap
Easy to build!
The block that holds the smooth rods and the frame is the same exact piece just reprinted twelve times!
5/16'' nuts and bolts are cheap and used to hold the frame and the nema block mount things together.
Things you will need:
Small CNC machine.
A cheap prusa. You can steal most of the parts off an Ebay printer to build this after you print all the parts.
3/4'' conduit
7/16'' threaded rod. This stuff is strong and eliminates a lot of issues for me.
So many nuts. I dont even use washers. It works with out it.
Other stuff I am still working on:
I have to cut and assemble the last 2 frames
I have to figure out some sort of bearing support thing for the long bed. I can imagine over time it will sag. Its currently just made of hardboard.
Wire management. Umm... yeah. I would take a better more complete pic of this thing but I am kinda shy about the rats nest of wires. I have to play around with some cable chains and how to mount that stuff. I dont even have them printed yet. If the long bed cover is made out of aluminum I will let you know this. The heat from a heated bed will transfer to the bottom plate and will melt the y axis bearings. So wood provides some insulation but my 110v 200 heated bed heats up the aluminum bed mounting plate and I had to add 2 12v fans on the underside to keep the bearings from melting.
Id love some input on this thing. I only have learned to use sketchup. There are some of you on here that have some fancy programs for CAD. I cant upload to those file formats. Sorry guys. For those of you that like open source designed stuff in sketchup this thing is for you.
Its super drafty in my house so I had to keep the breezes off the build plate. This thing seems to work pretty well. Its ugly but does an awesome job!
You can tighten the belts by extending the Y blocks out from the print bed. Makes it super easy to tighten the belt.
The extruder is a crazy hybrid bowden and compact blend. Ive tried both bowden and compact. Bowden is just too stringy, Compact absorbs too much heat from the extruder block, this mix of the two seems just right. I have fried so many motors on compact until I used this set up. I bought a piece of angled aluminum and just drilled a bunch of holes in with the measurements as close I could get it. I have built more than one this way and they all seem to work well.
You will also have to utilize some sort of auto level probe cause the bed is not adjustable. Its just a bunch of tall nuts tightened with the fury of the gods
This printer is like the battle station. Looks incomplete but fully operational.
It is a work in progress but the reality is nothing is actually never finished.
The build plate is also 8x8 with a sheet of PEI plastic.
Print Volume is currently X155 Y190 Z125 . As I play around with the design more and more I find that I can increase the Z size pretty easily. The X axis is gonna need some more tweeking. It might be as simple as making the width of the frame bigger.
6/13/2016
Update
I found a mistake in the frame. I had to add an extra 1/2'' or so to the bottom of the frame to get it to line up correctly. Oops. Sorry if you have downloaded the model. I have updated the file to reflect this. Also don't rely on the linear bearing in the sketchup model. Use the "1.7" stl I have uploaded to thing verse.
Ive updated the linear bearing. V1.7 works much better. I drill the holes out with a 5/16 drill bit after printing. Ive uploaded that file individually. The entire sketchup file has the old bearing. So be warned if you try to print that one. I have to update the part to reflect the insanely small adjustment to diameter I made. I had to redesign that part 7 times to get it just right. Hense 1.7 file name. When you tighten the nuts just snug it down lightly and use lock nuts. You may have to loosen or tighten the bolts ever so slightly to find the sweet spot.
I have a plan to replace the hardboard with a thin sheet of aluminum and support it with small angle extruded aluminum. It works in theory I just have to find the time to hack one together.
I have the firmware available also if you are interested. I had to figure all that out and can save you some time. I have not uploaded arduino programs before and they seem kinda tricky cause they have all sorts of files and what nots.
Build and use at your own risk... you know you want to.

/https://fbi.cults3d.com/uploaders/23657954/illustration-file/5c060bf9-a192-4c29-abc8-18fe4e01d636/a9b3329545064bbf20a44079b4f8335f.png)
