Skip to content

Arduped 2

Advertising
Advertising
?
Creation quality: 5.0/5 (1 vote)
Evaluation of members on the printability, utility, level of detail, etc.

  • 1.6k views
  • 2 likes
  • 45 downloads

License
3D design format
Folder details Close
  • BiPed_Arduino_Code.zip
    • ServoPrimitives.ino
    • uBipedino.ino
    • WalkFunctions.ino
  • Biped_Brackets.stl
  • Biped_Eyes_v2.stl
  • Biped_Feet_v2.stl
  • Biped_Platform_v2.stl
  • OpenScad_Files_with_Utils_Folder.zip
    • Biped_Eyes_v2.scad
    • Biped_Feet_v2.scad
    • Biped_Platform_v2.scad
    • Utils/cyl_head_bolt.scad
    • Utils/data-access.scad
    • Utils/data-metric_cyl_head_bolts.scad
    • Utils/materials.scad

Learn more about the formats

Publication date 2023-07-31 at 19:40
?
Published to Thingiverse on: 2015-08-17 at 07:37
Design number 1355081

3D printer file info

3D model description

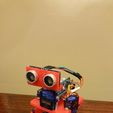
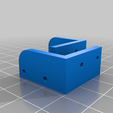
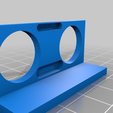
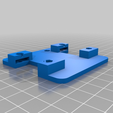
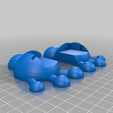
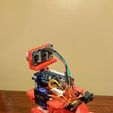
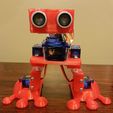
Arduped 2 is a tweaked version of David Ultis's Arduped Biped Robot (http://www.thingiverse.com/thing:19594) that includes source code by Gabriel Ro-Bot-X and Kai Neugebauer to make it work. I redesigned the build platform and head sensor and tweaked the feet, but I left the original legs alone because they worked just fine. The OpenSCAD source files for these changes can be found in the zip file called "OpenScad Files with Utils Folder.zip".

Here is a video of it in action: http://youtu.be/PAQJ-nnLGbg

Materials

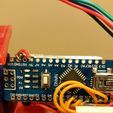
  • Arduino nano
  • 5 x Tower Pro SG90 servos (available on Ebay). You will need the horns and the screws for these as well.
  • 1x Ultrasonic sensor HC-SR04
  • A small on/off rocker switch (should be easy to find on Ebay)
  • 2 x M3 x 25mm screws to mount the servo for the head. M2 screws are actually preferable here as you will have to drill out the servo mount a bit to use M3 screws.
  • 4 x M3 x 12mm screws to mount the servos to the build platform
  • 6 x M3 nuts
  • Hot glue (from a glue gun) or super glue

See instructions for more details

3D printing settings

Here are some guidelines to putting the robot together:

  • Print the parts using an infill like 10% to keep them nice and light
  • Attach a switch to the positive (red) side of your power source. I used 2 x 3.7V lipo packs in parallel as it still works with that much power, but basically you need something close to 5V for this to work.
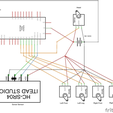
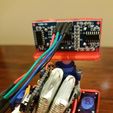
  • Wire up the servos, the HC-SR04 and the Arduino nano to the positive (red) and ground (black) of your power source after the on/off switch.
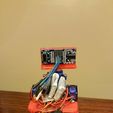
  • Mount and screw in the the servos as per the pictures. I used hot glue to mount the servos to the feet, but you could use super glue. I also used glue to attach the servo horns to the legs as this worked a bit better than the screws, but the choice is yours. You'll want to cut off the servo mount wings on the feet that are sticking out on the inside as these can catch and cause problems with walking.
  • Wire up the rest to the Arduino nano:
    • Trigger pin of sonic sensor - Pin 12
    • Trigger pin of echo sensor - Pin 11
    • Servo wires (orange) should be connected to the following pins:
      • Left leg - Pin 7
      • Right leg - Pin 10
      • Left foot - Pin 8
      • Right foot - Pin 9
      • Head - Pin 6
  • Open up the Arduino sketch program and import the NewPing library if you don't already have it. In 1.6.5 the menu path is Sketch -> Include Library -> Add .ZIP library.
  • Open up the sketch in "BiPed Arduino Code.zip", extract the contents and rename the folder uBipedino. Then Compile and upload the file to the Arduino Nano.
  • You'll probably have to play with the position of the servo horns on the servo at first to get the correct position for it to walk. But once that is done you should be set.
Advertising


Issue with this design? Report a problem.

Would you like to support Cults?

You like Cults and you want to help us continue the adventure independently? Please note that we are a small team of 3 people, therefore it is very simple to support us to maintain the activity and create future developments. Here are 4 solutions accessible to all:

  • ADVERTISING: Disable your banner blocker (AdBlock, …) and click on our banner ads.

  • AFFILIATION: Make your purchases online by clicking on our affiliate links here Amazon.

  • DONATE: If you want, you can make a donation via Ko-Fi πŸ’œ.

  • WORD OF MOUTH: Invite your friends to come, discover the platform and the magnificent 3D files shared by the community!


Sharing and downloading on Cults3D guarantees that designs remain in makers community hands! And not in the hands of the 3D printing or software giants who own the competing platforms and exploit the designs for their own commercial interests.

Cults3D is an independent, self-financed site that is not accountable to any investor or brand. Almost all of the site's revenues are paid back to the platform's makers. The content published on the site serves only the interests of its authors and not those of 3D printer brands who also wish to control the 3D modeling market.

100% secure payment by credit card, PayPal, Apple Pay, Google Pay, etc.
View all payment options.