Skip to content

Ardubot 2

Advertising
?
Creation quality: 5.0/5 (1 vote)
Evaluation of members on the printability, utility, level of detail, etc.

  • 3.3k views
  • 6 likes
  • 66 downloads
  • 1 collection

License
3D design format
Folder details Close
  • Magnetic_Hinge_Box.scad
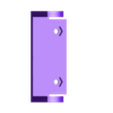
  • Magnetic_Hinge_Box_Lid.stl
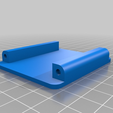
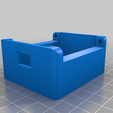
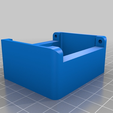
  • Magnetic_Hinge_Box_With_Power_Switch.stl
  • Magnetic_Hinge_Box_Without_Power_Switch.stl
  • battery-holder.stl
  • battery-pack.stl
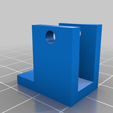
  • front-mount.stl
  • hc-sr04-back.stl
  • hc-sr04-front.stl
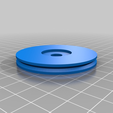
  • main_wheel.stl
  • rear_mount.stl
  • small_wheel.stl
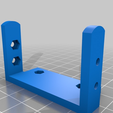
  • small_wheel_holder.stl
  • small_wheel_holder_top.stl

Learn more about the formats

Publication date 2023-07-31 at 19:40
?
Published to Thingiverse on: 2015-07-03 at 08:14
Design number 1355082

3D printer file info

3D model description

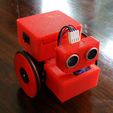
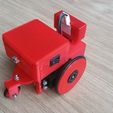
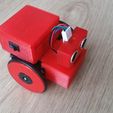
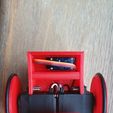
This little robot is based off David Hrbaty's great little Ardubot (http://www.thingiverse.com/thing:603907 and https://github.com/davidhrbaty/ArduBot). This is in turn based off the MiniSkybot Robot V1.0 (http://www.thingiverse.com/thing:7989), so the bulk off the assembly instructions can be found there.

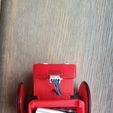
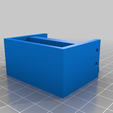
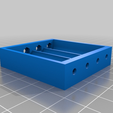
I found the little battery pack wasn't providing the power I needed, so I modified the design by getting rid of the speaker at the top and replacing it with a box that contained the electronics, lipo battery and a power switch.

Here is a quick video of it in autonomous mode: https://www.youtube.com/watch?v=0UoXiueChEg

Materials

  • 1x Arduino Nano rev. 3
  • 1x Ultrasonic sensor HC-SR04
  • 2x Servo motor Futaba S3003 modified for continuous rotation (see https://www.youtube.com/watch?v=SK8mhnEzcvY). I would suggest either super gluing the potentiometer in place after you have zero'd it or using the resistor approach.
  • 1x Micro servo motor Towerpro SG90 (available on ebay)
  • 1x IR receiver TSOP382 or another (available on ebay)
  • 1x 7.4v small lipo pack or you can use the 4xAAA battery pack in the original design and place that under the bot.
  • 8x 3x2mm (3mm diameter) rare earth magnets (find them on ebay in packs of 50 or 100 - they're quite cheap)
  • M3 Nuts - I can't recall how many but 40 should be plenty.
  • M3 Screws - A few shortish screws are required. I think I used mostly 10mm and 16mm long screws but various lengths will do as there is space for longer screws.
  • 2x 50mm ID x 3.5mm O-Rings for the large wheels. The thickness of the O-ring can be different or you could try and substitute this with something like a rubber band if that will work. (sourced from ebay).
  • 1x 13mm ID x 4mm O-Rings. Again like the large wheels, the small back wheel could use a smaller thickness or some substitute. (sourced from ebay)
  • On/Off Rocker Switch (5mm wide) - This is optional and you can choose to print the top electronics box with or without a hole for this. I sourced these from ebay.
  • Heat shrink to cover the exposed soldered wires

See the instructions for some more details.

3D printing settings

Here are some the broad guidelines to putting this robot together:

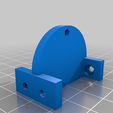
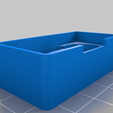
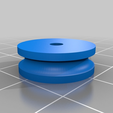
  • Print the parts. Don't forget to print 2 sets of wheels. Choose whether or not you want to include the on/off switch and then pick the appropriate magnetic hinge box.
  • Put in the m3 nuts into the various parts where they go. I used the approach of getting a long m3 screw feeding it through the hole, screwing on the nut a little bit, heating it up with a lighter for about 5 seconds and then pulling it into place. This is because you'll probably find that to get a tight fit they've used the old reprap trick of having the nuts slightly melted into place. However I found that some of them still came out so you can want to put a dab of super glue afterwards to really lock them in place.
  • Start off by following the mini-sky robot (http://www.thingiverse.com/thing:7989) assembly instructions (as the explode apart diagram), and feed the wires from all the servos between the chassis and the wheel servos in the space where the electronics box will be placed later. Don't cut the wires until you are ready to do the soldering. I made the mistake of doing all the cutting and soldering before this step and I had made the wires too long so I had to redo it.
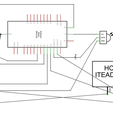
  • Connect the parts using the fritzing schematic as a guide. Don't forget the heat shrink. This basically entails:
    • Connecting the on/off rocker to the positive line from the battery
    • Connecting the positive wires (normally red) together for the wheel servos, the ultrasonic sensor and the battery and then feeing that into VIN (voltage in) on the Arduino nano. Note you shouldn't feed it into the 5V as there is no voltage regulator there and to do that would require a 5V source. Then from the 5V pin connect up the IR receiver (make sure you get the polarity right or you'll burn out the receiver).
    • Connect all the grounds together and connect that to the arduino nano ground.
    • Feed the various sensor and servo control wires to their target pins.
  • Download the zip file https://github.com/z3t0/Arduino-IRremote/releases/download/2.1.0/Arduino-IRremote-dev.zip. Open up the Arduino IDE and go to Sketch -> Import Library ... -> Add Library ... and then navigate to the downloaded zip file and select that for import.
  • Open up the ardubot.ino file in the arduino IDE and compile it. Then upload the sketch to the nano and connect to it using serial monitor. Use your remote control to record the signals it sends to mode it around as well as put it into autonomous mode. Then modify the code appropriately and upload the revised sketch,
  • Put the rare earth magnets into the hinge spots on the box. Ensure that you have the correct polarity and then super glue them in place.
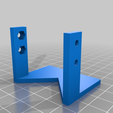
  • Feed the electronics through the slot in the bottom of the box and then screw the box in place at the back (I only put in holes to match the rear holes on the chassis).
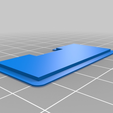
  • Put on the lid and off you go.
Advertising


Issue with this design? Report a problem.

Would you like to support Cults?

You like Cults and you want to help us continue the adventure independently? Please note that we are a small team of 3 people, therefore it is very simple to support us to maintain the activity and create future developments. Here are 4 solutions accessible to all:

  • ADVERTISING: Disable your banner blocker (AdBlock, …) and click on our banner ads.

  • AFFILIATION: Make your purchases online by clicking on our affiliate links here Amazon.

  • DONATE: If you want, you can make a donation via Ko-Fi πŸ’œ.

  • WORD OF MOUTH: Invite your friends to come, discover the platform and the magnificent 3D files shared by the community!


Sharing and downloading on Cults3D guarantees that designs remain in makers community hands! And not in the hands of the 3D printing or software giants who own the competing platforms and exploit the designs for their own commercial interests.

Cults3D is an independent, self-financed site that is not accountable to any investor or brand. Almost all of the site's revenues are paid back to the platform's makers. The content published on the site serves only the interests of its authors and not those of 3D printer brands who also wish to control the 3D modeling market.

100% secure payment by credit card, PayPal, Apple Pay, Google Pay, etc.
View all payment options.