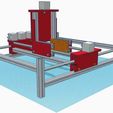
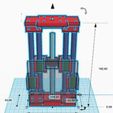
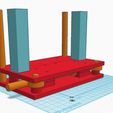
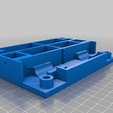
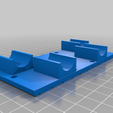
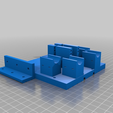
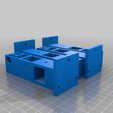
Having built a Mostly Printed CNC which is a great design and machine I am hooked. As I regularly have time between software compilation and testing I am designing my own CNC first rough sketch in Tinkercad pictured. Inspired by MP_CNC but designed from scratch in Tinkercad. Ability to switch easily between CNC, 3D Print, and Laser Cutting/Engraving heads is the plan.
Aim is to build a solid machine with doubled up linear supports (Easy to modify for additional strength and rigidity for larger builds) Using 10mm Linear shafts/bearings to keep accuracy and adding additional support bearings running on top of 2020 or similar to prevent sagging and aid accuracy.
I am designing and building machine from the inside out one axis at a time Z then Y then X.
Cost wise it will be slightly more expensive to construct than Mostly Printed CNC to build but although component wise almost identical, it should not be excessive if you find good suppliers of 2020 extrusion etc no reason 2020 could not be not replaced with 20x20 steel box section or even 20x20 Hardwood if these are more readily available to you only change will be fixings as I shall use mainly T-Nuts.
I already spaced 2020 as a T Slot base for my MP_CNC which has been successful and initially I shall use same bed for this build.
My plan is to release each Axis after it has been assembled and tested both STL and Tinkercad files. Z axis release due end of January 2016, complete machine by end of March 2016 as I am soon traveling for a few weeks therefore time for printing and testing will be limited for a while.
==============
First printed part first change although it printed well it failed the strength test, forgot an important rule "design for printing, not just for function", the direction the plastic is laid down is as important as where it is laid down. Third time lucky as first design was rejected without going to printer, size and mass convinced me it would be too difficult to print without warping.
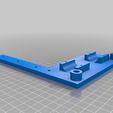
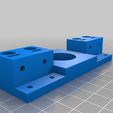
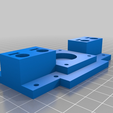
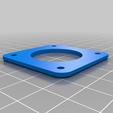
ZY_Carrier(1).stl
ZY_Carrier(2).stl
ZY_Carrier(3).stl
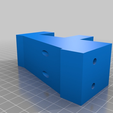
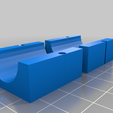
Main Z axis carrier combined with Y axis Bearings.
Print with 4x top/bottom/Shell 0.25mm @ 60% fill. Supports are advised.
Desription: Mounts the Z axis assembly sides onto the Y axis Linear Rods and Extrusions.
Additional hardware used:
4x LM10 Linear Bearings
4x 608z Bearings
4x M8x35mm with NyLock Nuts (608z retention)
18x M4x8mm with T_nuts (2020 extrusion attachment)
8x M3x35mm with Nuts (LM10 retention)
2x 14mm 2020 aluminum profile (Horizontal frame)
2x 180mm 2020 aluminum profile (Vertical Frame)
2x 500mm Linear shaft (Y Axis Shafts)
2x 500mm 2020 (Y Axis 2nd carrier strength/support)
7 Jan 2016
Back from travels rested and ready for work and play started printing and testing Z Carriage today rough up picture loaded. Assembled and uploaded first part of Z axis carriage Top Bottom and Spacer, you will notice my Z axis is short I have other machines for depth on Z axis adjusting the length of your Linear Shafts and Lead Screw will allow you extra height on Z axis legs will also need adjusting accordingly later in the build.
8 Jan 2016
Time tight today so designed and started to print X axis carriages, when two parts printed I can see if my sums add up or if 2+2=3.78 as usual!
9 Jan 2016
Not quite 3.78 but after checking first print decided to add an adjuster under 2020 X beams as design requires accurate placement.
10 Jan 2016
Not a lot of time today but designed back plate for Z-axis have some other items currently hogging printers so will be tomorrow before I print and test the axis, other hardware should arrive this week to assemble properly using some long bolts to dry fit at moment.
11 Jan 2016
Another busy day but had a thought and knocked together a part also useful for
MostlyPrintedCNC, a bed leveling leg usinga pair of m8 nuts and bolts a bed can be leveled by adjusting the 4 corners rather than the legs.
17 jan 2016
A dose of the FLU has had me laid up for a few days so l have not been documenting all changes for a few days , but have done some complete reworks on several parts, now have a mostly free standing unit ready for mounting drives and motors.
Progess is well ahead of schedule will update documentation this week as hardware needed to complete assembly arrives one or two cable ties utilised whilst waiting.
Experimenting using 10mm of 22mm heatshrink tubing to tyre the 608z bearings appears to be good but need to test durability when testing
Amended the X_axis Carriers now printed as one piece and V slotted on bottom of print to prevent any one else from cracking a glass when removing from bed,
18/01/16
Z Axis reworked minor changes
20/1/16
Corner legs added
02/02/16
So busy lately but finaly got a couple of hours working on this, everything gliding sweetly motors and idlers mounted and belted up a bit of wiring and ready for some testing.
2.5W 2500mW Blue Light Laser Module diode 450 445nm Focusable mounted for testing as need to test laser too, already fired up power seems reasonable for engraving but need to get it up and running for proper test with Differential TTL driven.
4/2/16
Wiring complete and testing a few amendments needed to parts currently printing but first test with 2w laser succesful cutting a mini prusa frame on a sheet of a4 paper. Gcode created in Inkscape using Repetier extension engraving and cutting with laser could not be simpler. Cut cleanly at 300mm minute would probably cut much quicker.
http://www.repetier.com/repetier-g-code-plugin-for-inskscape/
Good news and bad news the setup runs really nice and will be kept as a laser cutter engraver maybe 3d printing and plotting lightweight milling but my aim was for accuracy so I am re thinking the Milling side and will be starting from scratch. My conclusion haveng printed parts in Nylon, ABS,PLA and PETg id that the weakness of even solid printed parts is going to be a problem with the rigidity needed from a CNC router. I will complete this project as a laser cutter, plotter 3d priner but for any one looking for a CNC I suggest the next build that I shall be running alongside this one will will be far superior for routing milling and just as easy if not easier to to build with basic tools.
I have another idea that will be quicker to build and should solve the problems of flexing
I have encountered with the MP_CNC and this build, minimal printed parts more 2020 extrusion and some 5-6mm Acrylic Sheet replacing printed parts.

/https://fbi.cults3d.com/uploaders/29612580/illustration-file/7a52b642-28be-4a47-a09e-9552a44745ca/photo.png)


