Skip to content

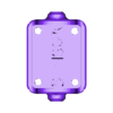
Ender 3 S1/S1Pro Filament Sensor Holder with PTFE Tube Guide for Sunlu S2 Filament Dryer Or Others Too

Advertising
Advertising
?
Creation quality: 5.0/5 (2 votes)
Evaluation of members on the printability, utility, level of detail, etc.

  • 3.7k views
  • 11 likes
  • 68 downloads

License
3D design format
STL Folder details Close
  • Adapter.stl
  • Filament Sensor holder.stl

Learn more about the formats

Publication date 2023-08-09 at 02:31
Design number 1374931

3D printer file info

3D model description

Ender 3 S1/S1Pro Filament Sensor Holder with PTFE Tube Guide for Sunlu S2 Filament Dryer or others too.

Purpose: Create a humidity-proof and smooth guide tube for the filament sensor, designed for personal use with the intention to share with the community.

MATERIAL LIST:
3D printed parts;
2x M3x18mm Original filament sensor screws;
1x T-Nut Screw (spare one from the printer;)
3x M3x8mm Screws;
4x M3x4mm Heat Staking Threaded Inserts;
2x M4x8mm Heat Staking Threaded Inserts;
PTFE Tube Kit for 3D Printer with M5 Push-in fitting threaded straight.

Assembly:
Part: Filament Sensor Holder.stl

  1. Carefully insert 4x M3x4mm Heat Staking Threaded Inserts into the designated holes on the surface labeled "Sensor." Note: Keep insert temperature below 220Β°C. Clean around the melted plastic.
  2. Gently insert 2x M4x8mm Heat Staking Threaded Inserts into the wall holes. Clean around the melted plastic.
  3. Attach the sensor using 2x M3x18mm screws to the holder, ensuring alignment of the filament sensor hole with the M4x8mm insert holes. If alignment is off, carefully adjust by reheating the M4 inserts and realigning.
  4. Cut a suitable length of PTFE tube (e.g., 38cm) from the dryer to the filament sensor. Shave and screw one end into the M4 insert at the sensor end.
  5. Repeat the process with a shorter piece (around 2cm) of PTFE tube for the other end.
  6. Gently guide a 50cm length of filament through the PTFE tube and the sensor. If it doesn't move smoothly, repeat step 4 double check where it stuck.

Part: Adapter.stl

  1. Attach the 3D printed part to the rear of Part 1 and secure it with 2x M3x8mm bolts. Ensure a tight fit.
  2. Place the T-Nut screw at your desired attachment point on the printer and tighten it securely. You can also secure it from the bottom if needed.

UPGRADED VERSION OUT NOW!

  • 1.8k views
  • 9 likes
  • 8 downloads

3D printing settings

PRINTING CONFIGURATION
Printer: Creality Ender 3 S1 PRO + Sonic PAD
Rafts: NO (YES - if you have bad adhesion / Raft Air Gap: 0.2)
Supports: NO
Resolution: 0.02
Infill: 10%
Infill Line Multiplier: 2
Notes: I recommend 4 shells for wall thickness.

Post-Printing:
Once the parts are printed, remove any rafts if you've used them.
Carefully insert the threaded inserts as mentioned in the assembly instructions.
Check the wall thickness and ensure you have at least 4 shells for stability.
Proceed with the assembly steps outlined earlier.

Advertising


Issue with this design? Report a problem.

Would you like to support Cults?

You like Cults and you want to help us continue the adventure independently? Please note that we are a small team of 3 people, therefore it is very simple to support us to maintain the activity and create future developments. Here are 4 solutions accessible to all:

  • ADVERTISING: Disable your banner blocker (AdBlock, …) and click on our banner ads.

  • AFFILIATION: Make your purchases online by clicking on our affiliate links here Amazon.

  • DONATE: If you want, you can make a donation via Ko-Fi πŸ’œ.

  • WORD OF MOUTH: Invite your friends to come, discover the platform and the magnificent 3D files shared by the community!


Sharing and downloading on Cults3D guarantees that designs remain in makers community hands! And not in the hands of the 3D printing or software giants who own the competing platforms and exploit the designs for their own commercial interests.

Cults3D is an independent, self-financed site that is not accountable to any investor or brand. Almost all of the site's revenues are paid back to the platform's makers. The content published on the site serves only the interests of its authors and not those of 3D printer brands who also wish to control the 3D modeling market.

100% secure payment by credit card, PayPal, Apple Pay, Google Pay, etc.
View all payment options.