3D model description
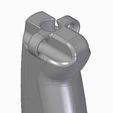
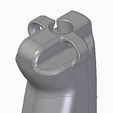
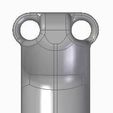
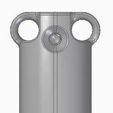
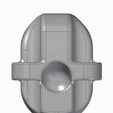
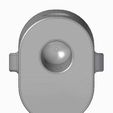
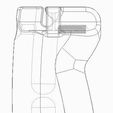
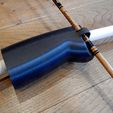
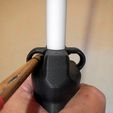
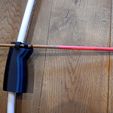
For this zero bow to learn and consolidate the movement for archery, you need two 3D printed parts: The giff piece is designed to be used by LH and RH. You just need to change the side to the other eyelet then. In the grip piece, one can insert into the grip ends, as a throwing arm each an "ARLI installation tube M16 lugged". I have chosen a tube length of 785 mm. The purchased pipes previously had a length of 1000 mm, and I shortened them to the above dimension. Then, during assembly, the sockets are at the end of the bend. These sleeves are for the printed tips (second 3D printed part). The tips have an M16 male thread on the longer diameter. Once you have printed the tips, you can insert them into the sleeves of the pipes, and heat the pipe sleeves with a heat gun. The pipe sleeves will then contract down to the M16 thread, and the tips will be tight in this position for the time being. In order to mount the polyamide chord, you can unscrew the tips with a 17 mm open-end wrench. Depending on how the tube was heated, this may be easier or more difficult. In the same way, you can also screw the tips back in, at a certain point they will wedge again. As an "arrow" I took an old arrow shaft made of carbon, which has an inner diameter of 6 to 6.5 mm. There I glued an eyebolt, which has an M6 external thread with hot glue into the arrow shaft. (see pictures). The string is made of a braided polyamide rope, with 3 mm diameter 170kg weight force and is as I said PA. (Mason's twine) I threaded the first end tendon into one of the tips from the rounded side, and set a double knot on the back side. I screwed this tip back into the tube at the top of the bow. Then I roughly determined the required chord length in the bent state, to the other end of the tube, with an addition of about 100 mm. I now threaded a piece of pneumatic tubing about 15 mm long onto the chord. Then, through the eyebolt of the arrow, an 8 mm shrink tube was inserted with a length of about 80 mm. This was then threaded onto the string with the eyebolt. The 15 mm piece of pneumatic tubing was inserted into the upper end of the shrink tubing. Next, another piece of pneumatic tubing about 30 mm long was threaded onto the string and inserted into the shrink tube from the lower end. The carbon arrow was inserted into one of the eyelets on the grip piece. Then the second end of the string, was passed through the second tip, and secured on the back side again with a double knot. The second tip was screwed into the lower socket. The carbon arrow was set up at the appropriate height of the string with the shrink tubing, and then shrunk with a heat gun. This was used to pre-fix the pneumatic tube parts and the carbon arrow. (see picture arrow holder zero bow 2023). Thus, the bow is assembled and the sequence exercises can begin.
3D printing settings
The 3D printed parts were printed with black matte PLA on the Ender 3V2. The walls on the initial sample were 0.8 mm, the Nozzel has a diameter of 0.4 mm and the filling was 20%.

