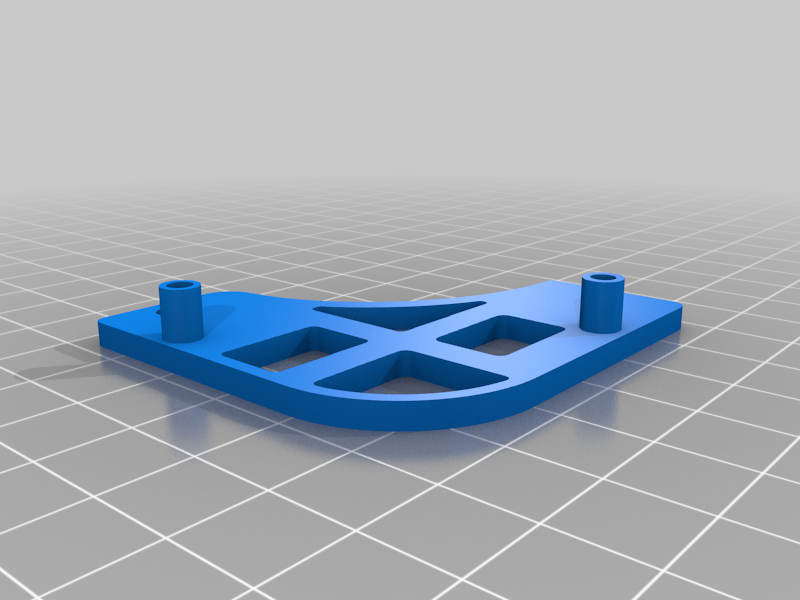
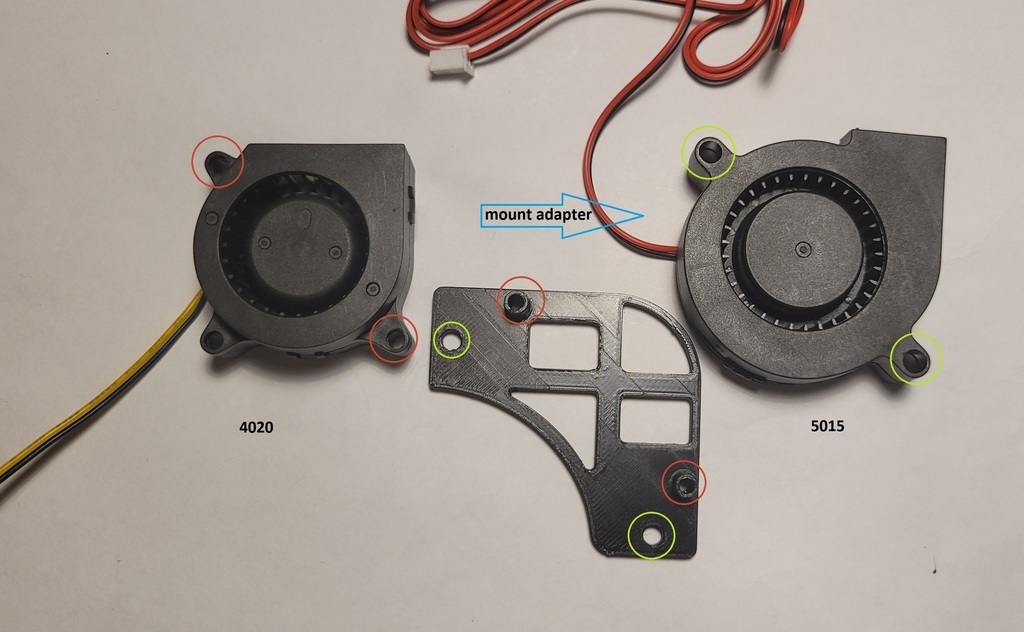
This is a simple mount adapter intended to allow for a (somewhat) drop-in-replacement of a 4020 blower-style fan with a 5015 blower-style fan. In my case, this 5015 fan was replacing a dying 4020 fan used to cool the mainboard in the bottom of my Creality Ender-6.
The replacement 5015 fan is attached to the printed plate with appropriate hardware; then, the plate is screwed into the place of the original 4020 fan using the threaded screw holes and screws of the original fan. Thus, all that should be required to replace a 4020 blower fan with a 5015 blower fan (presumably, of same voltage) - assuming there's enough clearance - is this printed mount/adapter and two screws with accompanying nuts.
I used two "round-head, #8-32 x 1 inch" machine screws to attach the 5015 fan to the printed adapter. I'm not sure of the metric equivalent, since they weren't readily available to me; but, it's probably M3 or M4, and you'll need them to be about 20-25mm in length, I think.
Note: it is assumed that the 4020 blower fan was originally screwed into standoffs of some sort, rather than being attached flat against some surface, or that there there is at least some amount of open space between the fan's body and the nearest surface, such that there is room for the screws/nuts. See the last picture in my assembly instructions, below, which shows the need for some amount of clearance in my use case.
Cross-posts: Printables (https://www.printables.com/model/551148-adapter-blower-fan-mount-5015-replacing-4020), Thingiverse (https://www.thingiverse.com/thing:6166941)
Why Did I Make This?
The 4020 blower fan tasked with cooling the mainboard in the bottom of my Ender-6 was dying a slow and very noisy death; so, I sought to replace it. For whatever reason, I thought it would be a great idea to "upgrade" the 4020 stock blower fan to a 5015 blower fan. Unfortunately, the screw holes for the new fan did not line up with the screw mounting points for the old fan. This should be obvious, considering they are different sizes; but, it went completely over my head, at the time of ordering. 🙃
Doubly unfortunate, I could not seem to find some kind of printable adapter that would allow me to use the new 5015 fan in place of the 4020 fan - at least, not in the orientation/positioning I needed (as there are plenty of adapters for replacing 4020 print head fans with 5015 fans). I am either the first person to deal with this problem (without simply solving it by ordering the correct fan), or I just suck at searching.
Either way, I could not rely on someone else to have already modeled a solution to a problem, for once; instead, it seemed, it was finally time for me to learn how to design a model for myself. I'd always intended to learn Blender at some point, too, so I took the opportunity to do so, simultaneously. Suffice to say, one migraine later, it was a rough experience - as I'm sure many could have told me, hah. But, in the end, I succeeded: my first model, ever! 😻
I hope that this model manages to be of some use and help to anyone else! 💜 If it does, don't forget to leave a Like and share your Make of it!
How Could This Be Improved?
Unless someone else remixes and improves upon the model, before me, here are some ways that I might improve the design, down the road:
- Properly design this in CAD software of some kind instead of modeling by hand in Blender..lol.
- Inset the screw holes for the 5015 fan such that flat-headed screws may be utilized for a more-flush surface (removing the requirement for some amount of clearance on either end, possibly - see note, above).
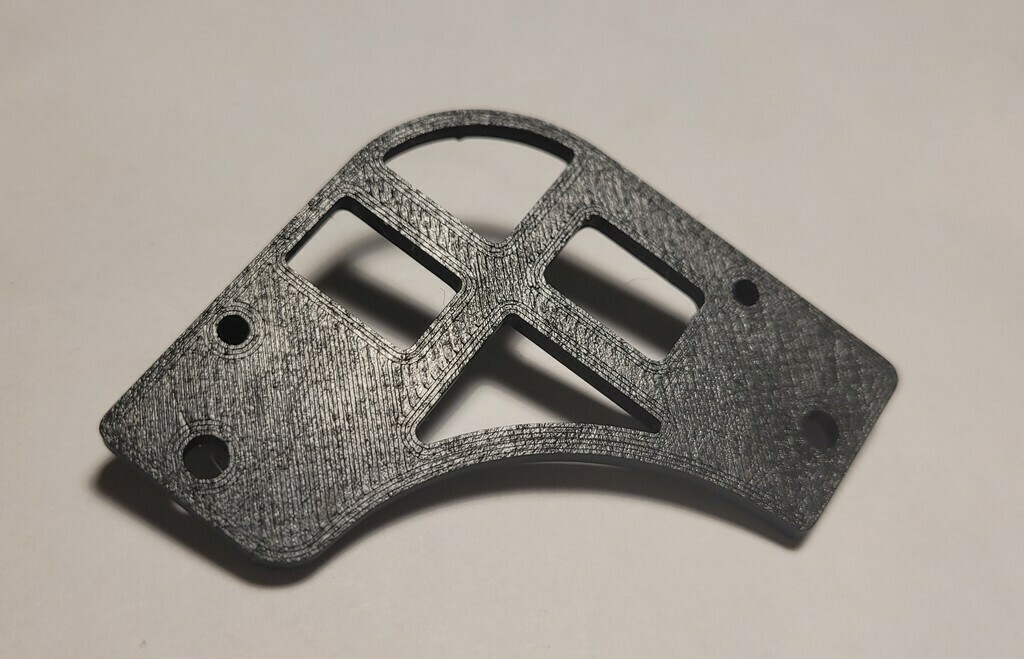
- Further reduce the amount of material used while maintaining structural integrity. (Honestly, I placed the non-screw holes kinda randomly, to remove big chunks of material; but, it could be done better.)
- Add threads to the screw holes, perhaps? This would remove the requirement for nuts, possibly. However, it would add to the complexity of the model and limit the variety of usable screws.
Instructions:
(See cross-posts for more pictures and better organization)
Firstly, remove the 4020 fan to be replaced, keeping its screws.
Then, gather your 5015 blower fan, two appropriate screws + accompanying nuts (+ washers, if desired), and this printed mount adapter. Assemble them.
Lastly, with the original screws from your 4020 blower fan, screw the assembly into its place. Orientation of the blower's exhaust end should mostly line-up with the direction of the original blower fan. Make sure not to put it on backwards! 😽
And that's it! Hook it up and test it out. In my case, the wires of the original 4020 fan went into a through-hole connector on the Ender-6's board. So, I clipped the connector off of my replacement 5015 fan and placed the wires appropriately. The 4020 fan's wires were different colors, but there were little labels attached at the ends.
If all is well, the fan should spin-up when you apply power. If not, ensure that you've wired things correctly. As well, be sure that you have a 24V 5015 fan if you're replacing a 24V 4020 fan. If your replacement fan is 12V, or otherwise, then you'll either need to acquire a 24V fan, instead, or do some extra electronics DIY tinkering to make things work (i.e. adding another 12V fan in series to split the voltage between them, etc.).
Best of luck! 💜😸
:format(webp)/https://fbi.cults3d.com/uploaders/29522960/illustration-file/c6a7a5c4-7953-497f-861f-d5f95c6918fd/ebe8c846-7cbf-491d-ae4d-601d2498a193.png)

/https://preview3d-images.cults3d.com/0qwbzz0aay7vidzi69ahfu85diok)