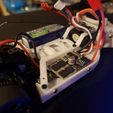
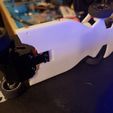
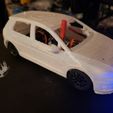
I took ideas and modified the cad from several designers and added a little of my own ideas to it.
the idea was to use what i had laying around. i had old miniz's, xmods, and propulse. just some old parts. lots of left over screws, a couple diffs, and lots of tires and wheels. so i downloaded and printed openz cars from rockracer, garuo3d, byebyeracing, and "make it rc". then took the chassis that i had the most stuff that fit and modified till i was happy. several test cars and broken pieces later and this is V1.
i designed the parts extra thick so even if you have a 3d printer that is not so great or can just not get good prints this should print fine. the other thing is that you can use just about any screws and hardware to make it work. the screw wholes are designed at 2mm but with all the extra material you just need to cut it with a tap, drill it out, or use wood/plastic screws. you can use printed wheels or miniz. there is only 15 screws and 2 axles. i pulled the axle out of the steering knuckles on my miniz and used miniz tires. the rear end is designed to use the miniz pods. any configuration will work mid, top, rear. and it has 2 sets of holes and with the different size tplates it gives you a range of wheelbases you can use 115-105mm. the width is kind-of adjustable depending on the wheel offset, 68-75mm.
it uses standard 9g servos, but i have used 8g and 10g and they all fit. the servo mounts with screws or friction or both. you can trim the friction one by cutting the tab that holds down the servo on the top plate. I used xmods shock screws because they had the non threaded section in the sliding part of the linkage. you can drill out the linkage so that it the screws slide through or just tap them and the hub carriers, just dont tighten them up, leave a little play so that they dont bind. i used springs from the xmods too. but a ball point pen spring cut would also work.
since it uses the miniz pods. you can use brushed or brushless. with adapters or special miniz brushless motors 130 size. xmods, miniz, and slot car pinions for with the pods too. most of the miniz parts are still available. kennonhobby still sells all the stuff, pods are 6, screw sets are 6, gear diff is 11, and steering axles are 8. if you just want to buy all the parts. but you can just pirate all the part if you want.
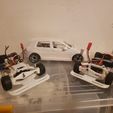
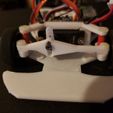
I will also add a short wheelbase chassis that uses the same hubs one that is done. I use bodys from all the cars i had and have 3d printed a couple others. mk7.5 gti, toyota 86, 67 bug. and they all work great. i just adjust the size to the width and then set the wheelbase. it makes the scale a little wonky but i dont really care. to mount the body i used magnets to the side of the tub. and i made the bumper xtra large so that it can be cut down to fit the body you plan on using. you can also drill 2 holes in the bumper to add mounts from miniz and xmods. byebyeracing also has a 3d printed one you can use.
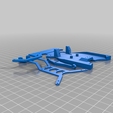
use supports when printing and brim if your printbead doesn't stick really well. i have printed the parts in pla and with all the extra reinforcements it is surprisingly tough and stiff. the .stl has all the parts in one build plate.
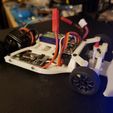
you also have multiple places to put electronics and batterys. i tested 1rc batteries both nimh and lipo, and eflight plane lipos, and some hobbyking lipos and just double sided taped them down. i mounted the receiver on the top plate and the esc on one side with the battery on the other. all double sided taped down. works great. i used flysky fs2a receiver because it is so small and only 10. and the 30a esc was 10 on amazon.
This is NOT a drift chassis. the balance is terrible and the rear will just swap on you if you try.. there is not enough steering angle to be able to save the slide. i designed it to play on concrete/carpet/and rcp tracks. I printed a parts bins worth of replacement parts and plan on racing/playing at my local hobby store where they race 1rc midgets and sprints. and a friend has an rcp track that i can use too.
I have a feeling this will change in the future but this one works well for what i want to do. i hope it works for you too.
video
https://youtu.be/dHHThOzrQko

/https://fbi.cults3d.com/uploaders/29754589/illustration-file/659b6ece-46b2-4666-bb2e-154ef07c7040/Openz_jdpancar_110mm_thingiverse.png)
