Skip to content

Upgraded corners for Dreamer glass bed update (for smaller glass)

Advertising
Advertising
?
Creation quality: 5.0/5 (1 vote)
Evaluation of members on the printability, utility, level of detail, etc.

  • 277 views
  • 7 downloads

License
3D design format
Folder details Close
  • Dreamer-corners-for_smaller-glass-upgrade.stl

Learn more about the formats

3D model size X 39.1 Γ— Y 38.5 Γ— Z 16.2 mm
Publication date 2023-08-20 at 05:38
?
Published to Thingiverse on: 2015-08-23 at 08:06
Design number 1396898

3D printer file info

3D model description

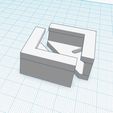
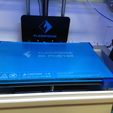
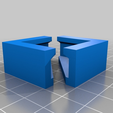
I printed up Makersome's corner brackets in anticipation of upgrading my FlashForge Dreamer with a glass bed. But when I got the glass cut, I used the measurements that were stated in the information (230 x 150mm) so when I got the glass home, I found it was actually smaller than the build plate. I still used Makersome's corner brackets, but printed up a second set so I had one on each corner. Even with four brackets, my glass moved around, so I have been using tile wedges pushed in between the glass and the brackets. Not an ideal solution but it worked. However, I found that the wedges would still move now and then, causing the glass to move. So I redeigned the corner brackets to be a little higher (still lower than the top of a 5mm piece of glass) and to come in over the build plate further.

So these are for those people (like me) who didn't measure the bed and ended up with glass that was too small.

3D printing settings

I would recommend printing at 0.2 layer height in ABS (so they don't melt when the glass gets hot)

You may get away with just two brackets placed at opposite corners, but I used four, placing a bracket on each corner.

To install, remove the nut from the screws under the build plate. Place the bracket in place on the bolt and replace the nut and tighten. These nuts can be extremely difficult to loosen and tighten, so I replaced mine with wingnuts which are much easier to work with.

There is a detailed video on the makersome site showing exactly how to do all this. You can find the video here..

http://makersome.com/project/how-to-upgrade-your-glass-bed-for-flashforge-creator-x-pro-3d-printer/

You will also need to print up a shim to stop the bed rising too high and hitting the printheads with the glass. You can find Makersome's shim here...

http://www.thingiverse.com/thing:735736

Advertising


Issue with this design? Report a problem.

Would you like to support Cults?

You like Cults and you want to help us continue the adventure independently? Please note that we are a small team of 3 people, therefore it is very simple to support us to maintain the activity and create future developments. Here are 4 solutions accessible to all:

  • ADVERTISING: Disable your banner blocker (AdBlock, …) and click on our banner ads.

  • AFFILIATION: Make your purchases online by clicking on our affiliate links here Amazon.

  • DONATE: If you want, you can make a donation via Ko-Fi πŸ’œ.

  • WORD OF MOUTH: Invite your friends to come, discover the platform and the magnificent 3D files shared by the community!


Sharing and downloading on Cults3D guarantees that designs remain in makers community hands! And not in the hands of the 3D printing or software giants who own the competing platforms and exploit the designs for their own commercial interests.

Cults3D is an independent, self-financed site that is not accountable to any investor or brand. Almost all of the site's revenues are paid back to the platform's makers. The content published on the site serves only the interests of its authors and not those of 3D printer brands who also wish to control the 3D modeling market.

100% secure payment by credit card, PayPal, Apple Pay, Google Pay, etc.
View all payment options.