This is the same model as I used to have uploaded to my forum at depronied.com. There are no changes apart from the short instruction with some points I've learned while building it.
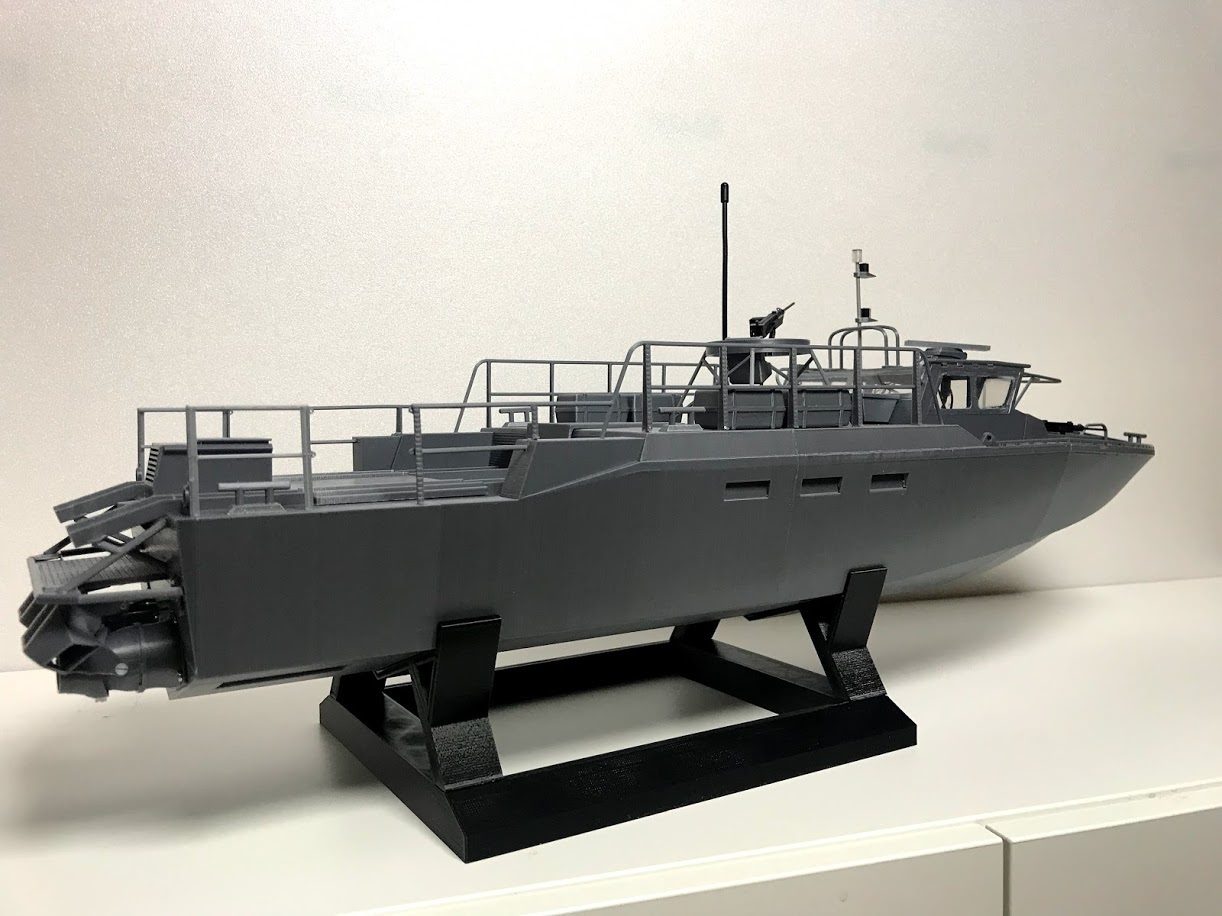
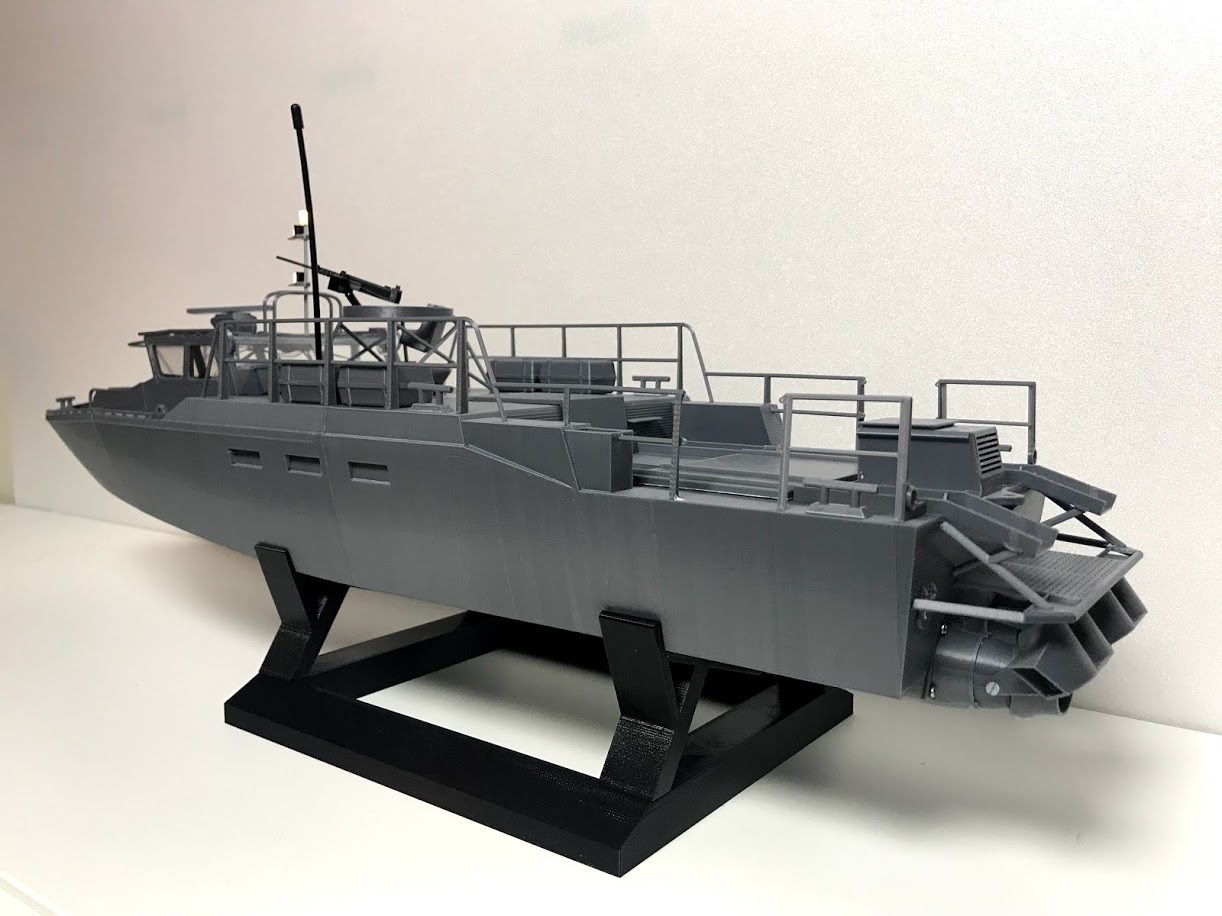
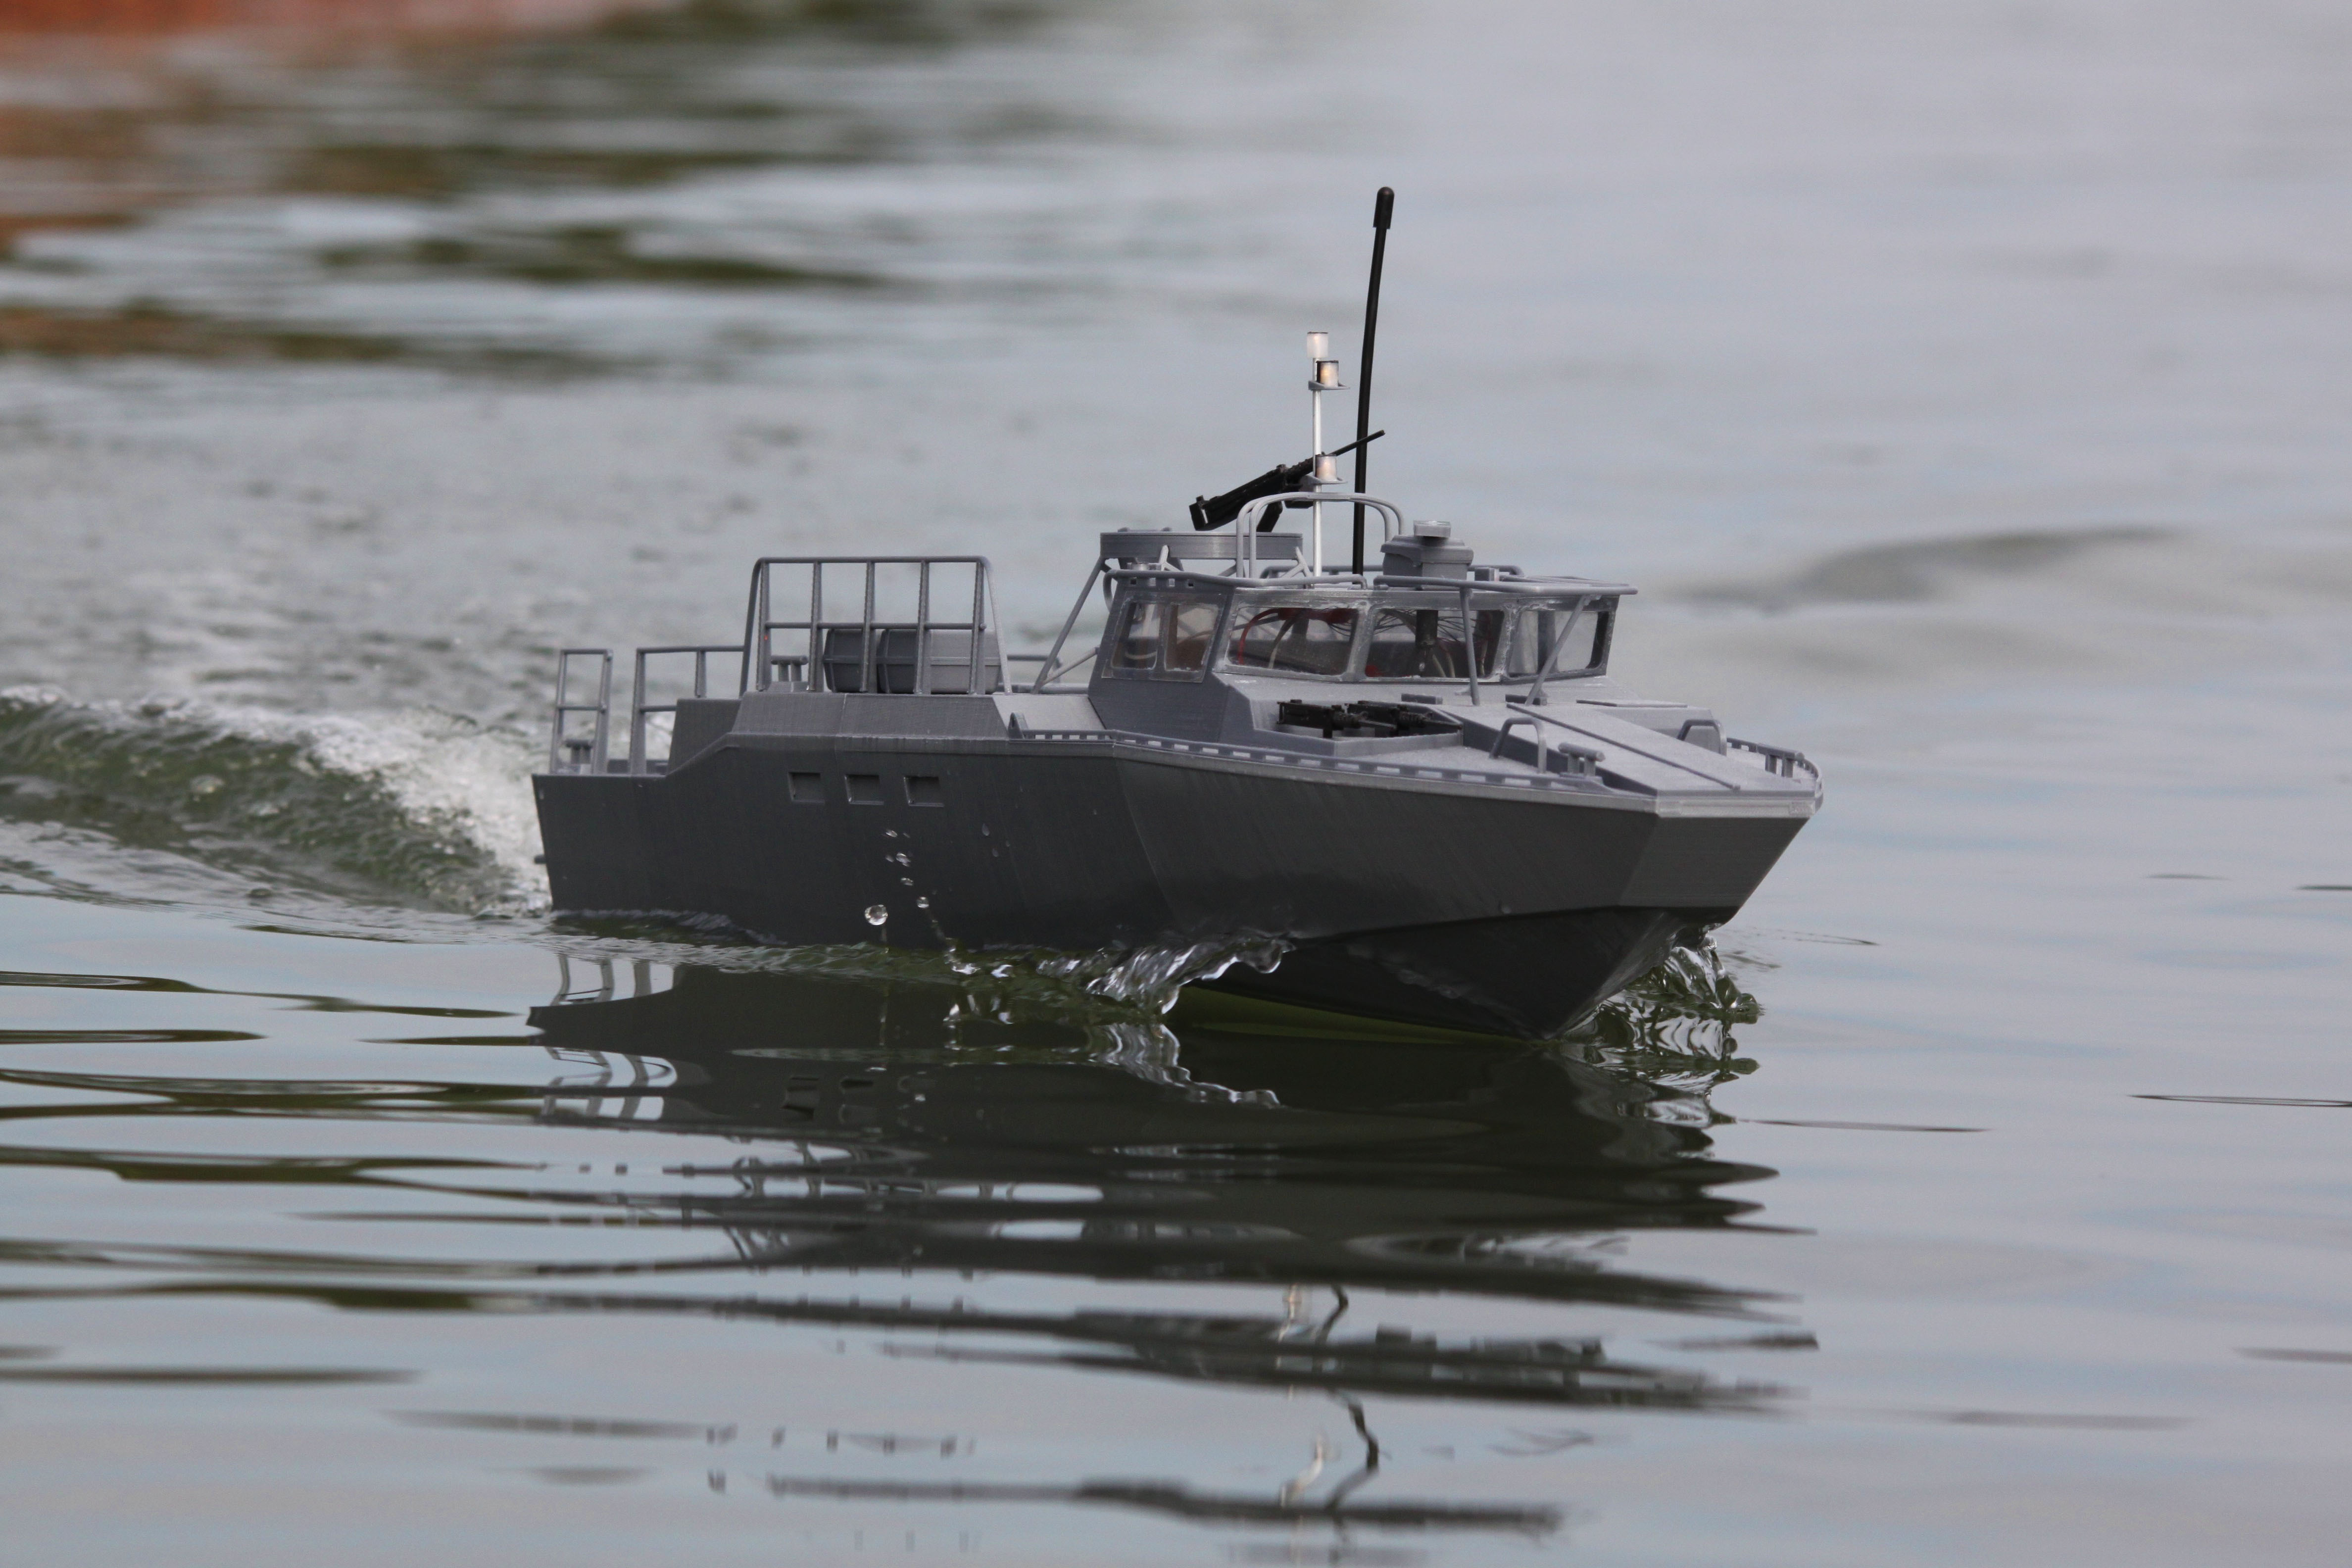
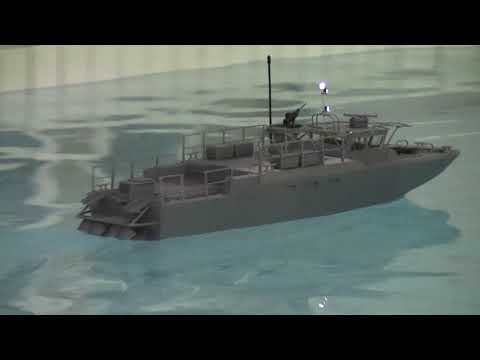
The model is a 1:24 scale model of the Swedish Combat Boat 90H.
It is roughly 70cm long from the aft end of the transom platform to the tip of the bow. Total weight to get the water line correct is around 1,3kg.
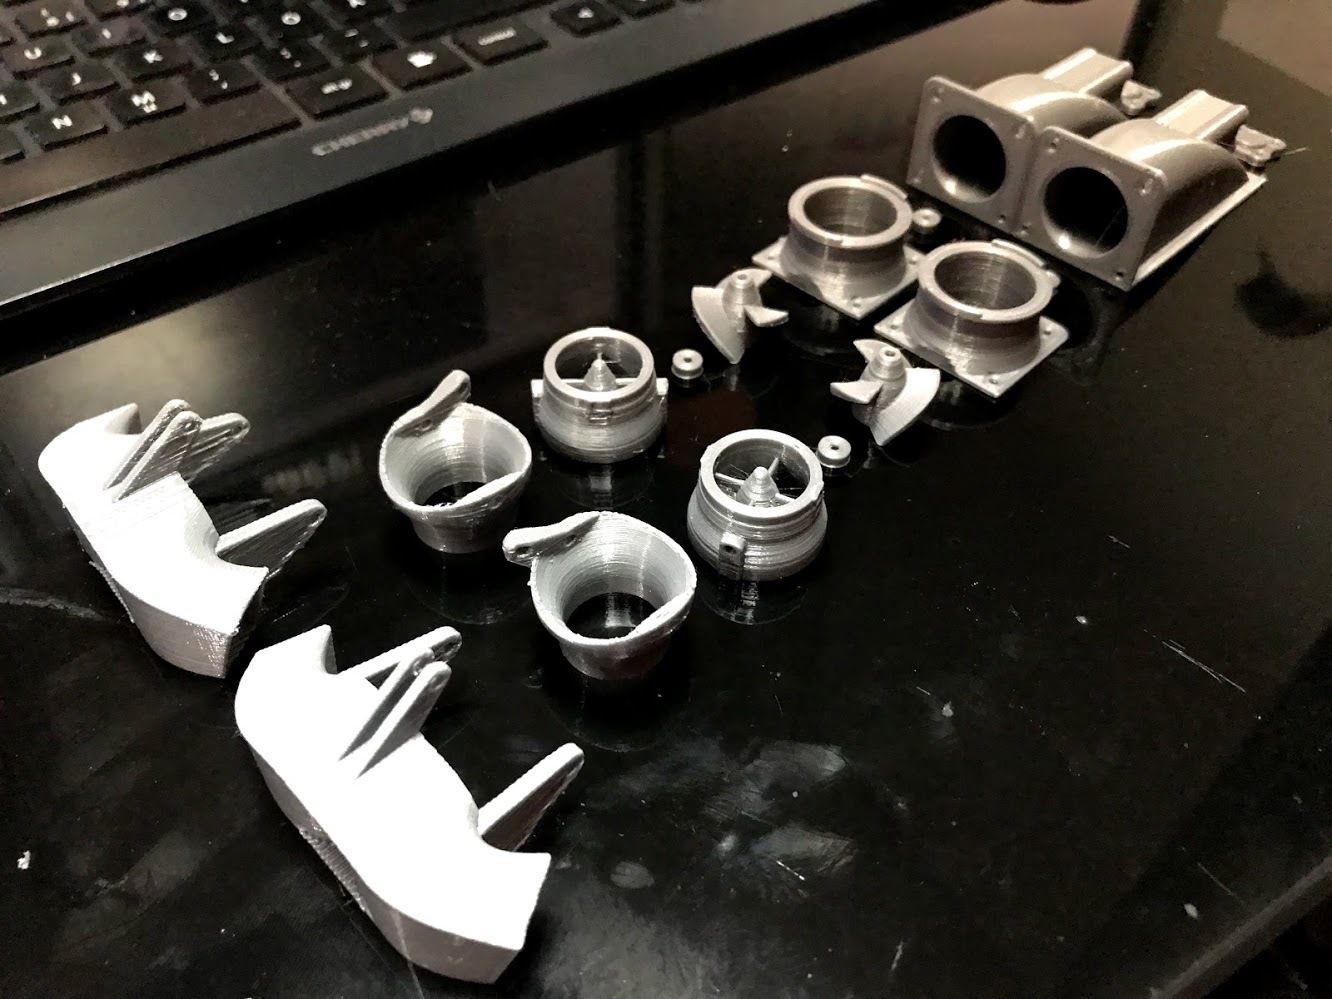
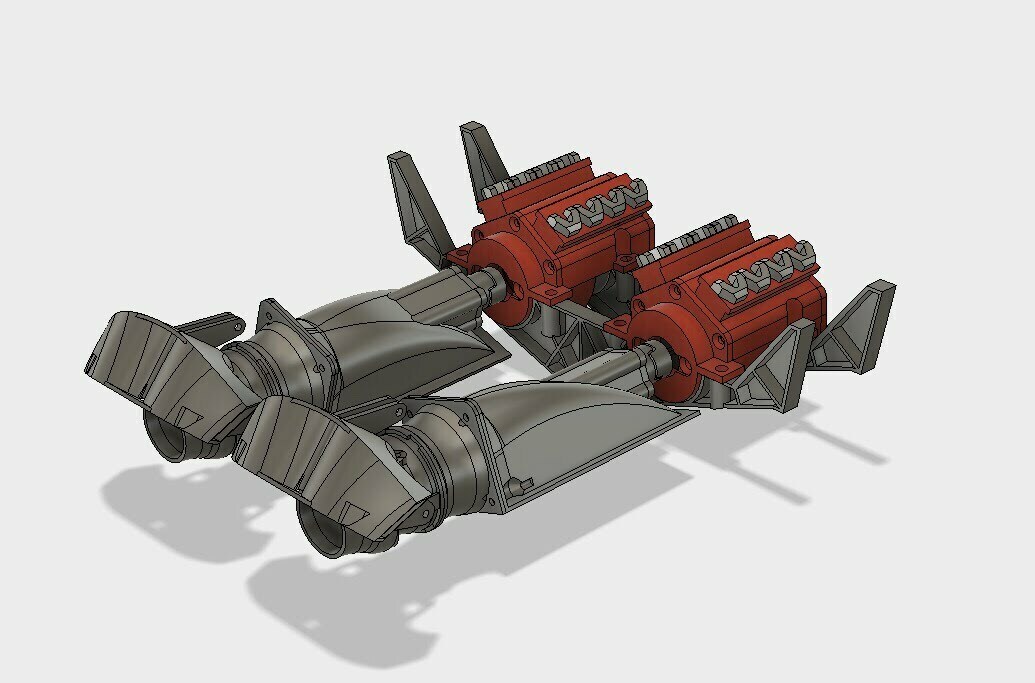
The waterjets are fully 3D-printable and working models of the Kamewa FF410 with working reverse buckets and steering nozzles as well as printed impeller. The only part that has not worked well are the 3D-printed shaft couplings which I recommend to replace with metal couplings because they have a tendency to melt due to the high rpm.
What you need:
5-6 channel programmable RC-transmitter and receiver. (Its possible to use Y-cables for speed controllers, buckets and nozzles which brings down the needed channels to 3.
I highly recommend to use a dual-stick airplane transmitter for this model as it enables you to control the water jets individually which is required to be able to move sideways for example.
2x 20mm diameter brushless inrunner motors, or water-cooled motors of your choice (needs motor mount modification, STEP-files included).
2x speed controller suitable for your motors. Don't pick exactly the current the motor is rated for, pick a bigger one if you can and you will avoid overheating. Note! you don't need forward and reverse since that is taken care of using the reversing buckets!
4x RC-servos similar size to HK15178 (27,5mm CC screw holes, 12mm width, 23mm body length).
4x servo rods with tubes, length roughly 40cm each. Each water het requires 2 rods, one for the reversing bucket and one for the steering nozzle. These are usually not stainless so add oil to prevent them from rusting. Maybe it's possible to add grease in the tube to prevent water form entering the tubes.
M2 screws for the water jets. A tip is to buy nylon screws as you can cut them to the right length and they don't rust. Screws for mounting servos are usually included with the servos.
SMD LED's for lanterns. I used the smallest available pre-wired from eBay. Just make sure to add the right resistor to get 5-10mA current from 5V. A tip is to connect the red wire from one of the speed controllers to the RC-receiver and the one from the other speed controllers to power lights since the speed controllers are usually not very happy that both +5V leads are connected to the receiver at the same time.
Aluminium tubes for water cooling hose connection and lantern pole. (for example 4-5mm diameter for the water cooling connections and 3mm diameter for the lantern pole).
Thin piano wire for hatch-hinges (1mm diameter or close to).
This is not a beginner model but aimed to those who have prior experiencing building/assembling RC-models. However 3D-printing enables you to just try and reprint if something doesn't work or if you mess up during the assembly so don't be afraid to try, just be aware that not every little step on the way is explained here and you need to source RC-parts on your own. I cannot recommend specific parts since parts are coming and going at different suppliers.
I used 20mm brushless inrunners from Hobbyking. These came without water cooling so I designed a 3D-printed house around them using two O-rings to seal it of and two pieces of aluminum tube as nozzles to attach the hoses. It wasn't easy to get the house prints watertight, so I recommend to increase the material flow to 1,1 and increase the perimeters to 3 or 4 to get these parts water tight. You can also use clearcoat or glue on the inside to make it water tight.
There are motors available with water cooling which is a lot easier to use if you want. This however requires some modification of the motor mounts.
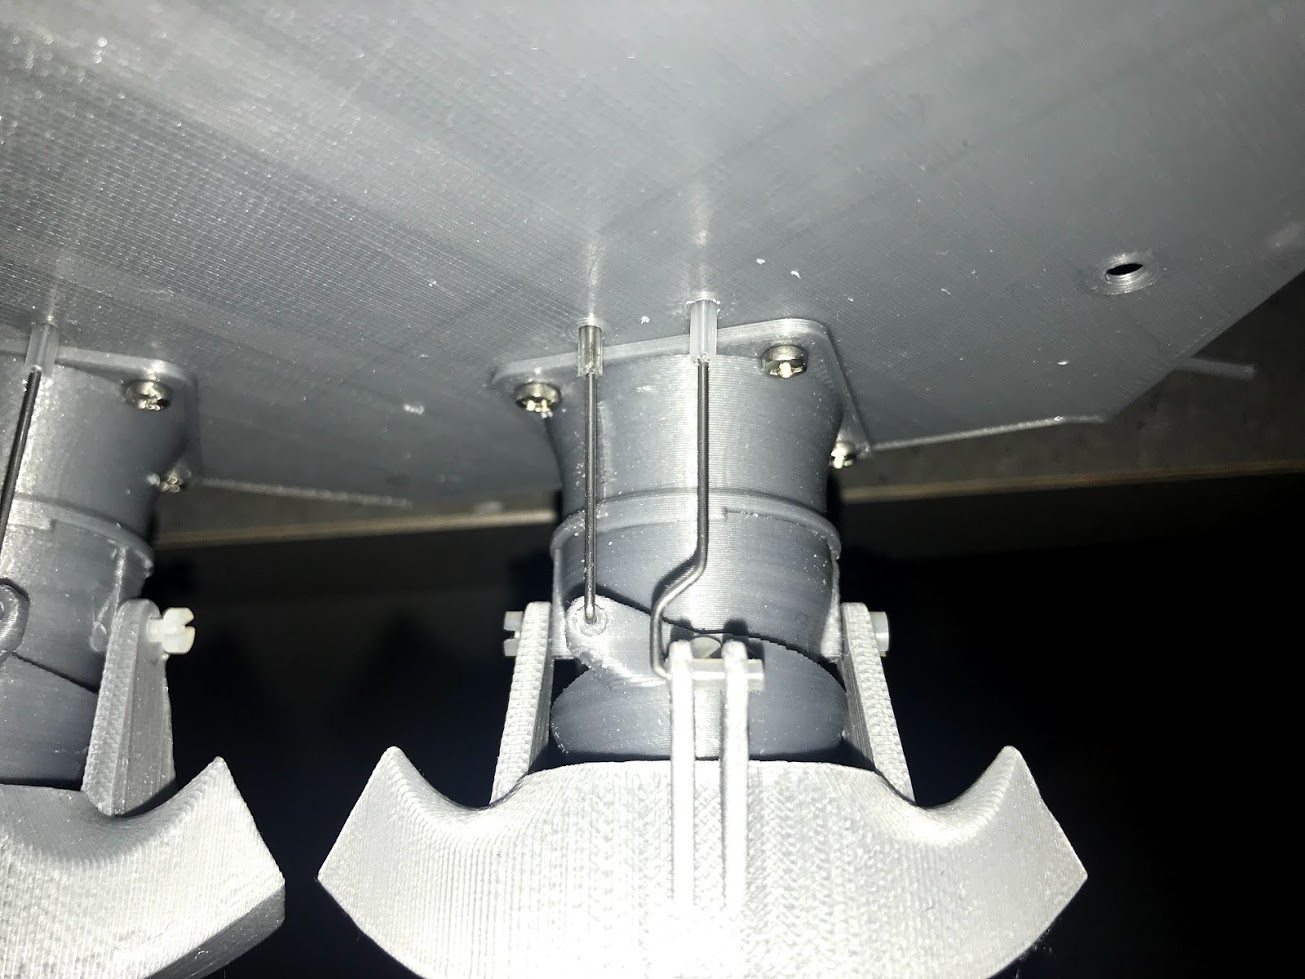
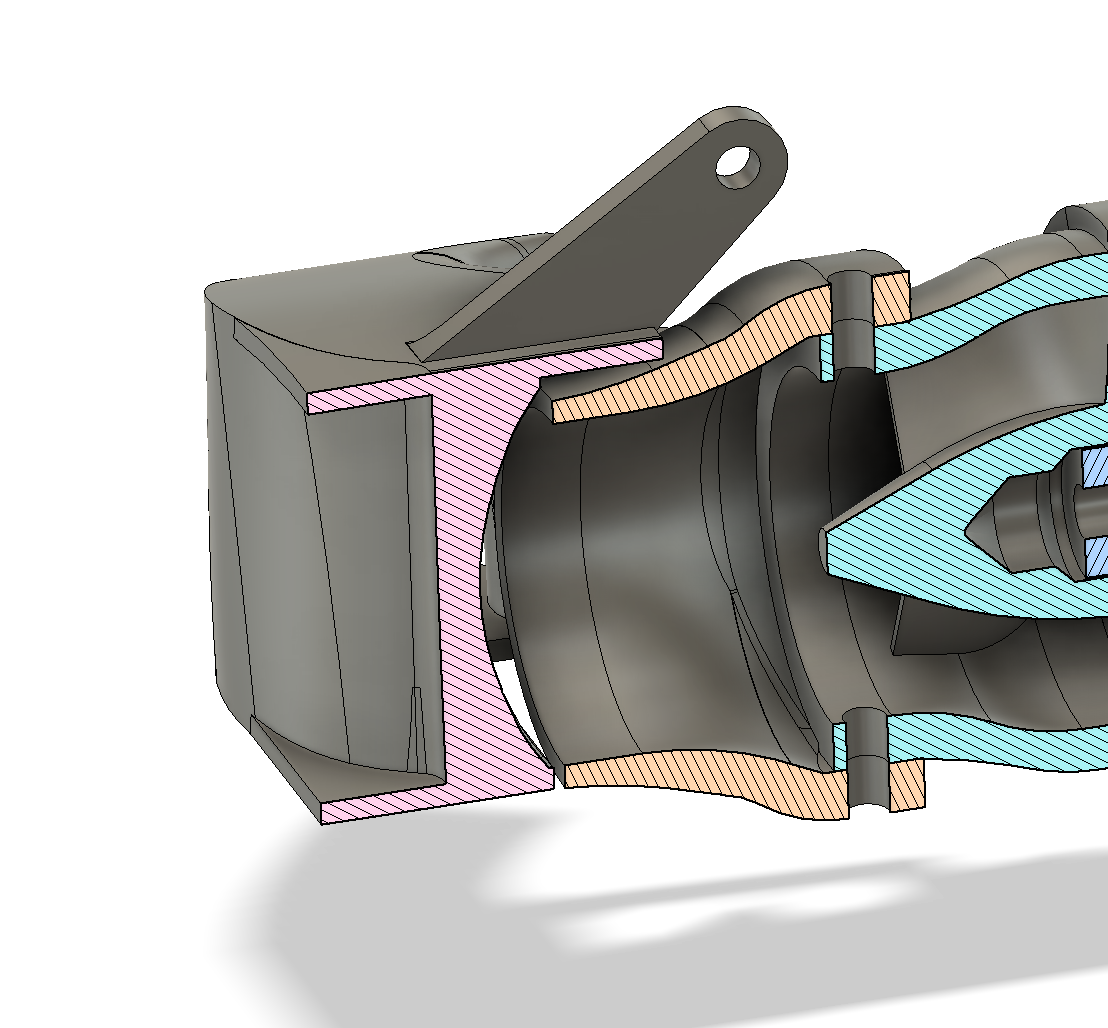
You need to install taps for cooling water yourself. If you have previous experience of RC-boats you know that this is usually done with a metal tube with an angled cut that either extends down under the hull or preferably sits behind the propeller to get propwash to force water through the cooling system. I have included pictures of where I have drilled holes in the waterjet stator house to insert this pickup tube. This works well on my model and means that as soon as the waterjets are running to create a water flow regardless if the reversing buckets are down or not, the motors will get cooling.
I glued most parts using CA-glue and did not add any paint or any other reinforcement except small strips of carbon fiber cloth along the glue joints of the hull. This works but I would strongly suggest to reinforce the hull if you plan on driving it a lot as a hard grounding would otherwise likely crack the hull at a print line.
5-6 channels programmable RC-system is preferred so that you can control the nozzles individually.
Note! Speed controllers can get really hot, so hot that worst case they can melt through PLA if you're not careful! pick an ESC with great current margin, a water cooled one or mount it on a metal plate to increase cooling and to make sure first of all that it doesn't fail, but also that it doesn't melt through any critical components or the hull itself.
https://youtu.be/zyv4hcl0Z6o?si=1RmhA-mgiNfK4tvV
Change Log:
2023-09-12 Replaced water jet zip file because of missing STL for the impeller duct.
2023-10-09 Replaced the stand, it was the wrong version! Also had the wrong version of the reversing bucket which contacts the nozzle, in the new uploaded ZIP there is a version with adjusted edge to not collide with the steering nozzle.