Skip to content

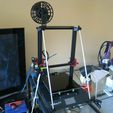
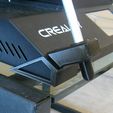
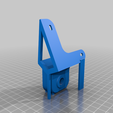
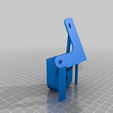
CR-10S Pro Frame Brace (light version) 10mm REMIX

Advertising
Advertising
?
Creation quality: 5.0/5 (1 vote)
Evaluation of members on the printability, utility, level of detail, etc.

  • 859 views
  • 20 downloads

License
3D design format
Folder details Close
  • Frame_Bottom_L_10mm_w-Brace_v1.stl
  • Frame_Bottom_L_10mm_w-Brace_w-Supports.3mf
  • Frame_Bottom_L_10mm_w-Brace_w-Supports.stl
  • Frame_Bottom_R_10mm_w-Brace_v1.stl
  • Frame_Bottom_R_10mm_w-Brace_w-Supports.3mf
  • Frame_Bottom_R_10mm_w-Brace_w-Supports.stl
  • Rod_Tip_Cover_13.1mm.stl

Learn more about the formats

Publication date 2023-09-09 at 05:20
?
Published to Thingiverse on: 2022-03-01 at 00:41
Design number 1438744

3D printer file info

3D model description

For the Creality CR-10S Pro and the Creality CR-10S Pro V2 only. I have the V2.

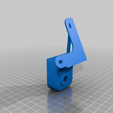
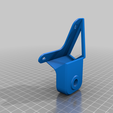
This is a remix of Anar's CR10-S Pro Frame Brace (light version) (https://www.thingiverse.com/thing:4000797) 10mm bottom frame brackets. IMO, his light version remix was an improvement over the original version (https://www.thingiverse.com/thing:3905499). I added braces to the sides of his bottom brackets to remove the flex Anar had designed into his brackets. My remix of the frame brackets is very stiff and still does not cover the vent slots.

The four M3x5 screws that come on the CR-10S Pro are not long enough to mount the bottom brackets. I found M3x8 screws with washers are needed.

You will need to get the two Left & Right Frame Top 10mm STL files from Anar's remix (https://www.thingiverse.com/thing:4000797) to complete the mod. Each top brace requires three M3 or M4 T-nuts and screws. Download these two files:

  • Frame_Top_L_10mm.stl
  • Frame_Top_R_10mm.stl

I have only remixed the 10mm bottom brackets and have no plans to remix the 8mm and 6mm sizes. The 10mm size works well for us in North America, where it is easy to buy 3/8" aluminum rods of sufficient length. They provide a very snug fit that does not require threads and nuts, though you can thread the rods yourself and add the nuts if you feel it is necessary. The smooth rods have a better appearance than threaded rods, IMO. My rods are cut to 28" in length.

I have included an optional rod cap that slips over the rod tips for a more finished appearance. Print one and check for fit. Make micro adjustments in the X & Y axis of your slicer if the rod cap is too tight or too loose.

There are Left & Right 3MF file versions with built-in supports. There are also STL versions with supports if you prefer STL files. I recommend using the built-in supports versions. I found this orientation and support placement to be the best. The supports are very easy to remove and leave minimal surface artifacts. But if you are the DIY type, there are Left & Right STL files without supports.

Installation Tips. Do not secure the top and bottom braces before putting the rods in the upper braces first. See below:
1) Install the upper frame braces first.
2) Slide your printer forward so the two front rubber feet are halfway off your desk. This will give you full access to the screws from the bottom of the printer.
3) Remove the 3 bottom screws from each corner.
4) Slide and twist the aluminum rods into the upper braces, so they stick out about 3/4".
5) Slide and twist a bottom brace onto each rod while working the brace into position.
6) Secure the bottom braces with the M3x8 screws with washers.
7) Even out the rods so the tips stick out the same.
8) Push the printer back into place.
9) Push the tip covers onto the rods (optional).

Advertising


Issue with this design? Report a problem.

Would you like to support Cults?

You like Cults and you want to help us continue the adventure independently? Please note that we are a small team of 3 people, therefore it is very simple to support us to maintain the activity and create future developments. Here are 4 solutions accessible to all:

  • ADVERTISING: Disable your banner blocker (AdBlock, …) and click on our banner ads.

  • AFFILIATION: Make your purchases online by clicking on our affiliate links here Amazon.

  • DONATE: If you want, you can make a donation via Ko-Fi πŸ’œ.

  • WORD OF MOUTH: Invite your friends to come, discover the platform and the magnificent 3D files shared by the community!


Sharing and downloading on Cults3D guarantees that designs remain in makers community hands! And not in the hands of the 3D printing or software giants who own the competing platforms and exploit the designs for their own commercial interests.

Cults3D is an independent, self-financed site that is not accountable to any investor or brand. Almost all of the site's revenues are paid back to the platform's makers. The content published on the site serves only the interests of its authors and not those of 3D printer brands who also wish to control the 3D modeling market.

100% secure payment by credit card, PayPal, Apple Pay, Google Pay, etc.
View all payment options.